
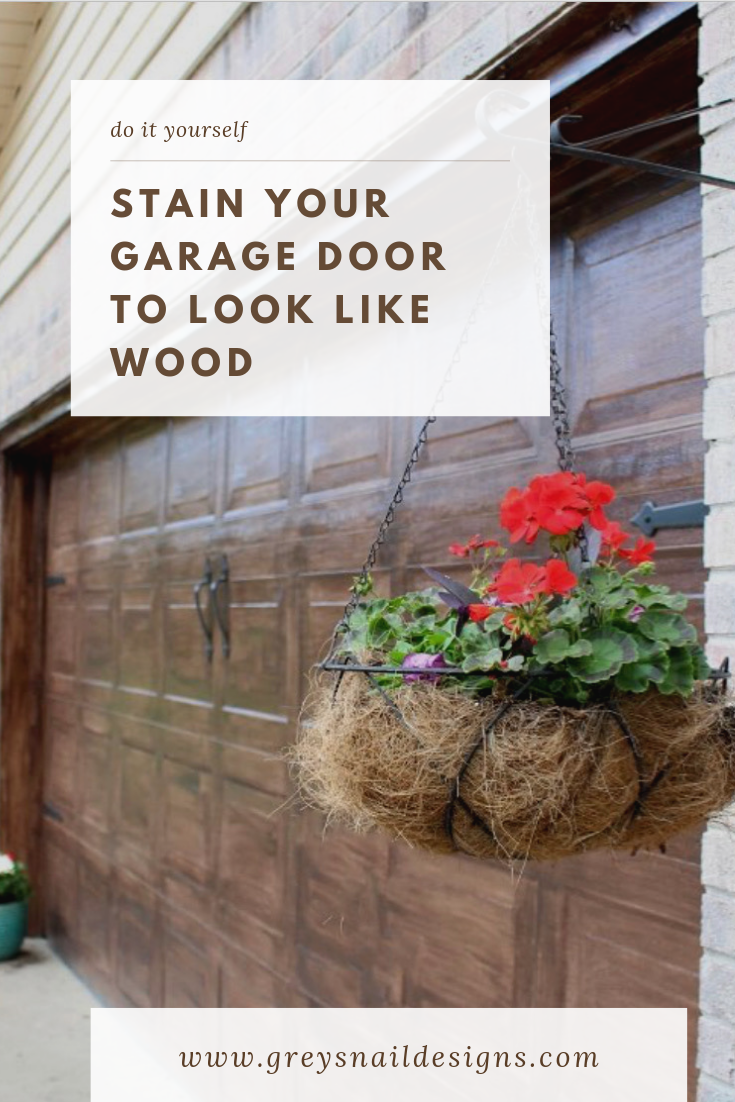
Faux Wood Stain your Garage Door
March 31, 2020
Minwax Gel Stain Transforms Garage Door
We’ve all seen these gorgeous wood or faux wood garage doors, complete with hardware. But who wants to spend over $1,000 when your existing garage door works perfectly well and replacing it just isn’t in your budget? I have the solution: stain your garage door. Well, actually, two solutions.
Add Faux Hardware
This is literally the easiest upgrade ever. Go to Lowe’s and grab a kit with decorative metal hardware that will transform your plain old garage door into a carriage house door. And get this, it’s all magnetic, so it’s a total no-brainer to install, if you can even call it an installation. We got our kit at Lowe’s a couple years ago for around $40.00, but I see that they have them online now for even less. Lowe’s kit is a great quality, and I can’t speak for the others, but they might be worth a try. Check out these at Amazon
for under $20.00.
Stain your Metal Garage Door
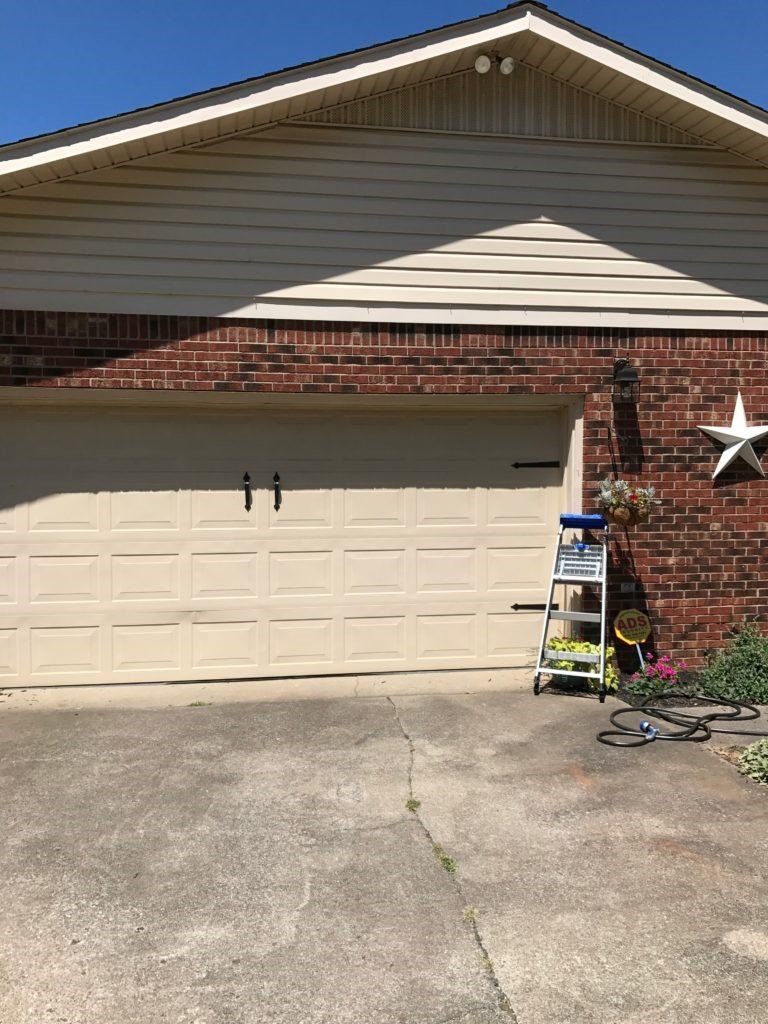
I wasn’t crazy about the color of our garage door, mostly because it had a permanent discoloration that you couldn’t wash off and a little dent. The color also brought out my least favorite part of our brick (the yellow tones). I thought about just painting it, because I was slightly nervous to try the staining process I’d seen all over Pinterest, but figured if I messed it up, I could always paint over it!
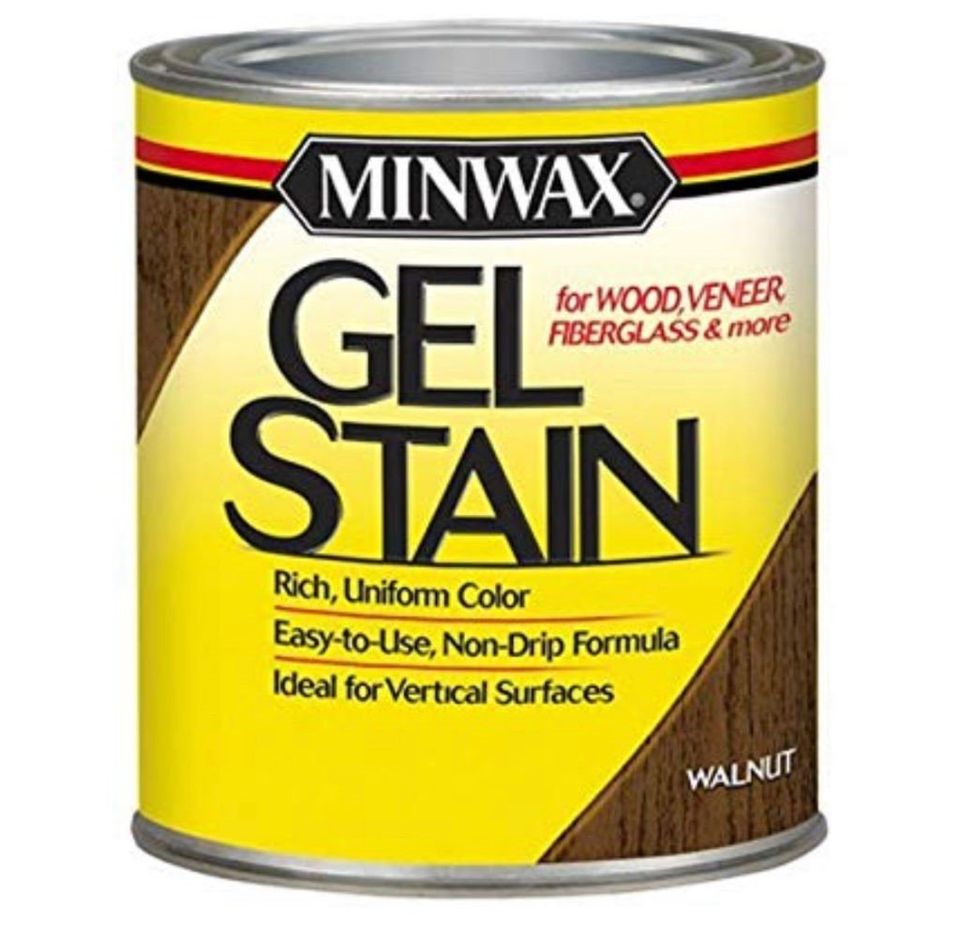
Choosing a Stain Color
I started with a quart of Minwax Gel Stain in Chestnut. Be sure you find the GEL stain, because regular wood stain won’t work. Gel stain is specially formulated to work on metal and vertical surfaces. There are a variety of colors, but I wanted something warm, but without red undertones. I found it at our True Value store, but it’s also on Amazon. It’s not on the shelf at all stores, but readily available online. Walnut is also a great color, too.
A foam brush didn’t hold up more than a couple strokes on the hard door, so I switched over to a 2″ paint brush. It actually worked much better, as well as creating a more natural look.
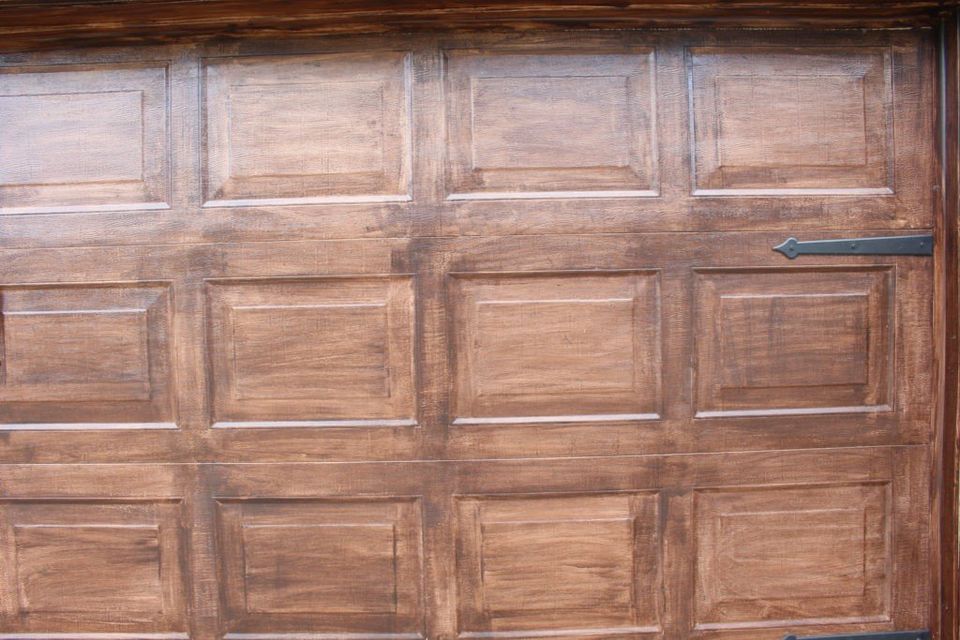
Basically, you’re just going to follow the “natural grain of the wood” when painting it on. Don’t just start on the left and move to the right. Start with the squares and paint the perimeter of each. Then, move on the the actual squares and paint those left to right on each. You can fill in the rest, going up/down or left/right, depending on where you are painting.
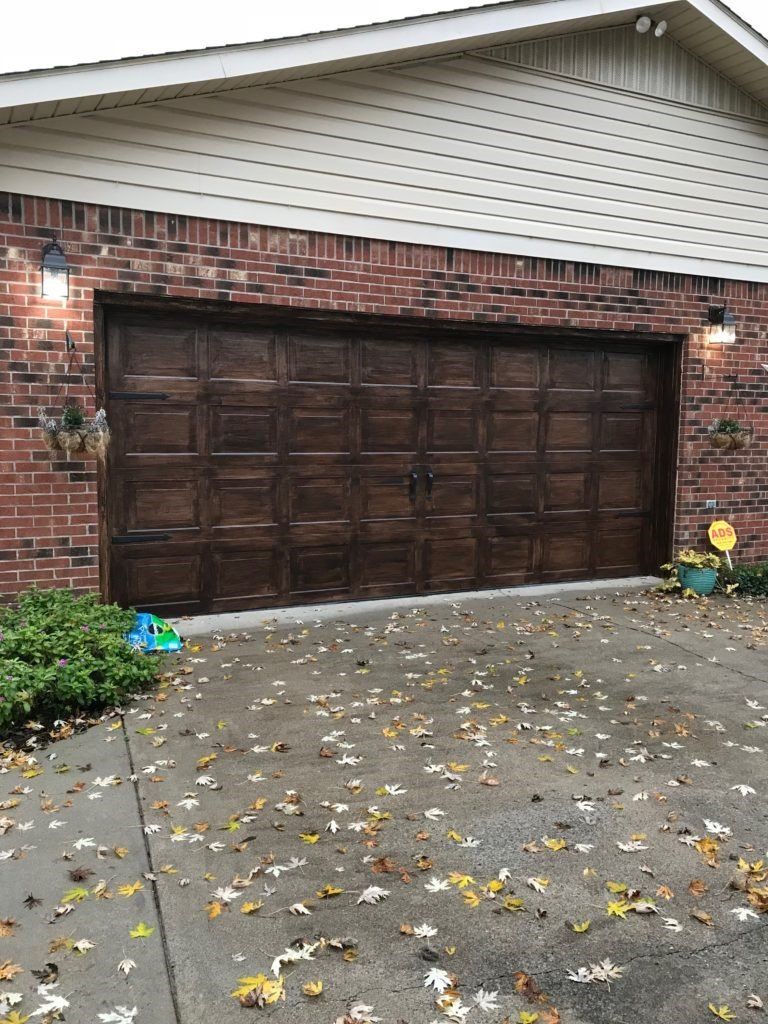
You’re going to need two layers. Don’t worry if it doesn’t look great after ONE coat; it won’t. Wait until you put on that second coat and the real magic will happen. I switched over to a walnut color to have some variation and make it look more natural. Feel free to mix up your colors.
I wish I had more photos of this process, but I never intended to blog about it. It was also cold outside, so I was trying to hurry. After having interest in our garage door after sharing photos of our lime washed home, I wanted to share this easy and economical project. I since stained our detached garage door, and may do a full tutorial with pictures.
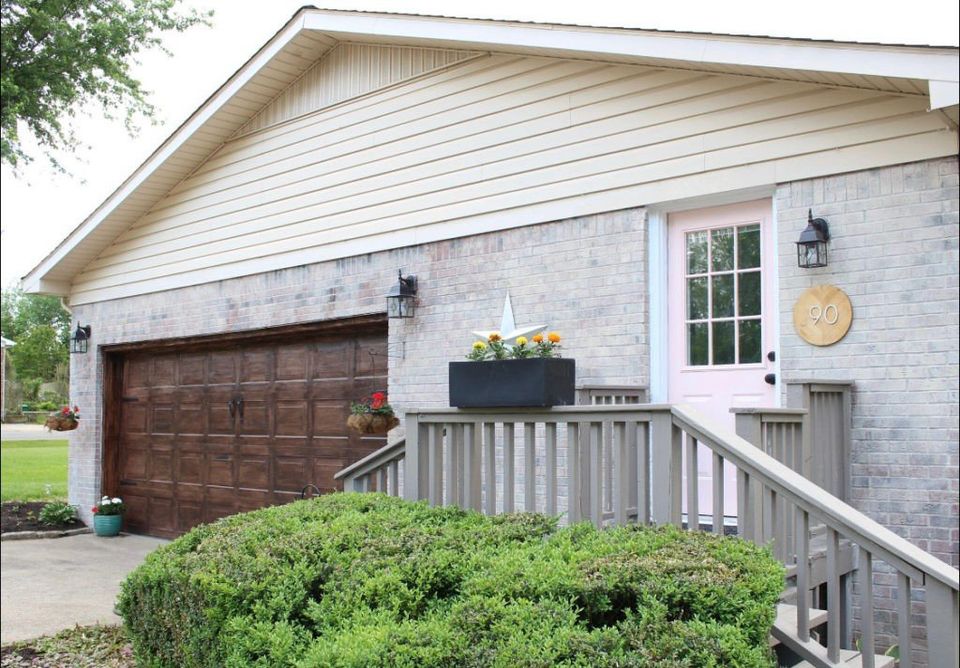
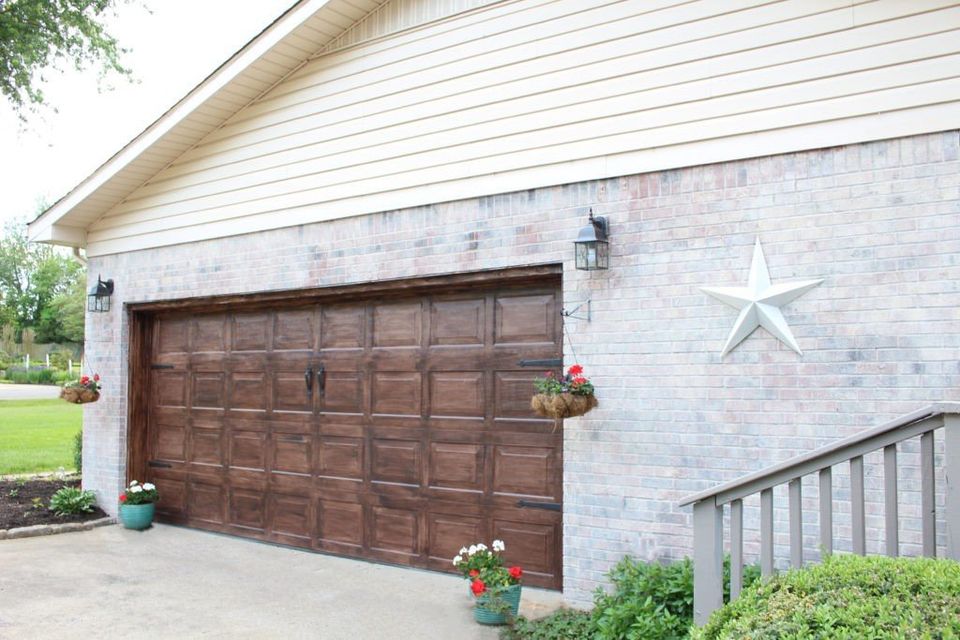
Our door has been stained almost two years, so I think it’s holding up super well. This was about a $50.00 fix, so well worth the money and effort. You can expect to complete the project in 1-2 days, depending on how much time you want to spend per day. I’m surprised to hear people who have been to my house multiple times thought we just bought an expensive new garage door! Boy, did we fool them!
If you decide to try this out, I’d love to see your project. Please share with the hashtag #GreySnailDesigns.
Pin for Later!

Rifle Paper Co Wallpaper

Space Planning

Rifle Paper Co Wallpaper

Designer Drapes

Rug Roundup January 2024

Booth at Christmas Market
Grasscloth

What not to do

Romabio Velatura Mineralwash

I can't remember the first example of fluted wood furniture I saw, but it was probably either this gorgeous custom wood bathroom vanity from Chris Loves Julia , or the DIY fluted coffee table Fariha shared on Pennies for a Fortune . The custom cabinetry was done professionally using a router for each line, which isn't something I possess the skills to do. This did help inspire the colors I used in our bathroom remodel, though! I really connected to the method Fariha used to build the coffee table--wooden dowels. What a fabulous idea!