
DIY Board and Batten Wall
June 1, 2020
DIY Board and Batten
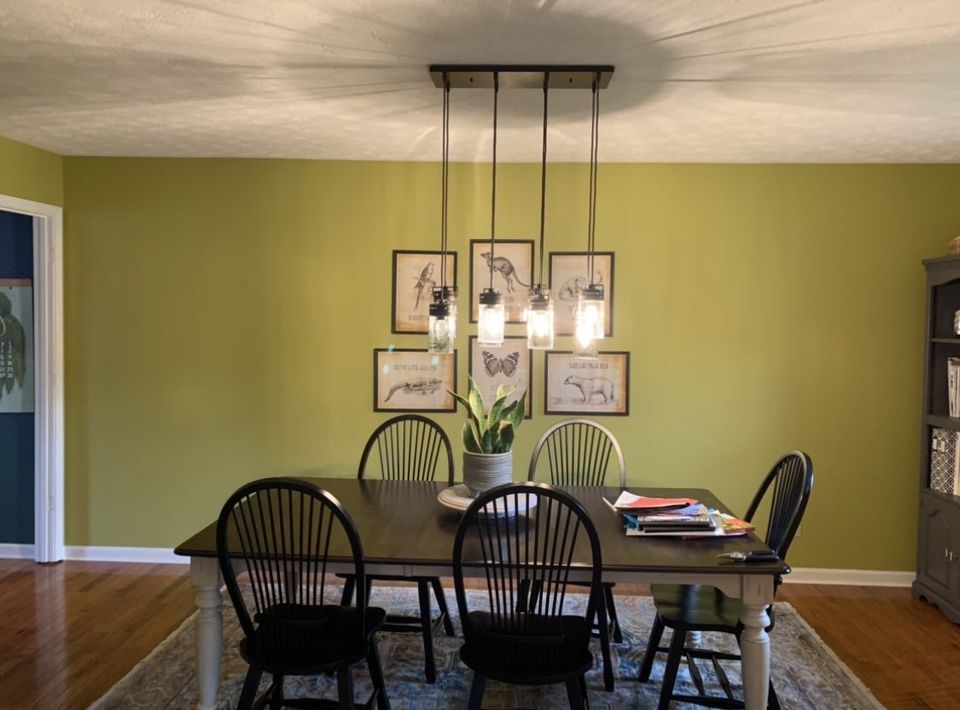
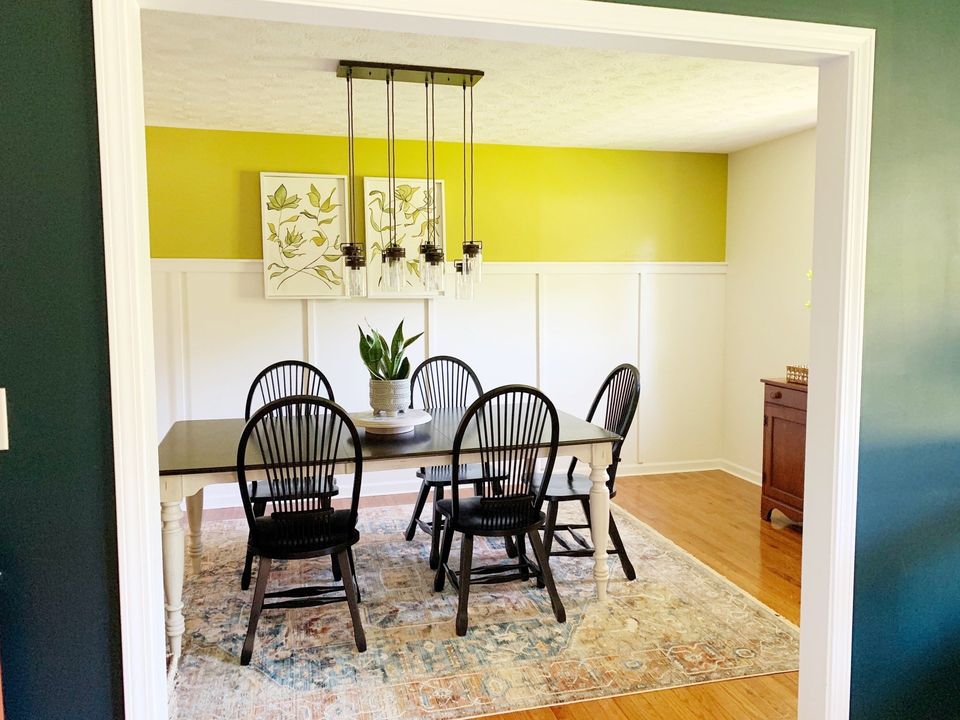
I did a diy of board and batten using faux vinyl planks in our master bedroom last year, but realized later it probably wouldn't be too much more difficult to create one out of actual boards. I had the perfect place to try it--our dining room. Our dining room is much longer than it is wide, so the long back wall (behind our table) has always given me fits for wall decor. I love the wall color, but it can be dark in there because of the small window and how the sun comes in, so I started imagining having the bottom of the wall white.
I gathered a lot of inspiration images on Instagram and Pinterest, and loved the idea of hanging wall art OVER the board and batten. I didn't want to be limited to the small area above the wall treatment--especially since we have 8' ceilings, and I wanted the white area to come up as high as possible to increase the light in the room.
Supplies & Instructions
You'll need to decide how you want to do your board and batten. I have fairly new baseboards, so I didn't want to remove them. If you are keeping your baseboards, you have two options. You can add a 1x2 board just above the baseboard, so your battens just set directly on top and are the same width as the bottom board.
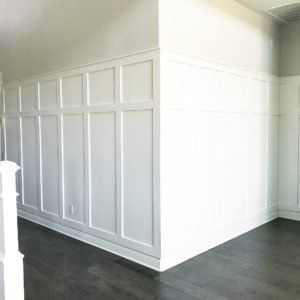
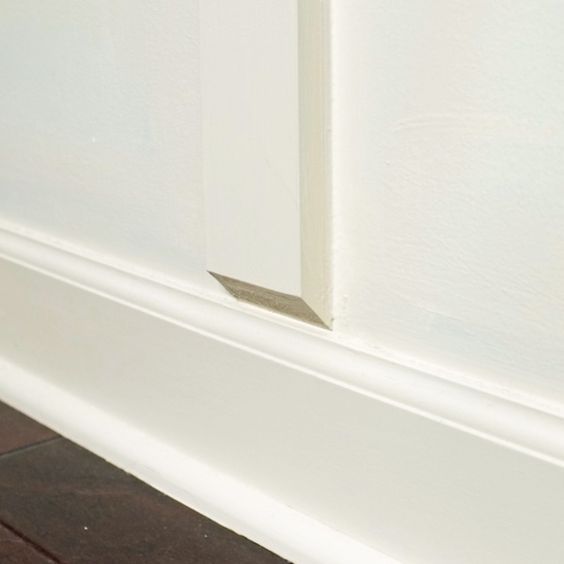
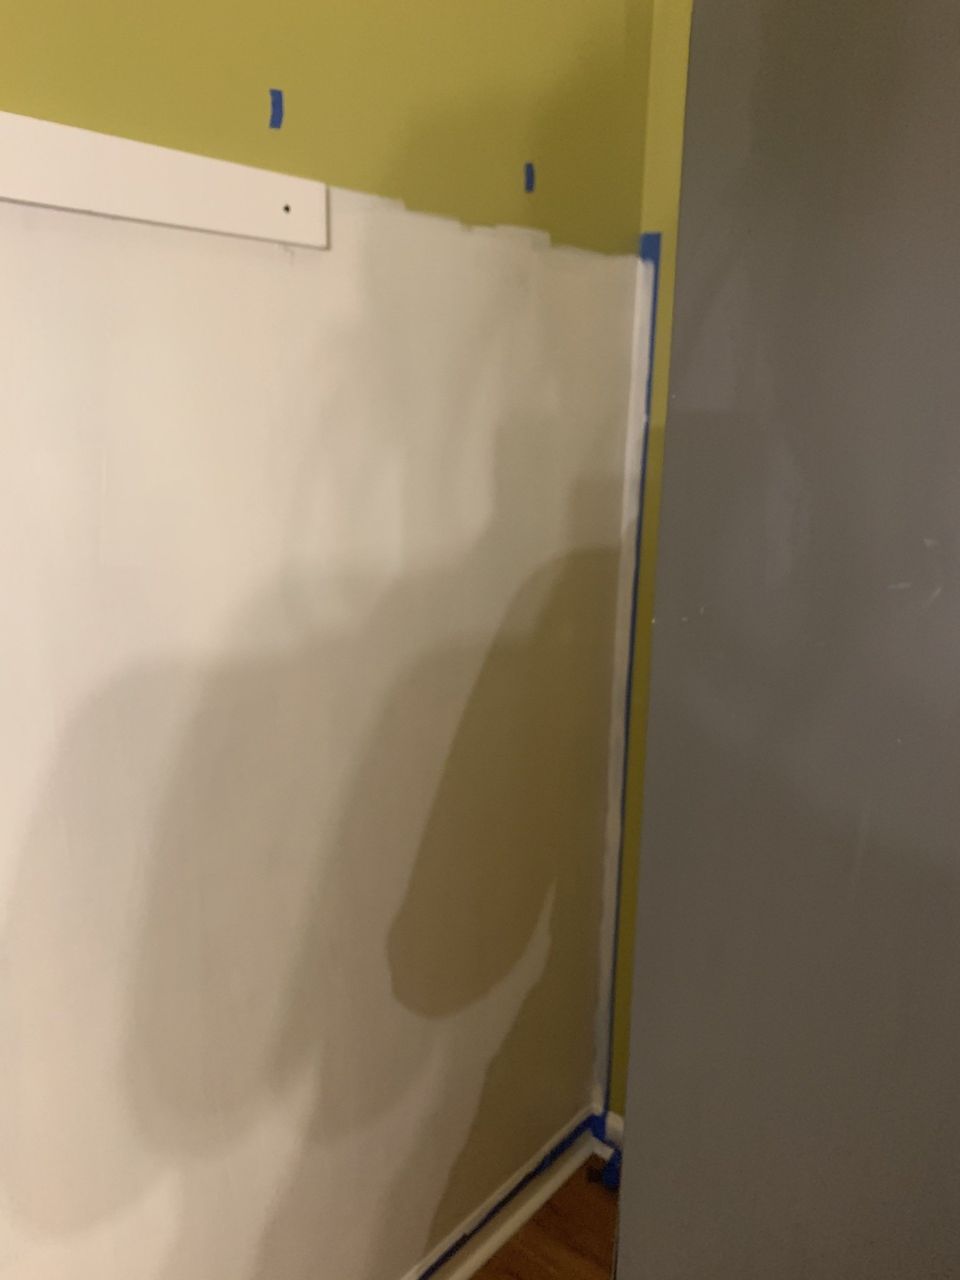
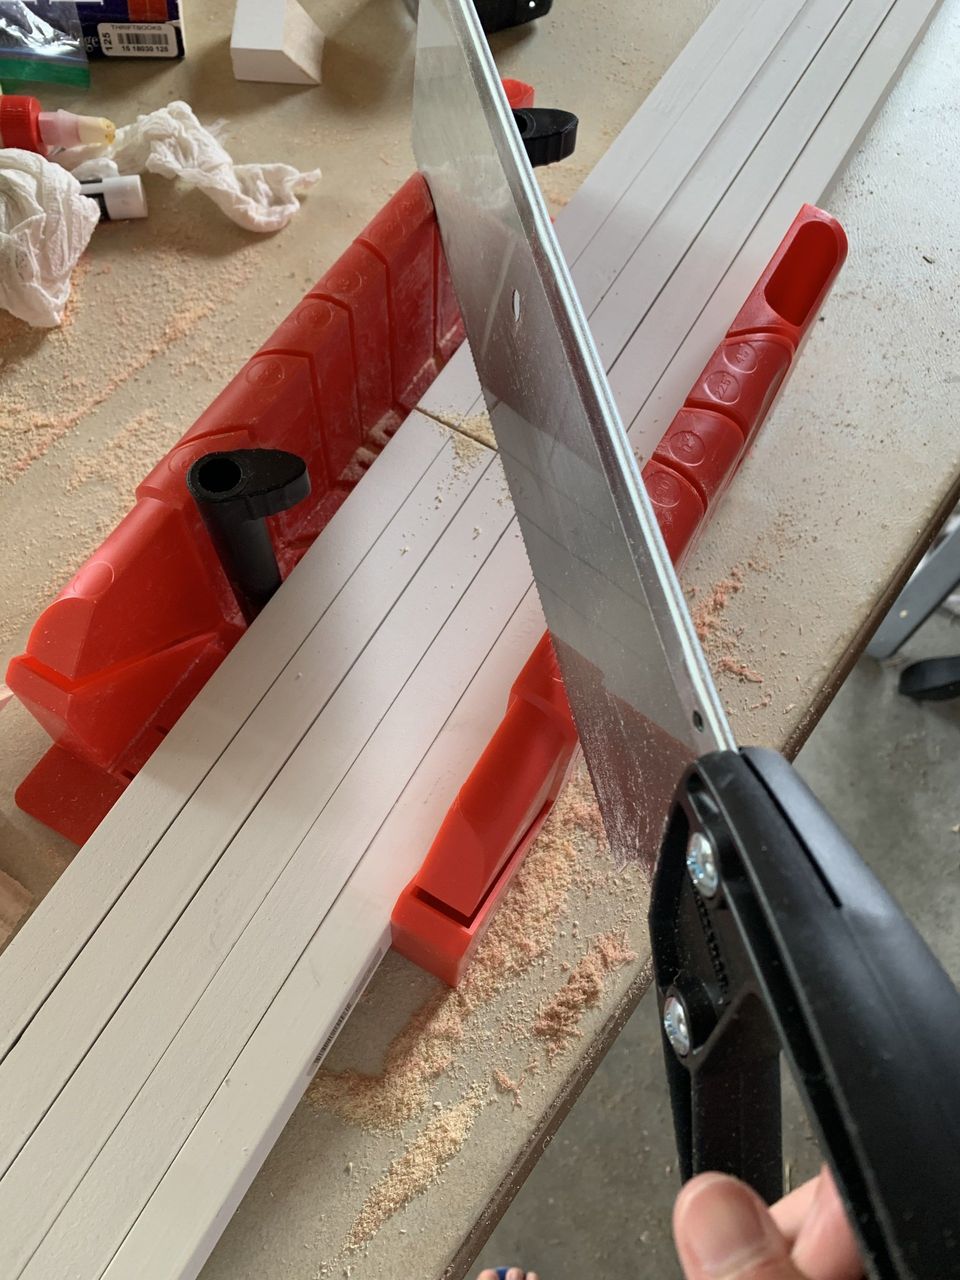
Or, you can just do a 45-degree cut on the bottom of each batten, so it sets on the small lip of your existing baseboards. This is the option I chose, but if I didn't have a mitre box, I would have had to do it the other way. I mostly preferred the look of this in my space.
Once you decide which style you want to go with, you'll need to measure the length of your room. I needed 3 1x3x8 boards to cover the top flat board. I decided I would need between 6-8 1x2s for the battens, since I didn't want the battens too close together. I also got 3 1x2x8 boards for the top ledge. I purchased preprimed white boards for all of these, since I was going to be painting them white, anyway, and figured I could use the head start. It's only a few dollars more for a project this size, so it was worth the extra expense.
You'll also need the following:
Drill
Hammer
1 1/2" finishing nails (or screws)
Stud Finder
Level
Laser Level (not totally necessary, but it's the perfect job for this tool)
Wood Putty
Sand Paper
Caulk Tube
Painter's Tape
Paint
Saw/Mitre Saw/Mitre Box
Painting & Attaching 1x3 Board
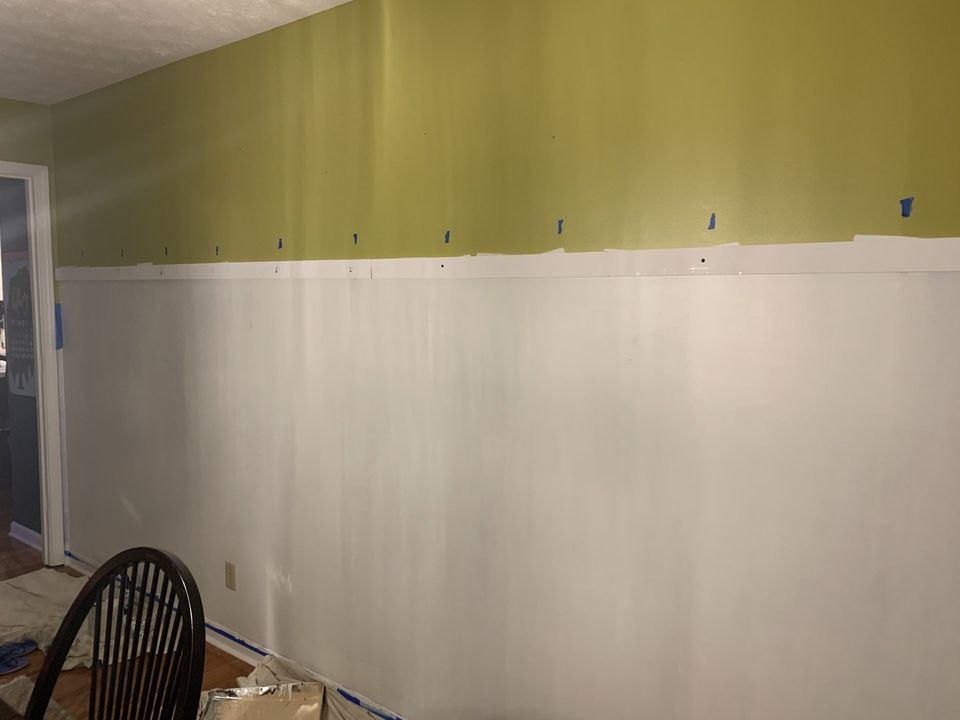
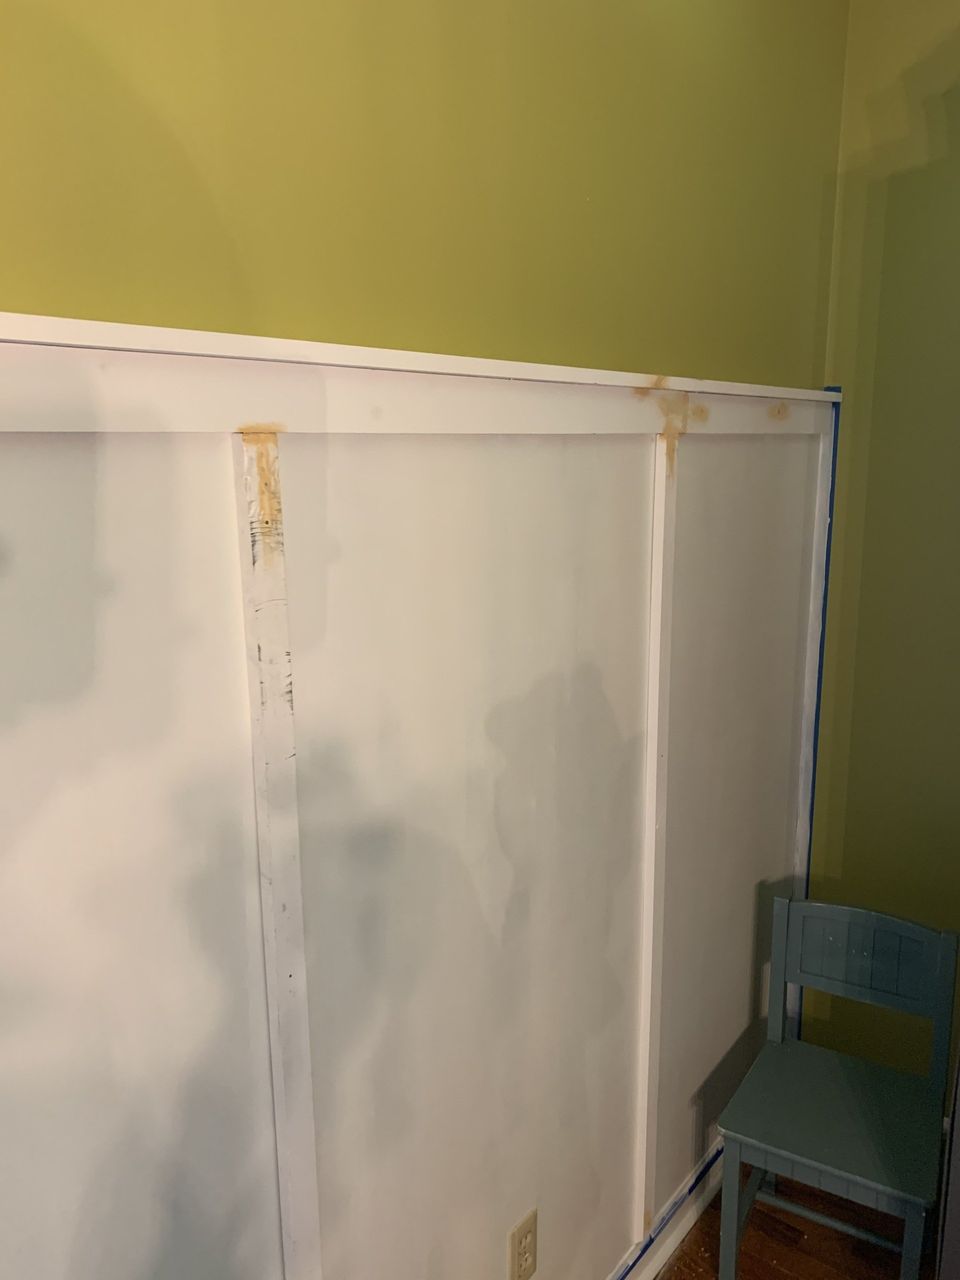
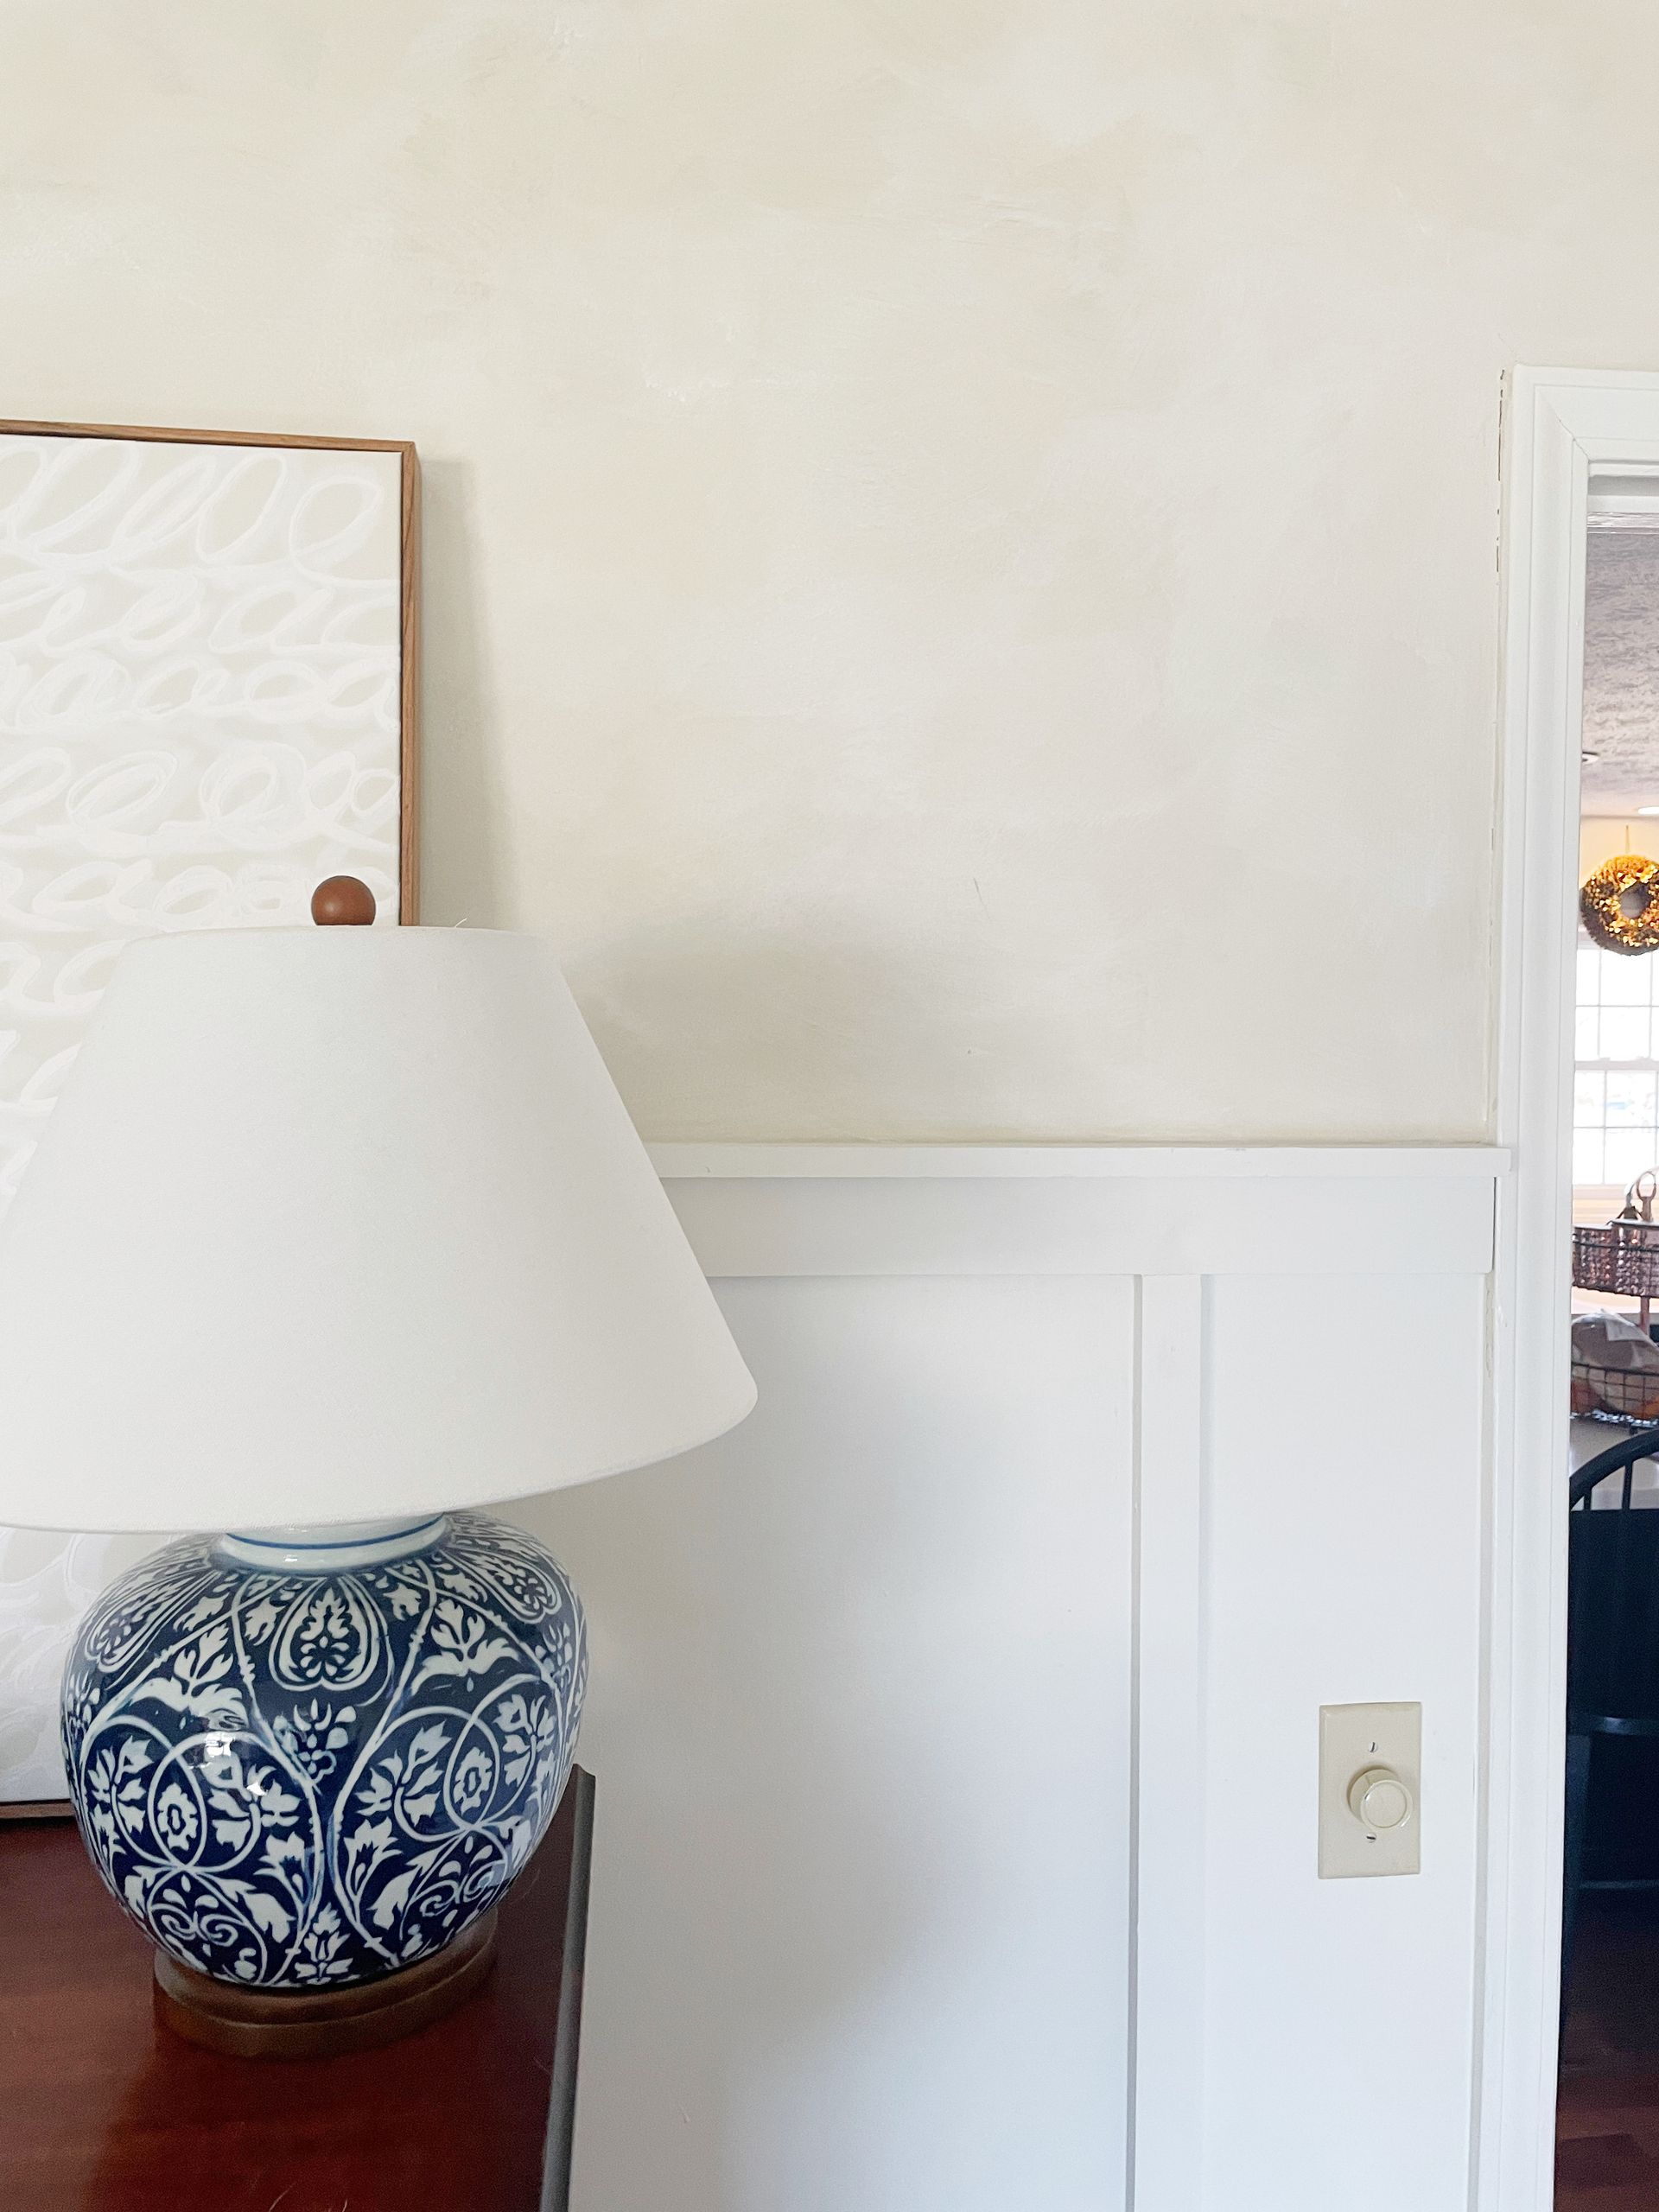
First you'll need to determine the height of your board and batten wall. You should generally work in thirds, so since I wanted mine as high as possible, I chose to go 2/3 the way up my 8' wall, so about 5'3.3". I measured and marked that height about 3 places across the wall, then used the level function of my Craftsman laser level and drew a light pencil line across the wall. I did double check it with a regular level.
After I had my line marked, I rolled two coats of white paint (SW Alabaster) on the wall. Don't worry about having the line perfectly straight on the top--it will be disguised by the top board. Once the paint was dry, it was time to attach the 1x3 board to the wall. I used my stud finder to mark the studs across the entire wall. I even checked them with my drill because I am never very confident in my stud-finding abilities. Haha.
I used my mitre box to make a 45-degree cut on three ends of the wood (anywhere it had a joint with another board. Starting on the left, I attached the board to the studs with a screw. I actually started trying to nail it up, but my nails weren't long enough, so I just went with screws. Nails would be better, but I didn't have the correct size and it wasn't easy to run to the store because of Coronavirus, so I used what I had. My dad reminded me the nails needed to be long enough to go through the board AND drywall before catching the stud. Mine were just catching the drywall, which is why they wouldn't hold. This was the biggest problem I had with this entire project and it was entirely user error (as usual), so learn from my mistakes.
Attaching the Vertical Boards
I cut all the battens to a 45-degree angle on the bottom and to the appropriate length (top of baseboard to bottom of 1x3 board) using my mitre box and saw. I love this thing!
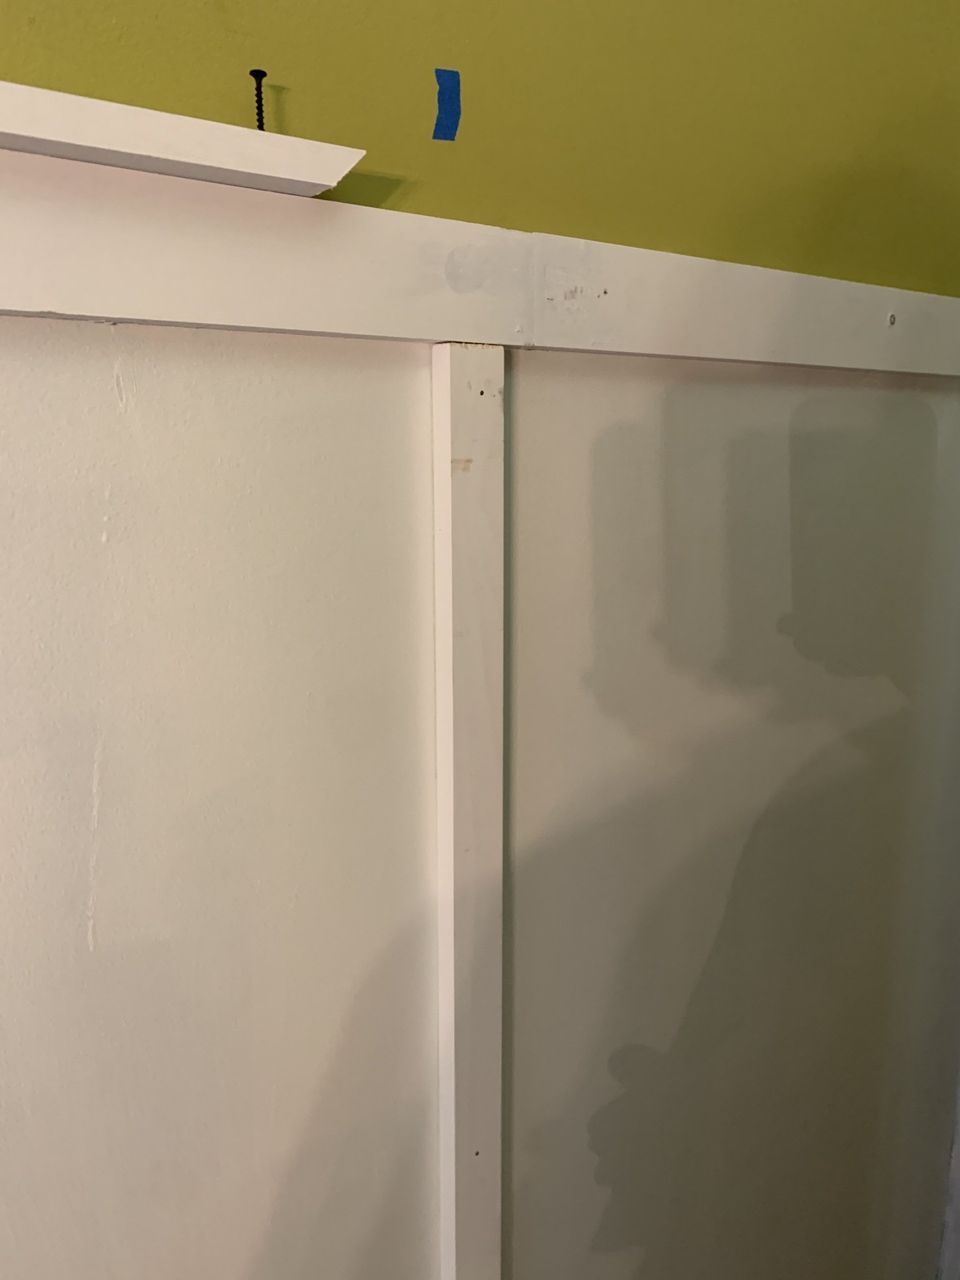
Then, I attached them with 1 1/2" finishing nails, using a level making sure I had the board totally straight. If you have a nail gun, this would be easier, but it totally works using a hammer. A nail gun is one of those tools I'm still afraid of getting hurt with. Plus, I'm getting better at hammering now. I basically attached a batten at every other stud. You could do every stud, if you wanted, but I didn't want it to be that busy. Once I had the correct length nails, it was much easier to add the battens. I just used a nail at the top and bottom of the board, and one in the middle if it wasn't laying nicely. Remember, your walls may not be totally smooth or flat.
After I got all the battens in place, I added the remaining 1x2 boards to create a ledge on top of the 1x3s. I used my mitre box to make 45-degree cuts at all joints and screws each board into place.
Wood Filler
Once all the boards were up, it was time for the wood filler. I used a Minwax brand. I just put it on over all the nails and screws, and along any wood joints. I let it dry and sanded it off with my electric sander, but a block of sandpaper would get the job done.
Caulk
Caulk is complete magic. It makes an average job look professional and covers all sorts of mistakes. Don't skip this step. It may be the most important. I don't like using a caulk gun, because they are hard to use and there is so much waste with small jobs. I discovered a squeeze tube of caulk at Lowe's, so that's my go-to. You should caulk anywhere the boards meet the wall or has a gap. Once you have your bead of caulk, you'll want to dip your finger in a cup of water and run it along the crease. It works perfectly.
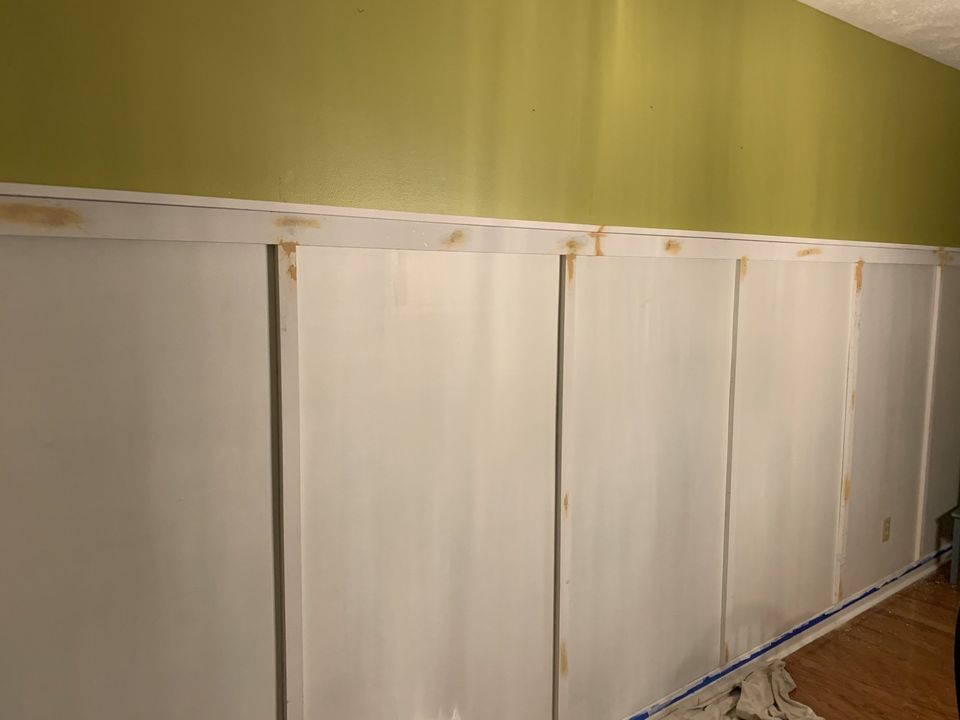
After you caulk, it's time to paint again. I gave all the boards two coats, and then one more coat on the walls. I used a small 6" foam roller for everything, and wrapped it in aluminum foil between painting, so it didn't dry out.
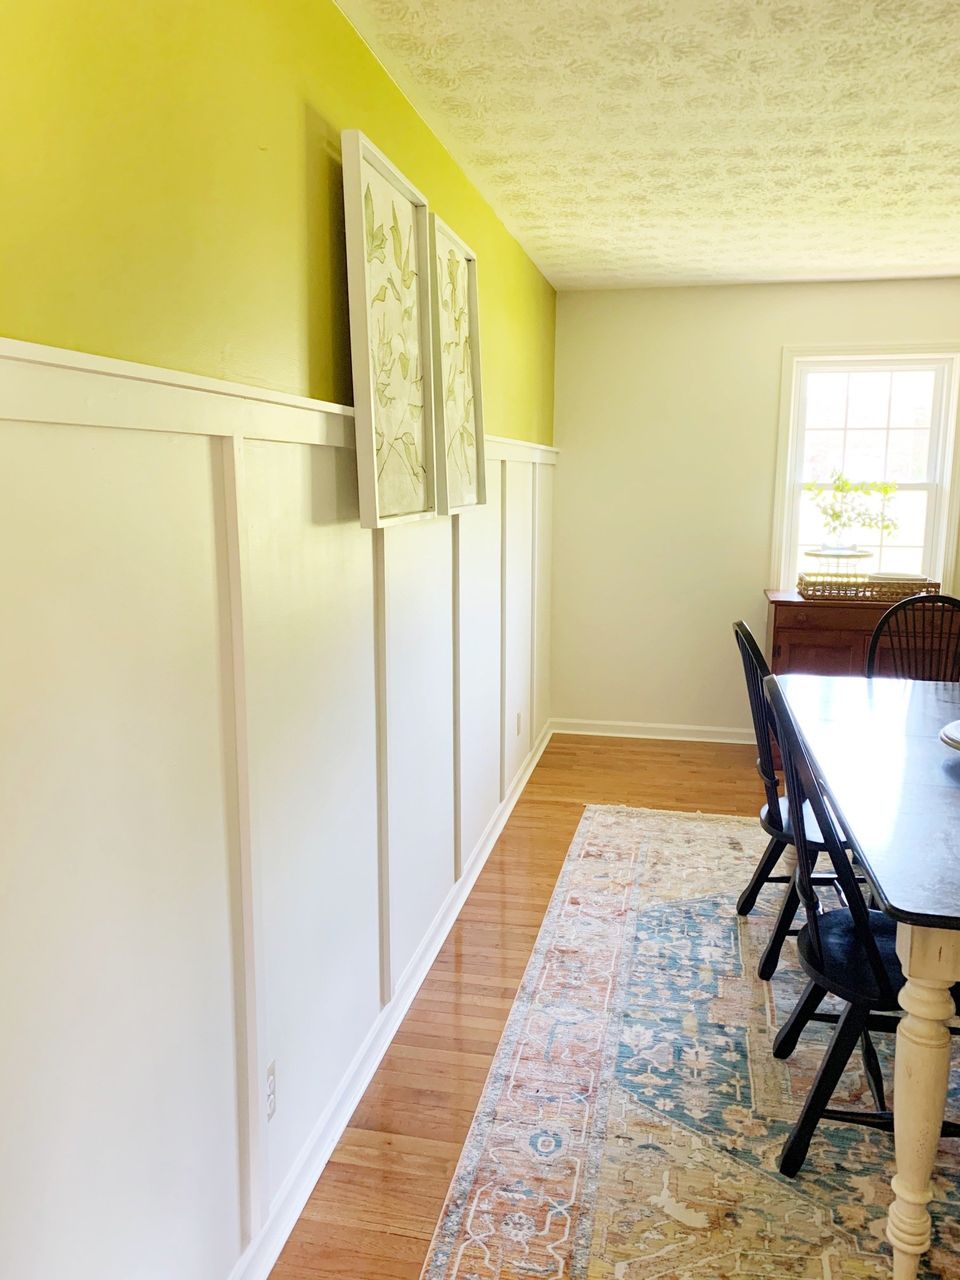
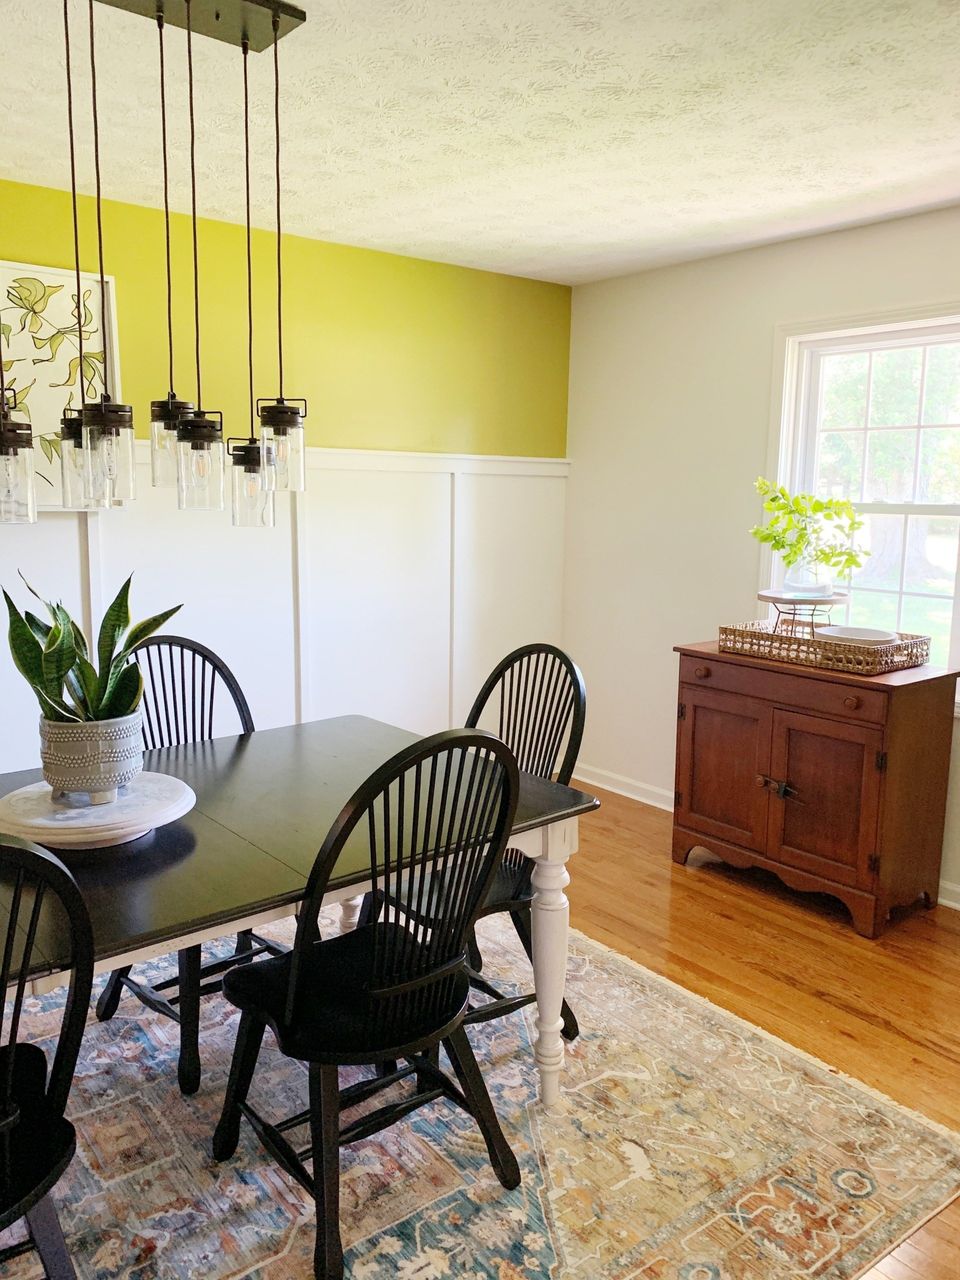
I am so excited to have completed this project. It looks like I hired someone to do it, and it probably cost me about $100 total--and that's including premium paint! I used the rest of the gallon of white to paint the window wall, because we plan to add cabinets and shelving down there. I just love the interest it created in this room and how much it brightened things up!
If you want to check out my tutorial on creating large-scale art
and hanging it over board and batten, check it out here.
Pin for Later!

Rifle Paper Co Wallpaper
Space Planning
Rifle Paper Co Wallpaper

Designer Drapes
Rug Roundup January 2024
Booth at Christmas Market
Grasscloth
What not to do
Romabio Velatura Mineralwash
I can't remember the first example of fluted wood furniture I saw, but it was probably either this gorgeous custom wood bathroom vanity from Chris Loves Julia , or the DIY fluted coffee table Fariha shared on Pennies for a Fortune . The custom cabinetry was done professionally using a router for each line, which isn't something I possess the skills to do. This did help inspire the colors I used in our bathroom remodel, though! I really connected to the method Fariha used to build the coffee table--wooden dowels. What a fabulous idea!