
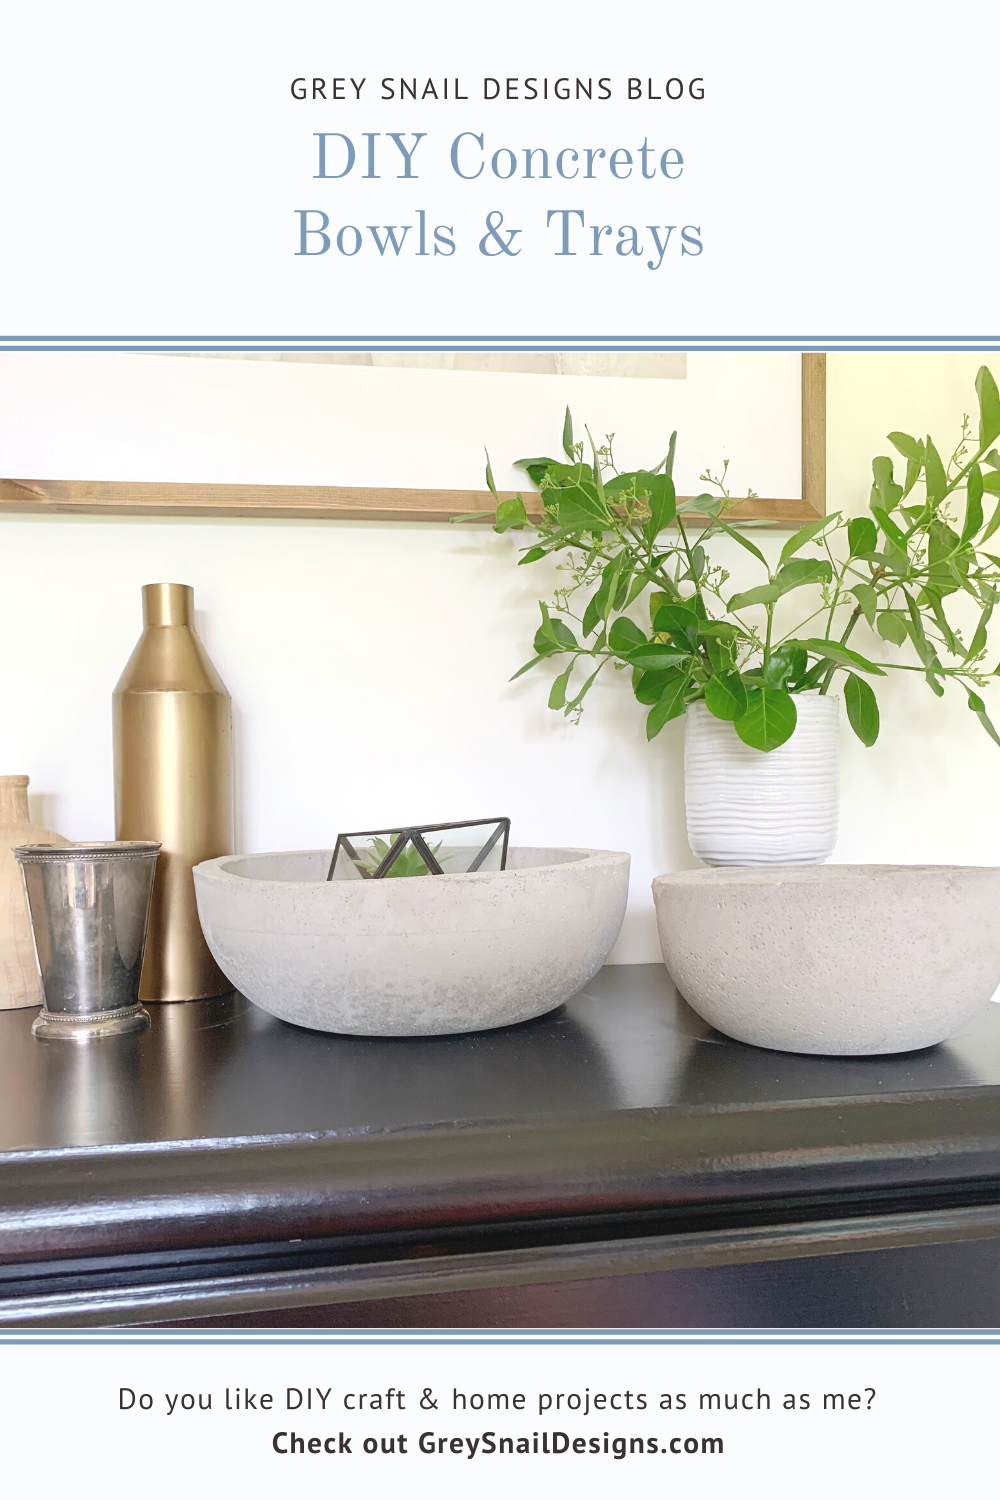
DIY Concrete Bowls and Trays
May 17, 2020
Cement Bowls
I originally saw this diy hack on Joinery & Design Co. on Instagram (@joineryanddesignco) a few weeks ago. The husband-wife team chronical their adventures building and decorating their beautiful new home. It definitely has a modern style--lots of whites, blacks and neutrals, and I love it! They shared this really cool and cheap project making their own cement bowls for decor and now all the home bloggers on the internet are also doing it. I'm late to the party, but I figured I better give it a shot.
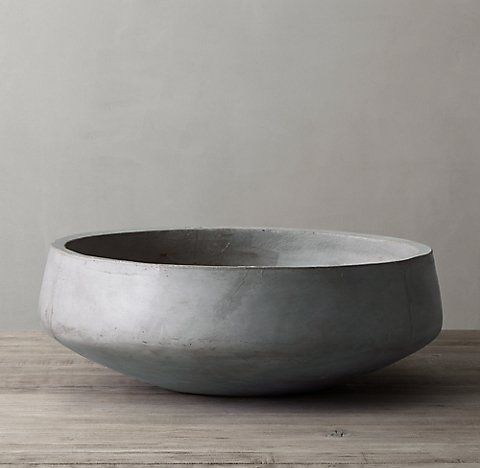
Cement bowls and trays are all the rage. Here's one below from Restoration Hardware for $125. I'm going to show you how to make as many as you want for closer to $10.
Supplies & Instructions
Plastic bowls in various nesting sizes
Bag of concrete
Drill with paddle mixer attachment
Vegetable oil or Pam cooking spray
5-gallon bucket
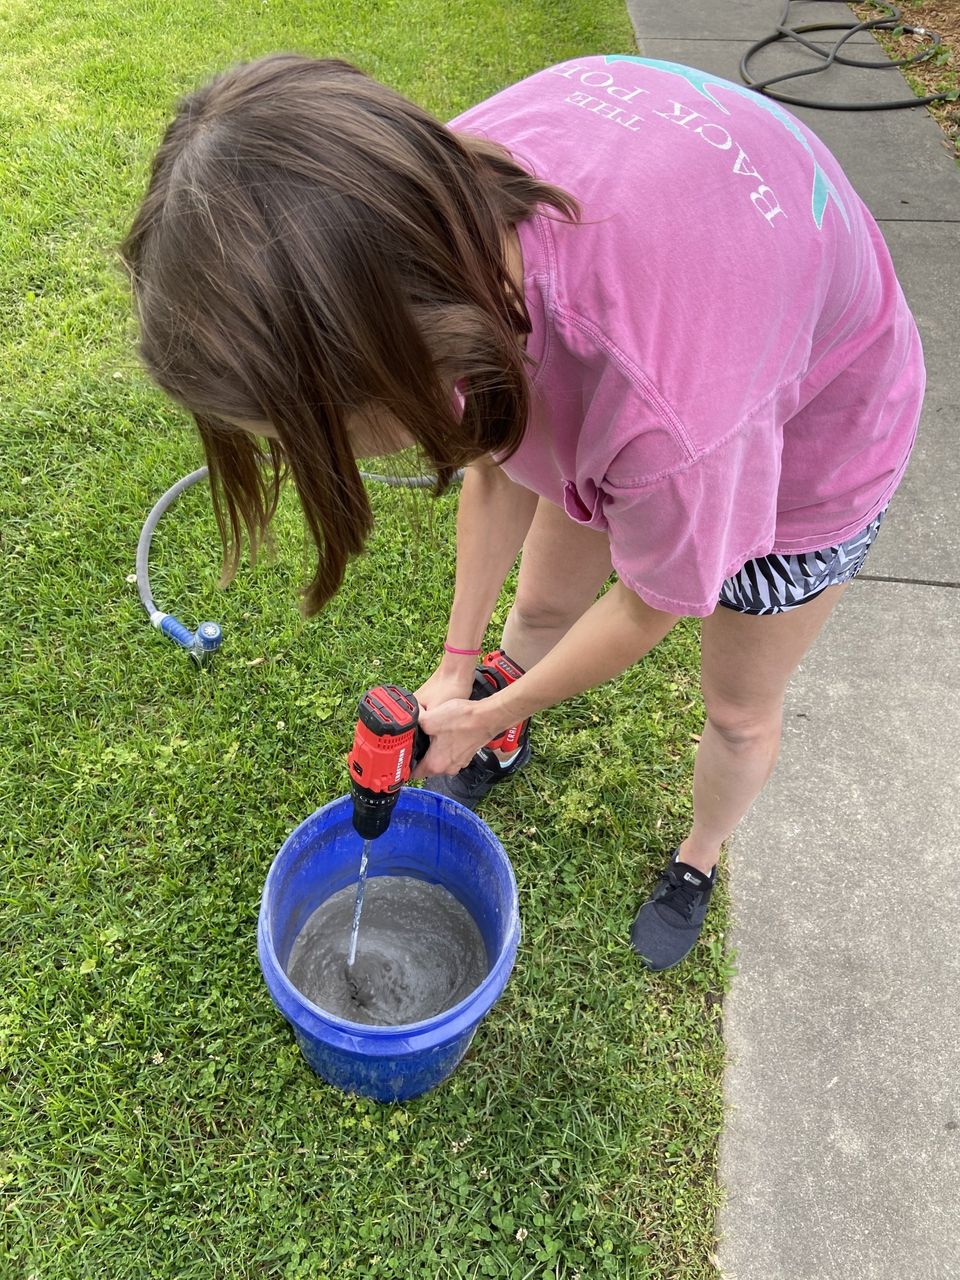
I used a 5-gallon bucket for mixing my concrete--I used a 60-pound bag of Quikrete from Lowes. I had my husband pour in a small amount of concrete to the bucket, because, man, it's HEAVY! I added water with the hose until it looked a little soupy. They say you want the consistency of batter. Then, I mixed it up really well with my Craftsman drill and paddle mixer.
Greasing the Molds
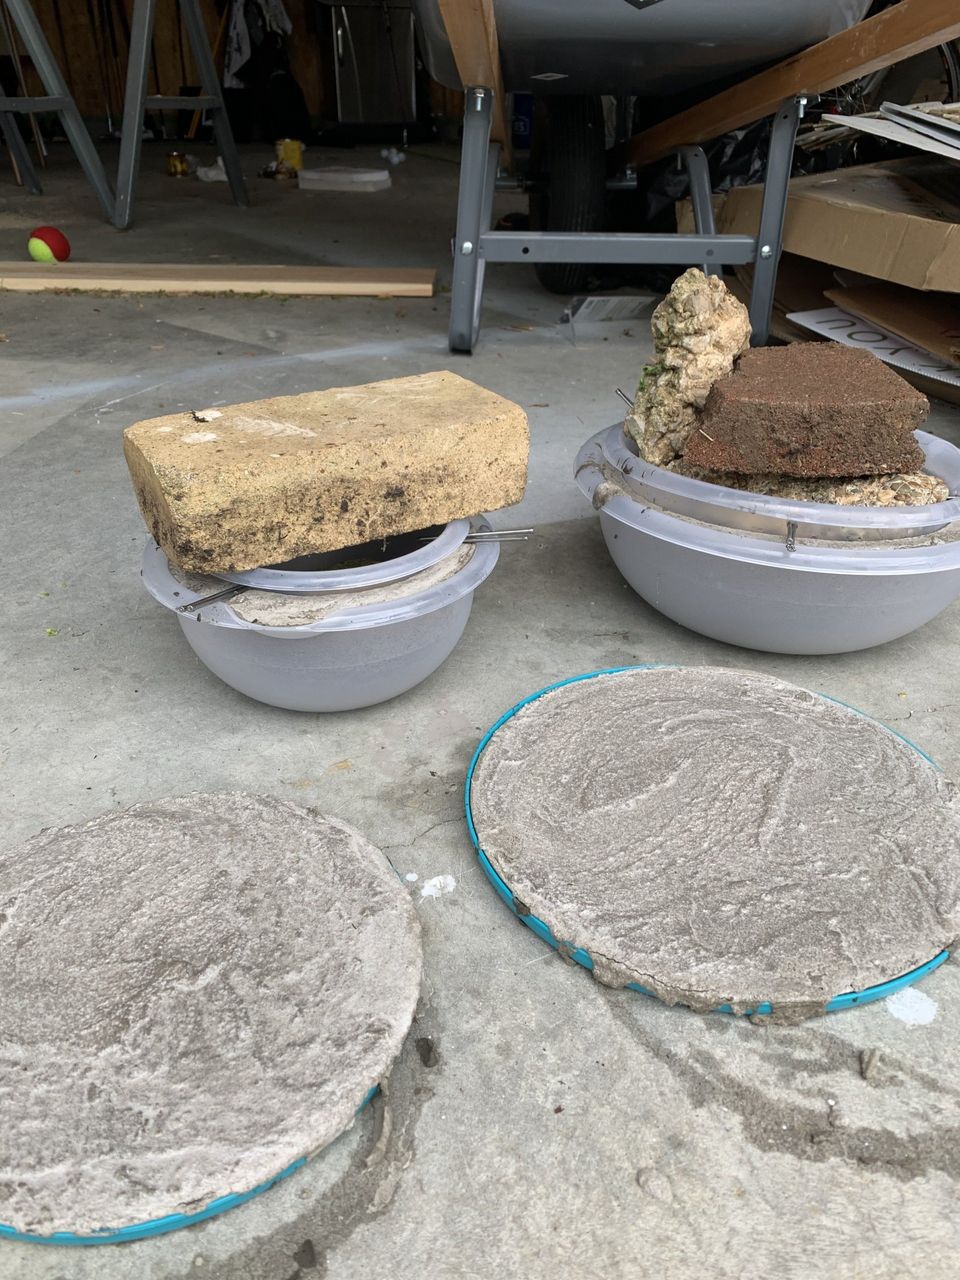
I ordered a pack of flexible plastic nesting bowls from Walmart that came with lids for my molds. I drilled 3 holes around the edge of the top (smaller) bowls for screws to stick in, so they wouldn't sink too far in, but I'm not sure if that was totally necessary. I'd seen other people do that, so I wanted to play it safe. My screws were too small and short for the holes I made, so I stuck a couple long nails in each.
If you want to make multiple bowls, it's important to grease your molds with vegetable oil/cooking spray. I just used Canola oil. I just poured a little on anything that the concrete would touch. I don't have a photo of this step because I my hands were covered in oil. I decided to try to make some trays, too, since I had the lids just sitting there.
Once everything is greased, it's time to pour in the concrete. I actually used a spade to scoop it into the bowls, because, like I said, that concrete is heavy! It was also easier to control the amount, too. I filled the bowls about halfway and pressed in the smaller bowl to see if I needed more or less concrete. I did the same thing for the trays, trying to get the tops as smooth as possible with my spade.
I used some bricks and rocks to weigh everything down, because otherwise, the top bowl will float.
Then, I placed all the molds in the garage, so they wouldn't be in direct sun. I saw a demo on Instagram and someone mentioned their bowls in direct sunlight kept cracking, so I wanted mine to be in the shade.
It's also important not to try to unmold these too soon. I learned this from watching a bunch of other peoples' experiences on Instastories. So, I was patient and waited until the next day to check them. Mine easily unmolded. I took out the smaller top bowls first, then the larger ones came off when I turned them upside down and gently broke the seal. I did the same thing with the trays, coaxing off the plastic lids by gently bending them around the perimeter until the came off. Everything was still kind of wet where it was touching the plastic, so I flipped them upside down and let them dry some more.
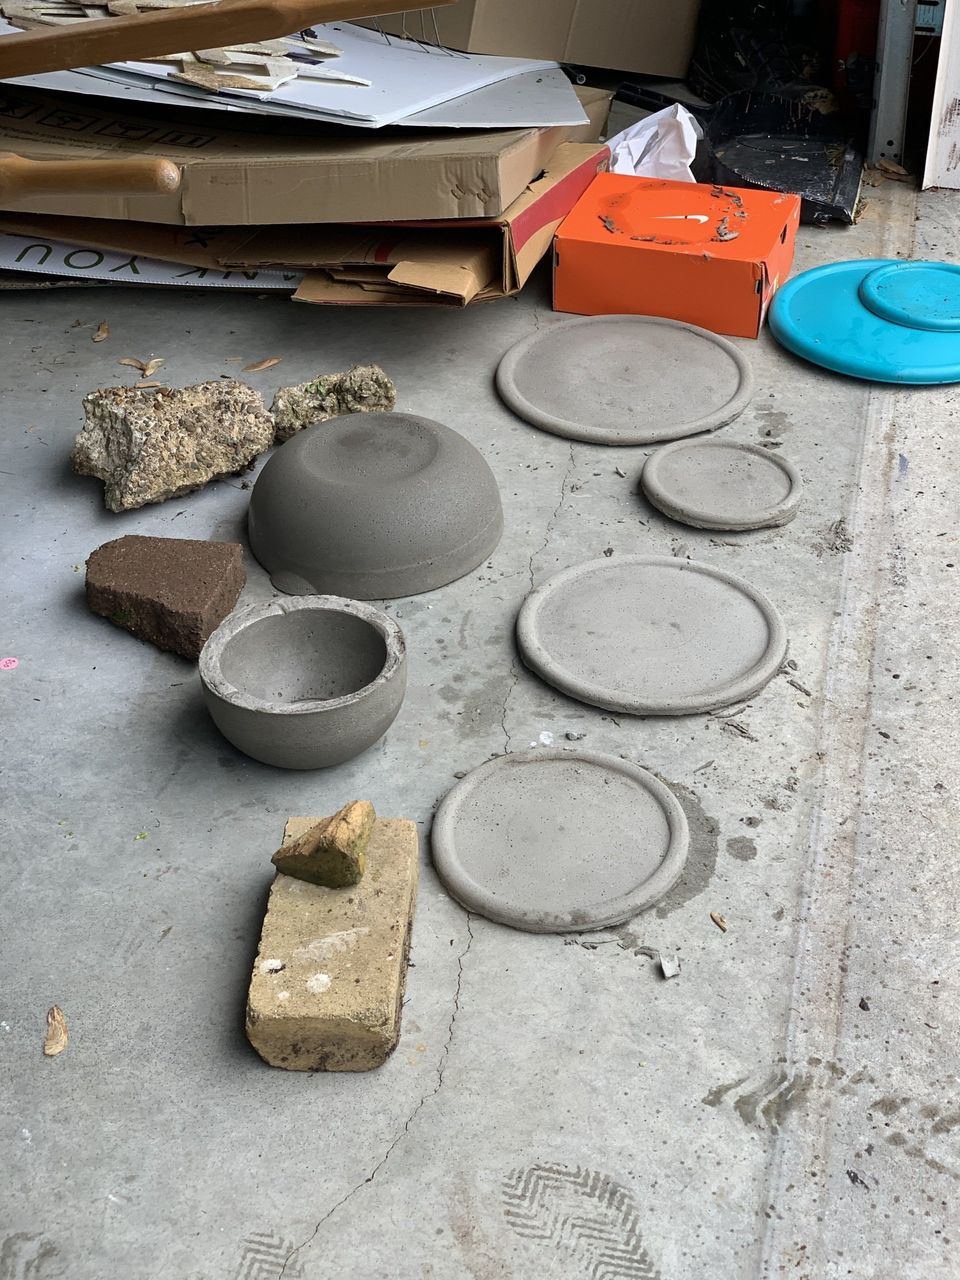
The next day, they were quite a bit dryer and I could handle them a little more. I just flipped them again. You can see their wet prints on the garage floor.
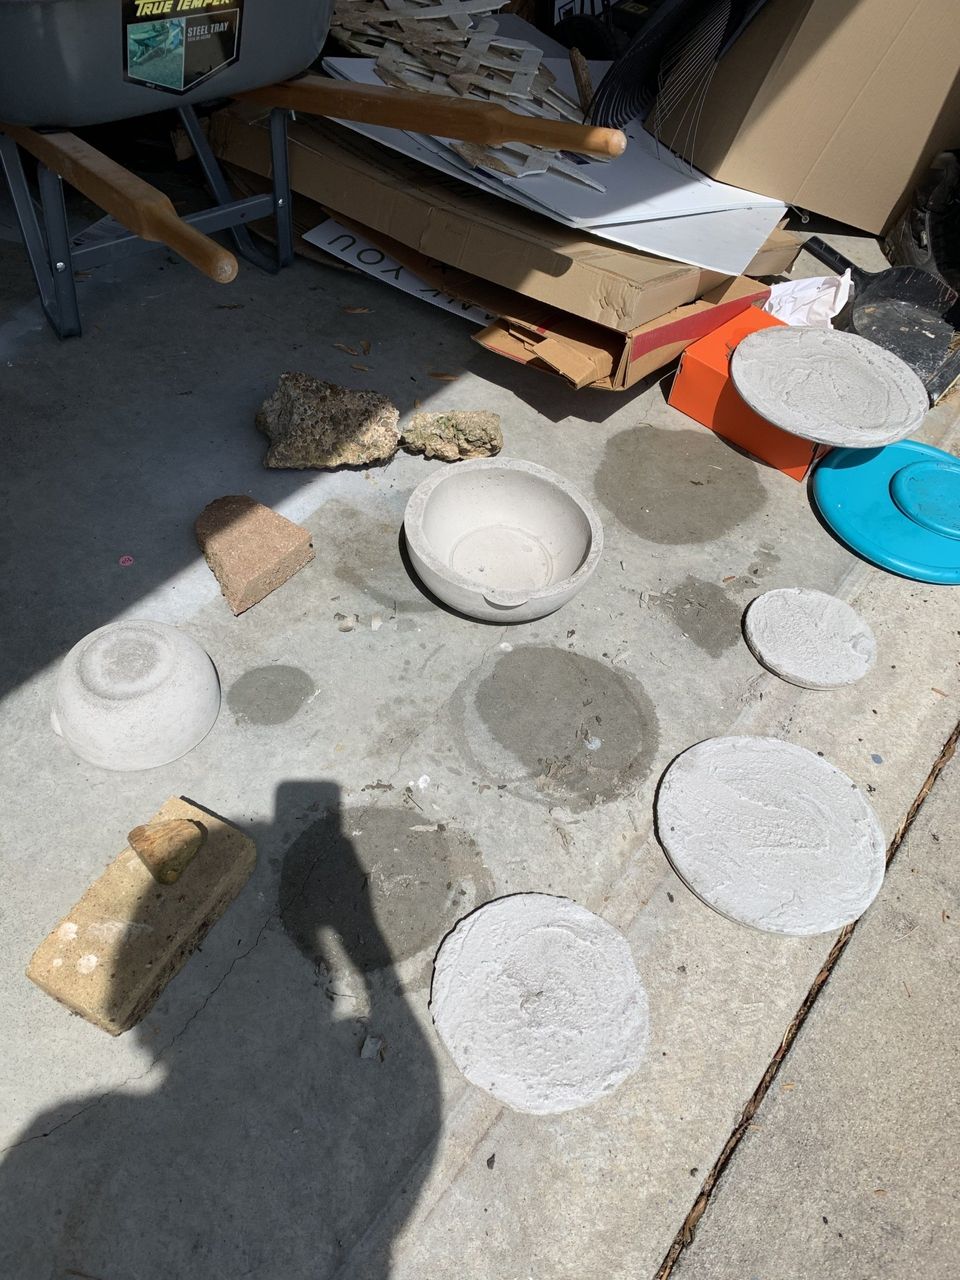
Once they are good and dry and you can comfortably handle them, take a block of sandpaper and sand the top edge of the bowl to smooth it out. I did this by hand, but ended up using my electric sander to sand off the pouring spouts on the bowls from my molds. It came off super easy. I also carefully sanded the edges and bottoms of all the trays.
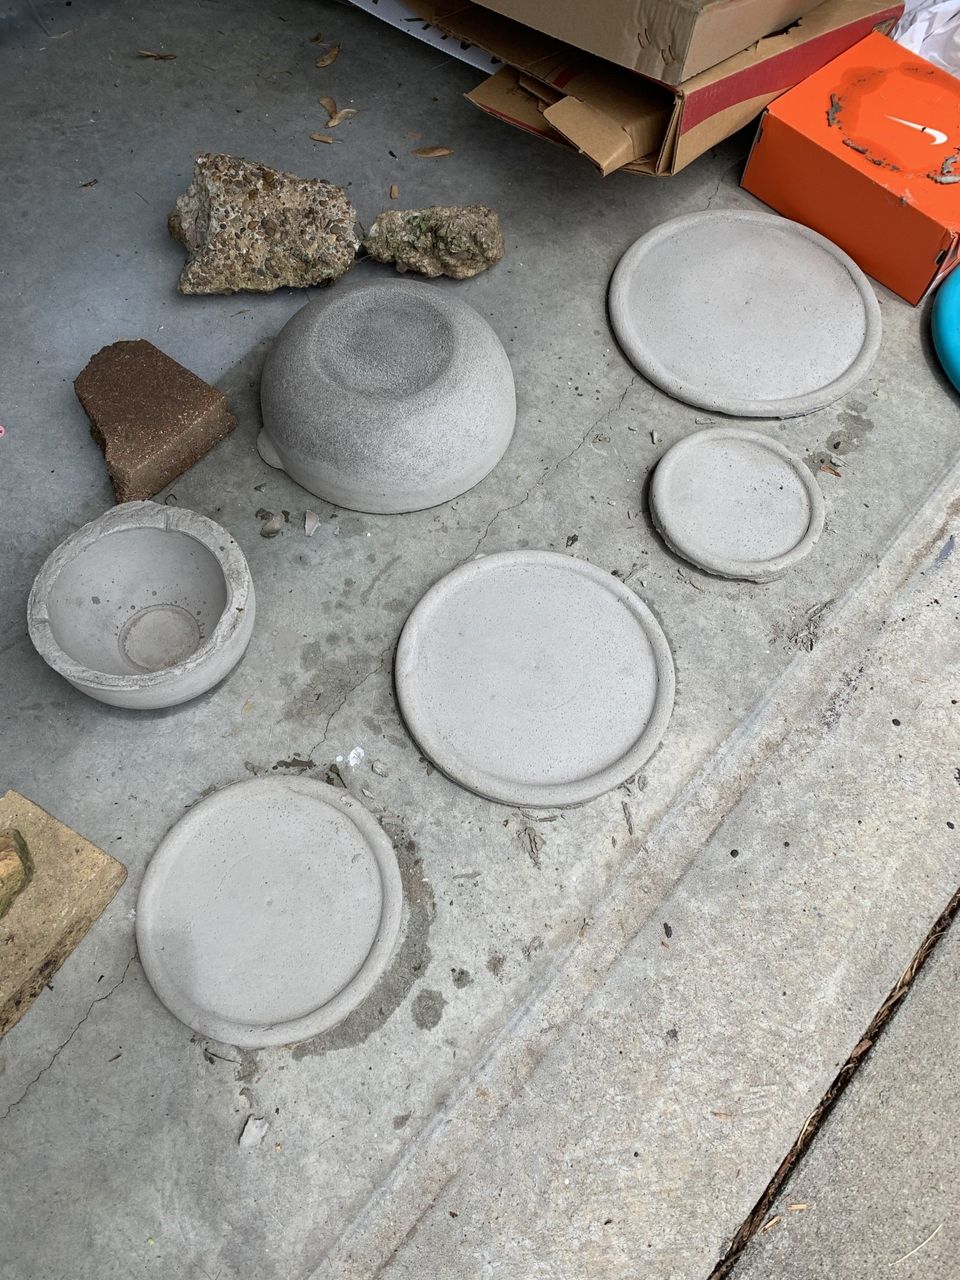
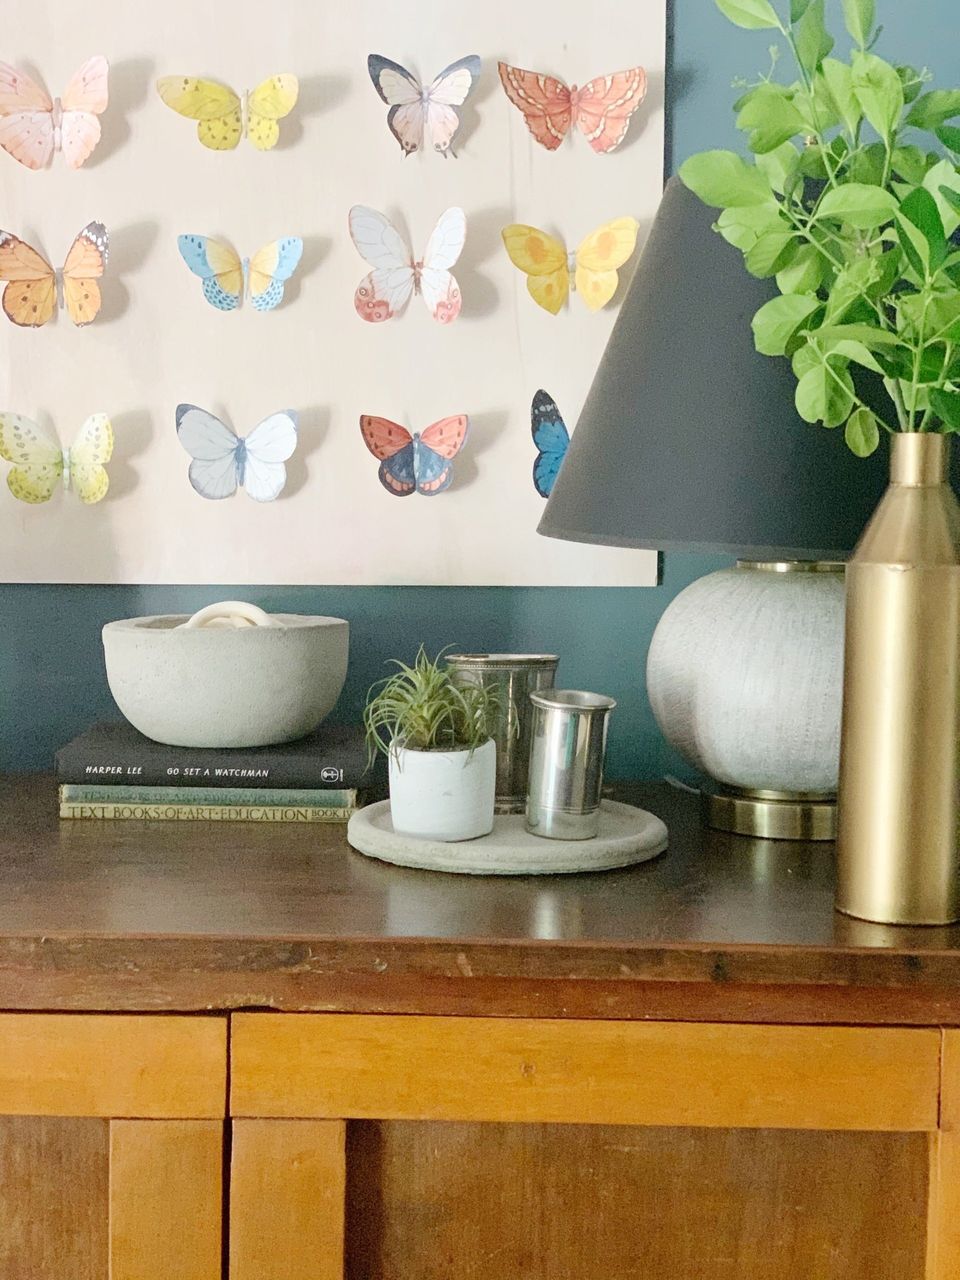
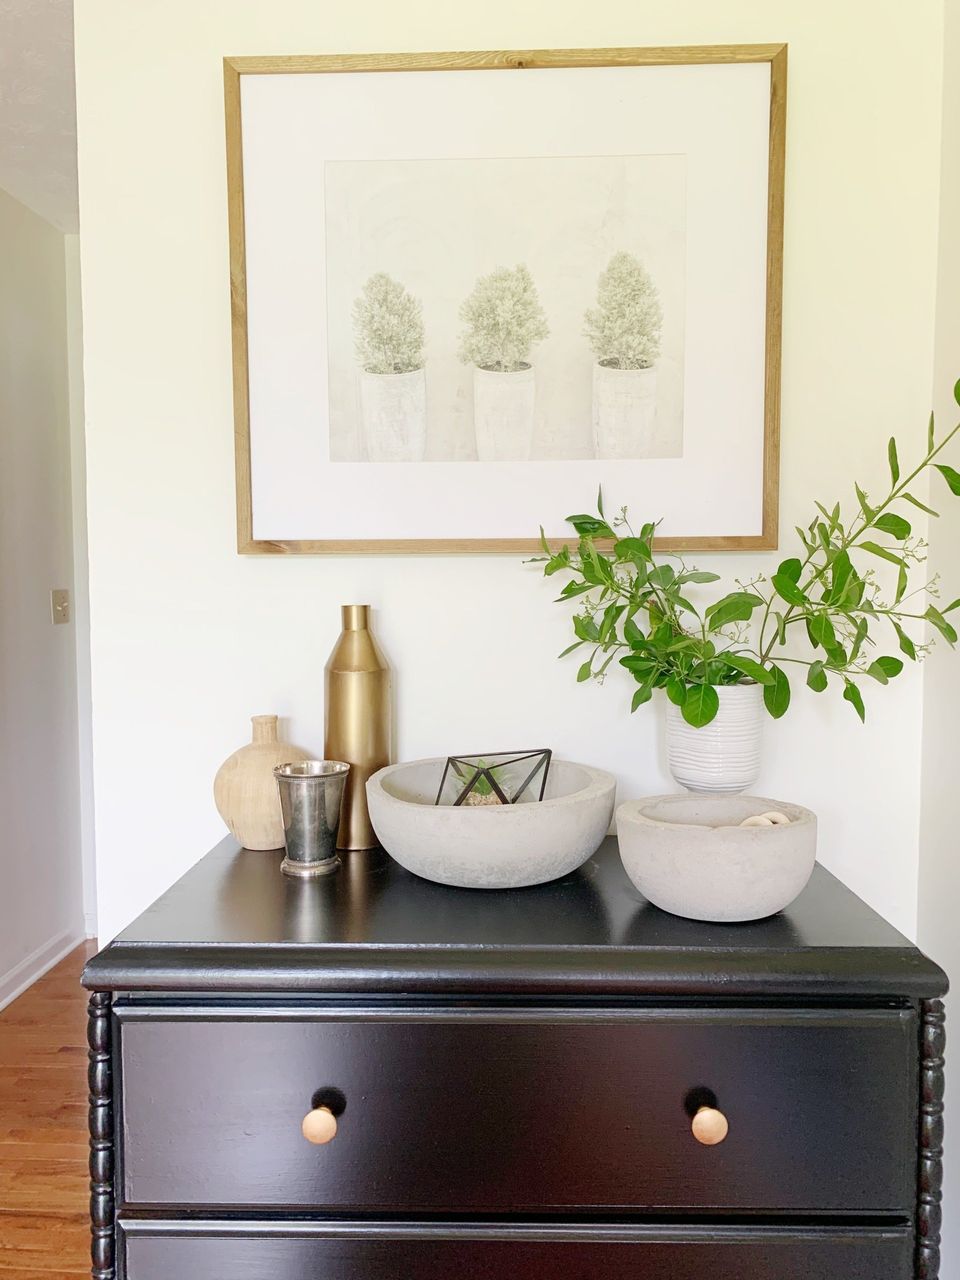
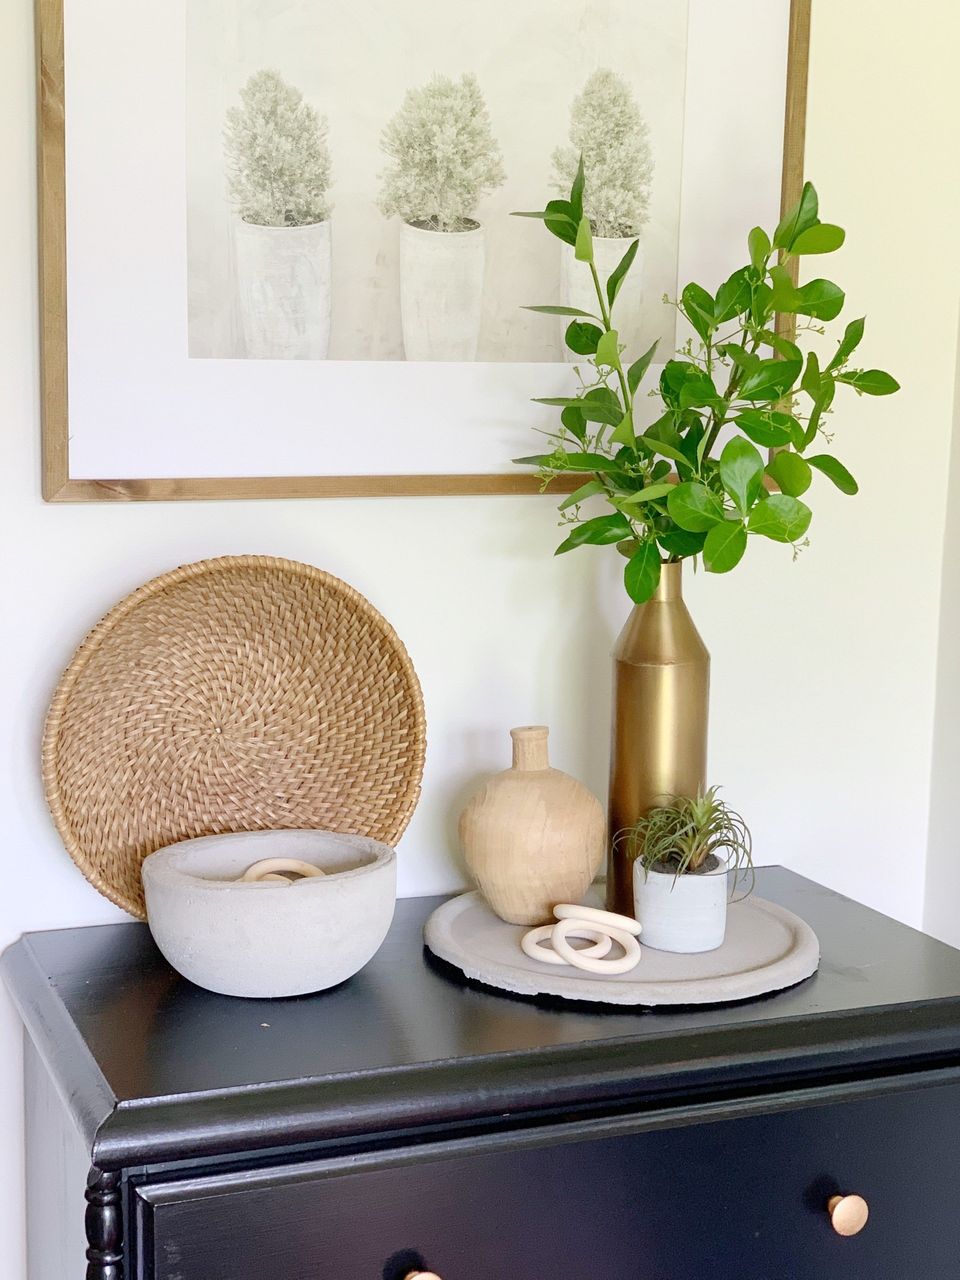
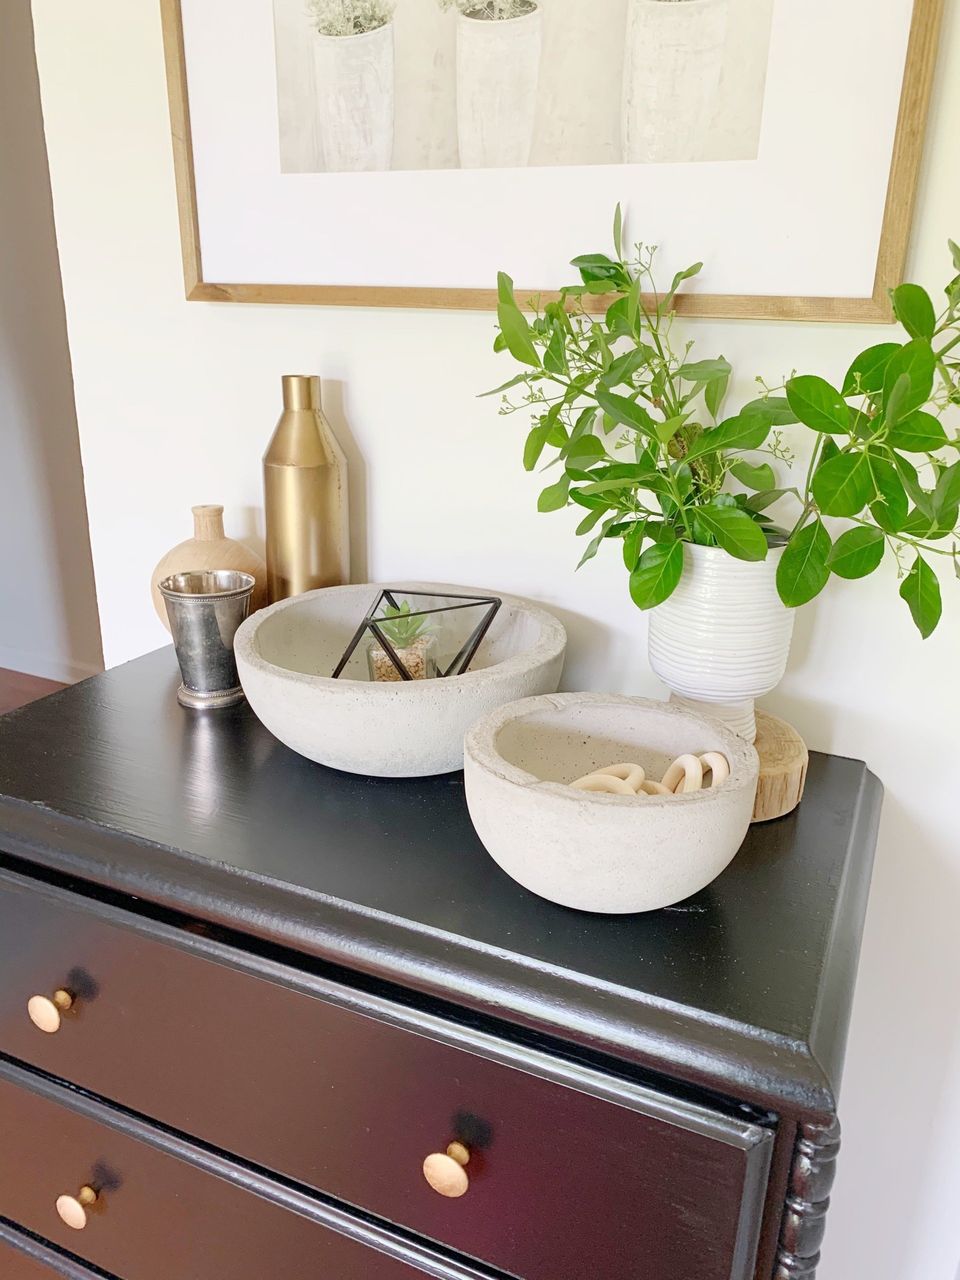
I absolutely love how these bowls turned out. I can see using them in the house for décor, a tray to corral objects, or even outside for a planter and tray underneath. They look super cute with a plant inside or filled with a collection of small items. I plan on making more with the rest of my bag of Quickrete. The best part is you can make TONS for $10!! I think it will be fun to experiment with different molds and shapes. I hope you'll give this a try!
Pin for Later!

Rifle Paper Co Wallpaper

Space Planning

Rifle Paper Co Wallpaper

Designer Drapes

Rug Roundup January 2024

Booth at Christmas Market
Grasscloth

What not to do

Romabio Velatura Mineralwash

I can't remember the first example of fluted wood furniture I saw, but it was probably either this gorgeous custom wood bathroom vanity from Chris Loves Julia , or the DIY fluted coffee table Fariha shared on Pennies for a Fortune . The custom cabinetry was done professionally using a router for each line, which isn't something I possess the skills to do. This did help inspire the colors I used in our bathroom remodel, though! I really connected to the method Fariha used to build the coffee table--wooden dowels. What a fabulous idea!