
Simple Orange Slice Holiday Wreath
February 7, 2020
Modern Holiday Wreath

I made this simple orange slice holiday wreath for around $10 and I couldn’t love it more! It only took about 10 minutes to put it all together and you can do it, too.
One of my favorite tricks for saving money on holiday decor is to use clippings from your own yard! I love snipping greenery for a wreath and just having a few stems or branches in vessels around the house. Boxwoods are a great choice, too, and last the entire holiday season.
First things first, you’ll need to make the orange slices. I had extras on hand from making garlands, but you can use them for all sorts of arrangements.
Thinly slice oranges and arrange them on a baking sheet and bake at 175 degrees for 3-4 hours until the middles are darker and dried out.
I found this gorgeous set of bells from the Christmas display at Hobby Lobby and centered the entire wreath around it. For the wreath itself, I bought an 18” steel ring from Hobby Lobby in the macrame aisle for $3.99. It was silver, so I sprayed it gold.
For the greenery, I went to my yard and took some clippings from an evergreen bush and attached them to the bottom of the ring with wire, and further secured with hot glue. I just covered the bottom half, since I wanted to keep the top open so you could see the simple gold ring.
Once the greenery was attached, I scattered a few orange slices around the leaves and secured with hot glue.
To hang, I just hung the wreath first, then hung the bells on top. I love my simple orange slice holiday wreath so much! I really like using unexpected color combinations for holiday decor and this one doubles for fall and Christmas so it’s a win-win!


Pin for Later!


Rifle Paper Co Wallpaper
Space Planning
Rifle Paper Co Wallpaper

Designer Drapes
Rug Roundup January 2024
Booth at Christmas Market
Grasscloth
What not to do
Romabio Velatura Mineralwash
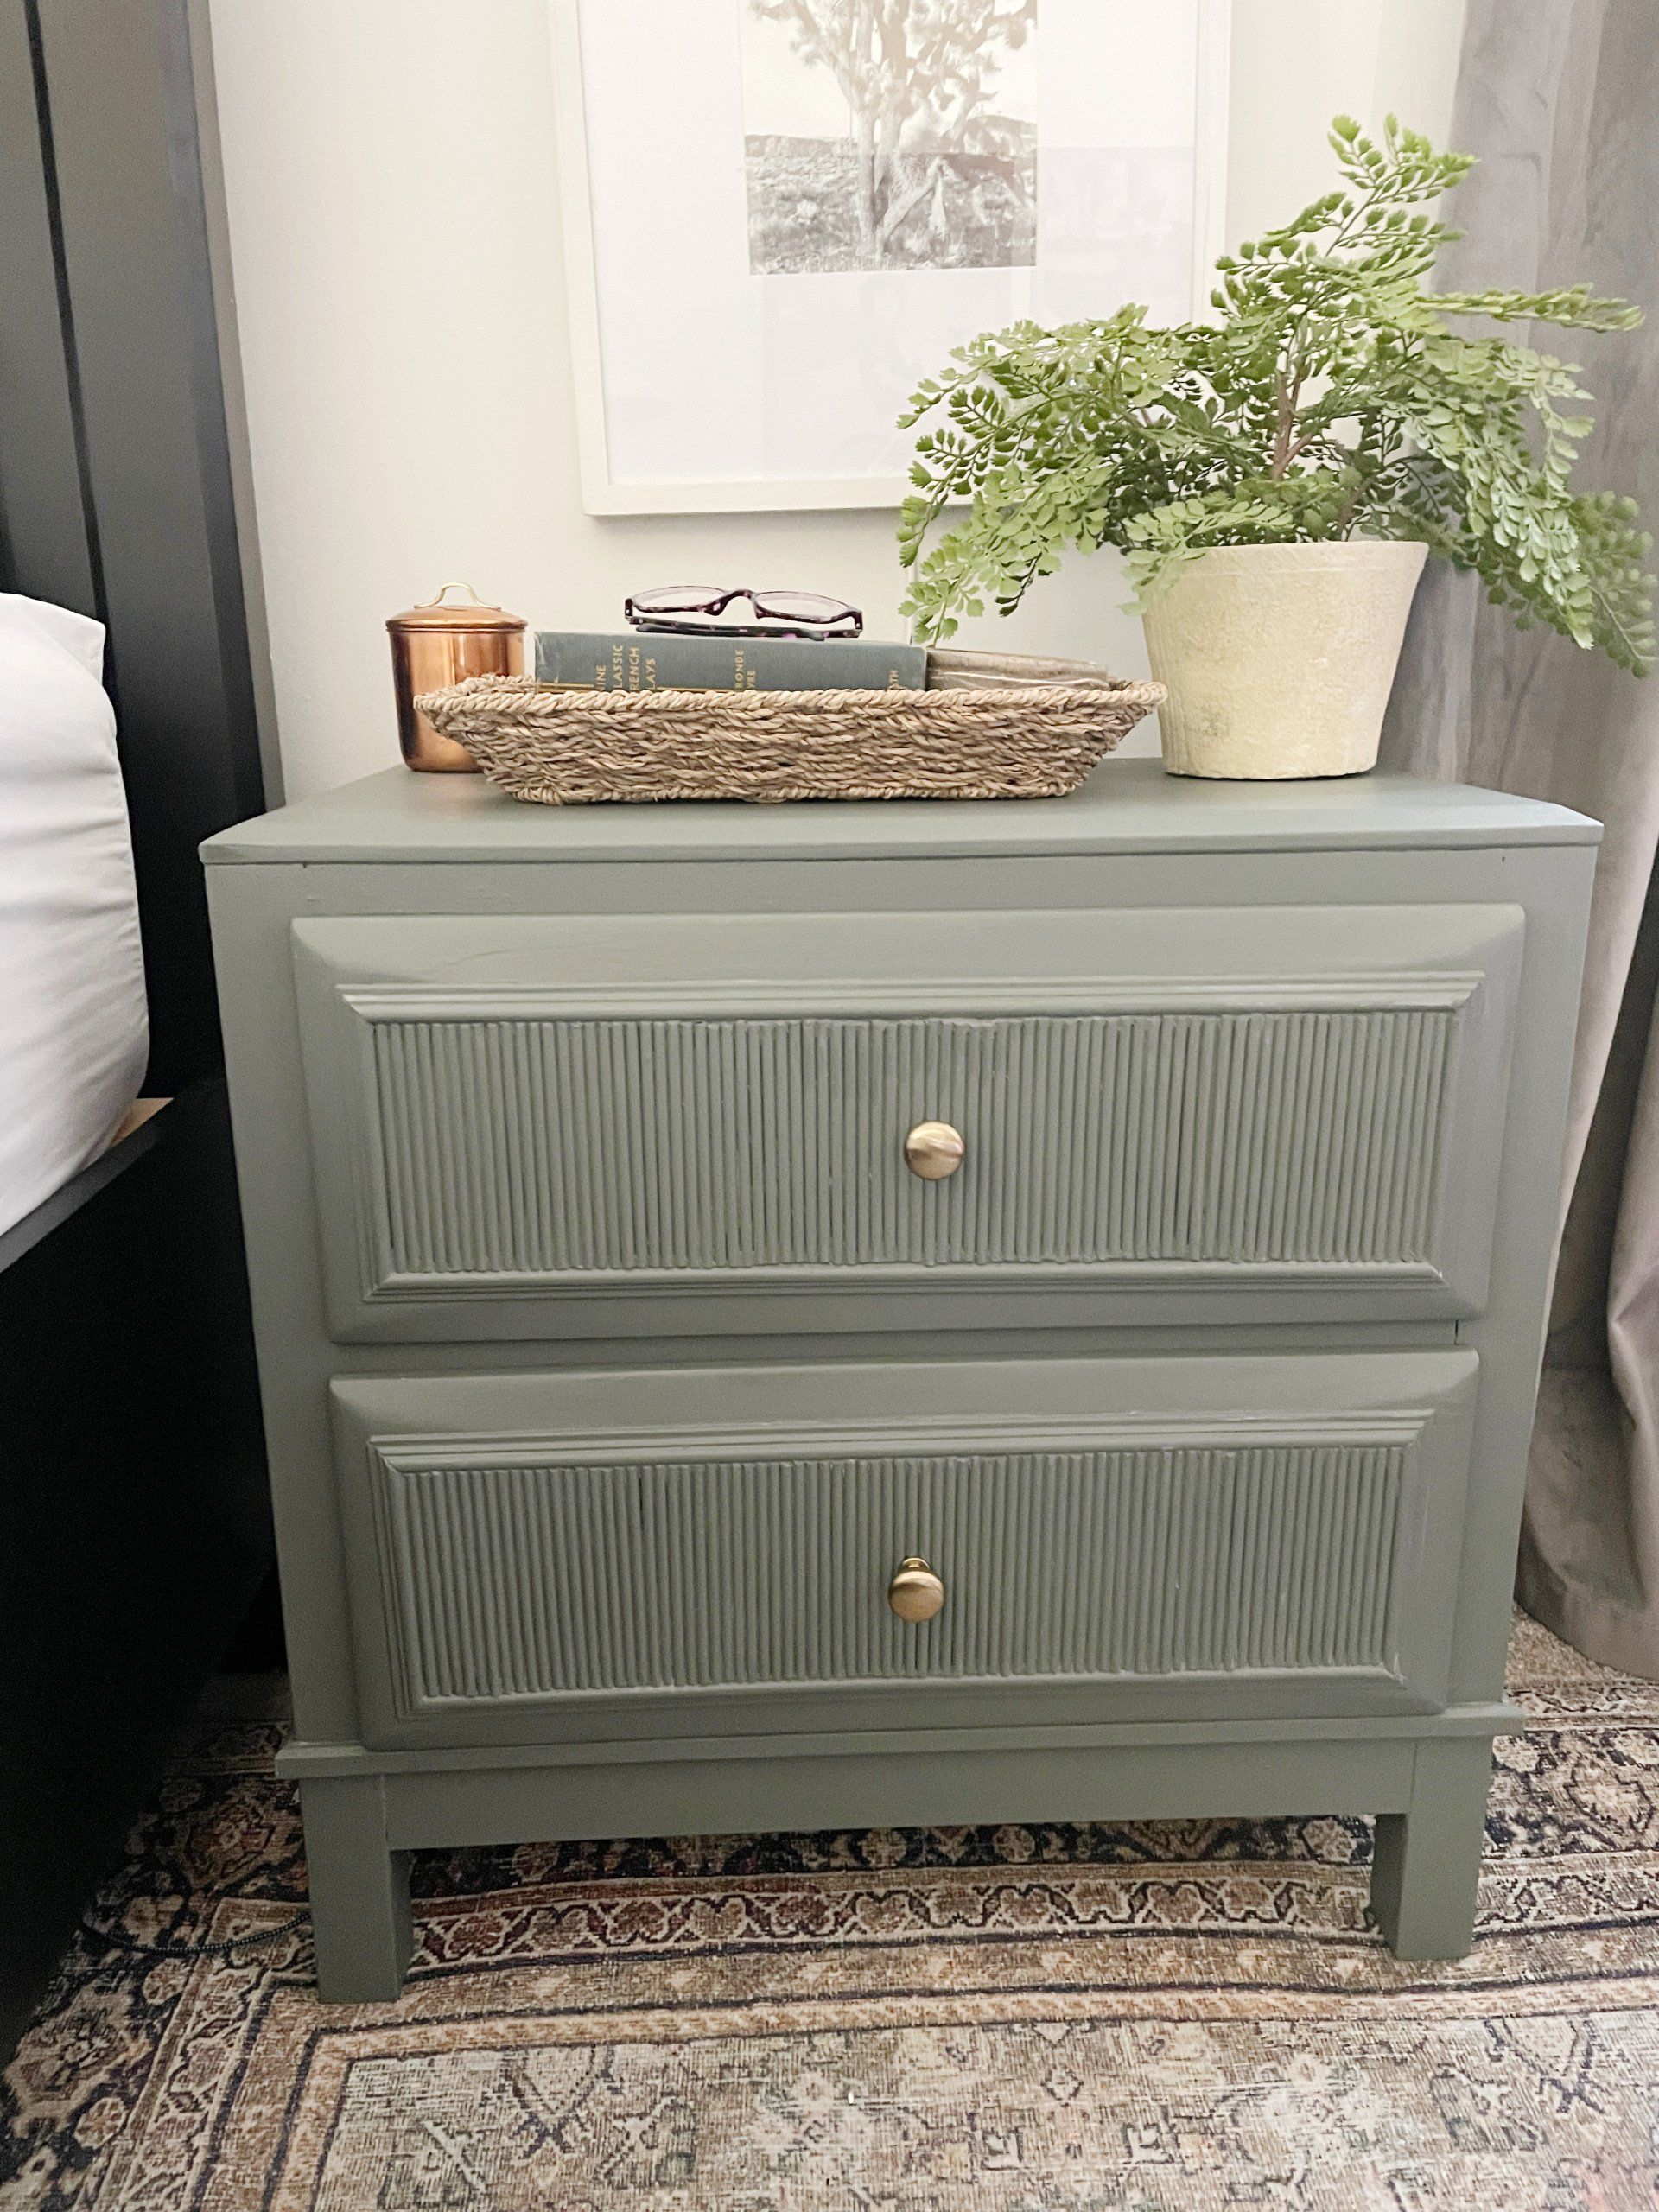
I can't remember the first example of fluted wood furniture I saw, but it was probably either this gorgeous custom wood bathroom vanity from Chris Loves Julia , or the DIY fluted coffee table Fariha shared on Pennies for a Fortune . The custom cabinetry was done professionally using a router for each line, which isn't something I possess the skills to do. This did help inspire the colors I used in our bathroom remodel, though! I really connected to the method Fariha used to build the coffee table--wooden dowels. What a fabulous idea!