
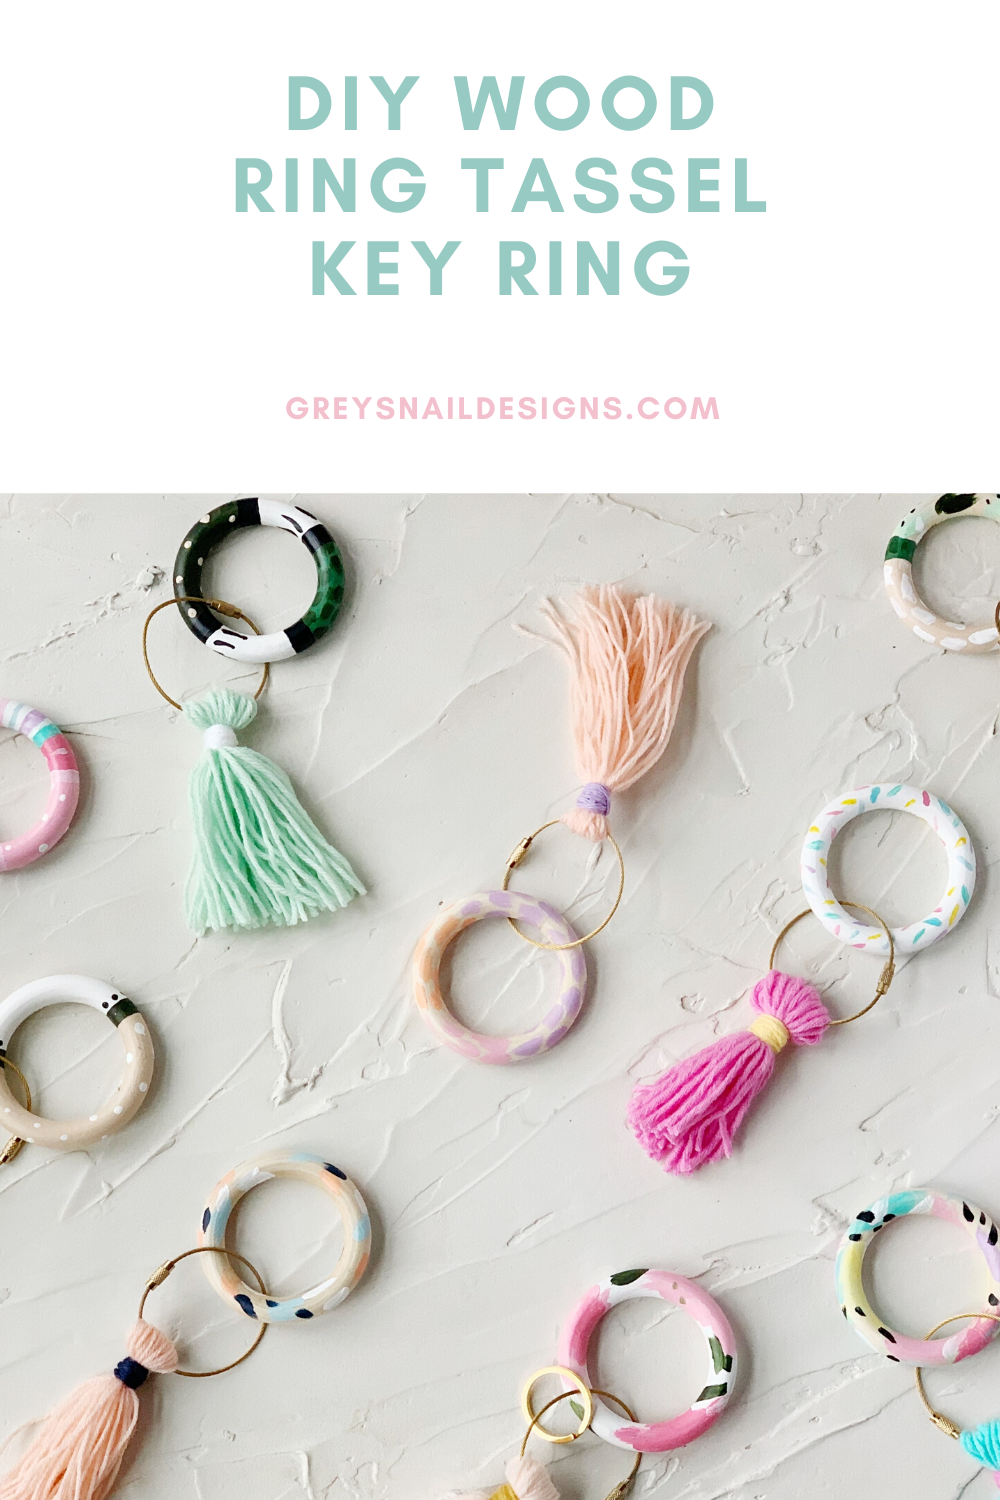
DIY Wood Tassel Key Ring
April 25, 2020
Inspiration
Sitting at home during the COVID-19 stay-at-home orders had me scouring the Internet for things OTHER than Coronavirus. At least after the first two weeks, when I consumed all things related to Corona. After that, I needed a mental brake.
I've followed Jill Makes
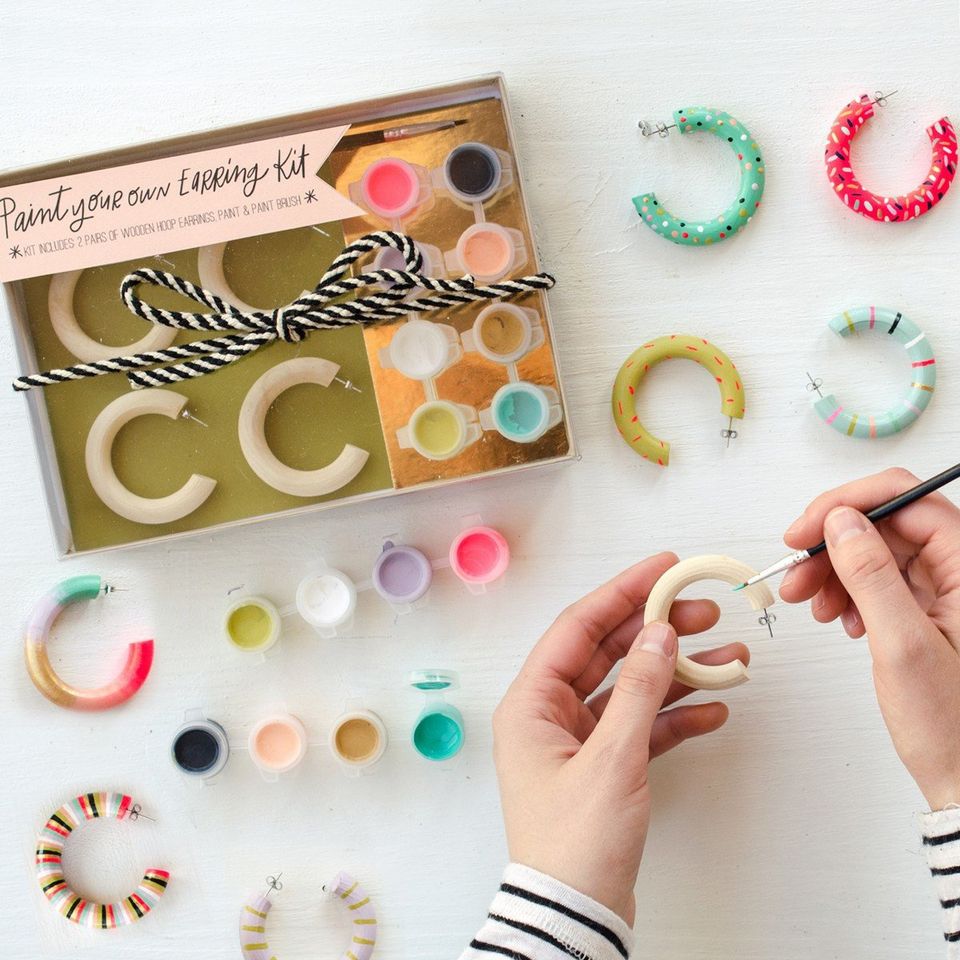
on Etsy for a long time, admiring her brightly-colored jewelry, but I saw she was offering kits to make your own creations--how cool! She has a paint-your-own earring and paint-your-own tasseled key chain kit. I was planning to link the adorable kits, but it looks like her shop is taking a break--probably to catch up with all the orders!

Process
I had so many ideas for the wood rings that I ordered some of my own on Amazon. Along with some key rings. The first set didn't work because they were too small, so I did a little research and found some that were a screw-on cord, so the size of the ring wouldn't be an issue.
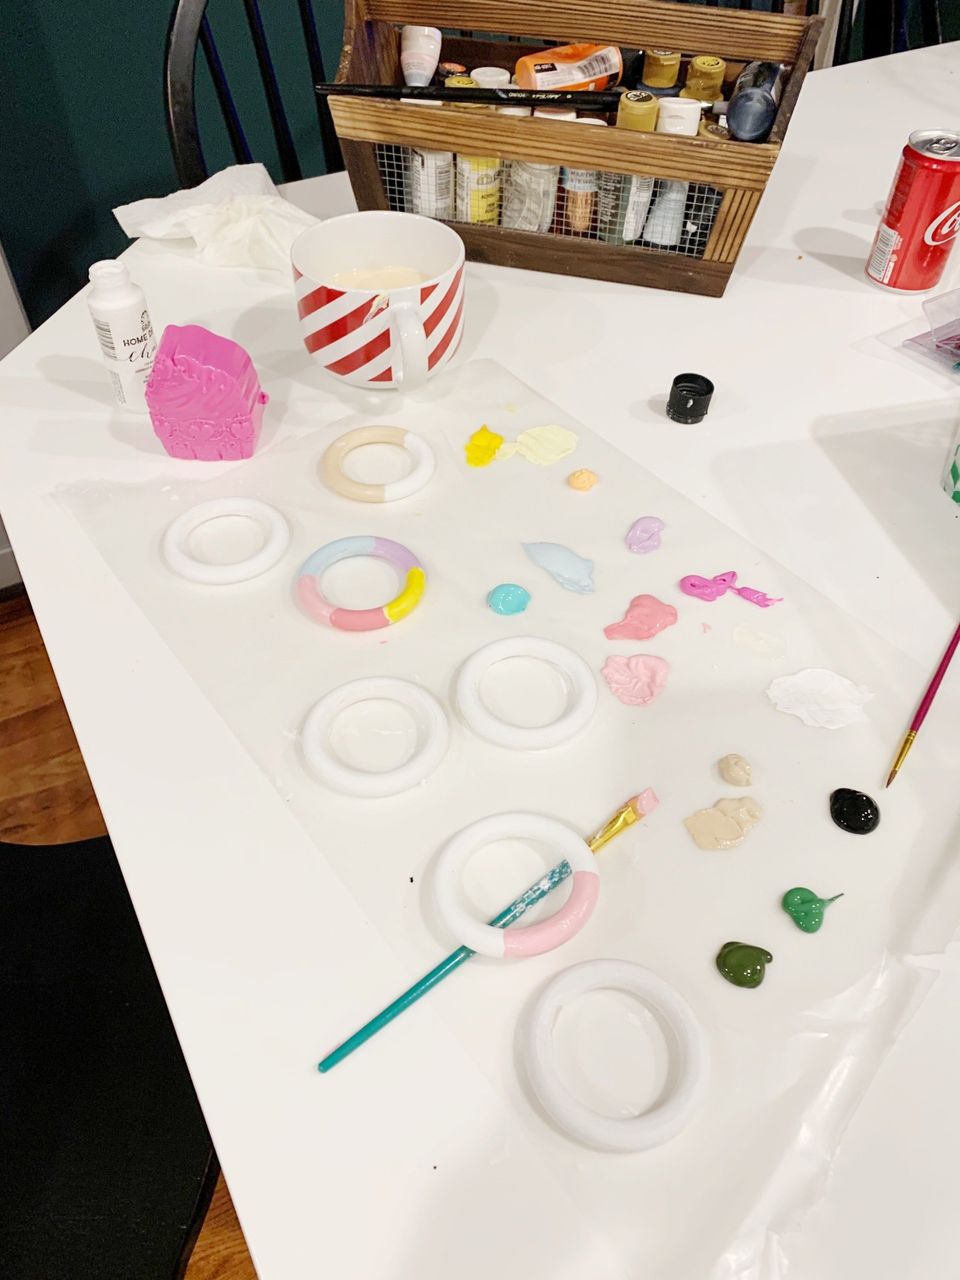
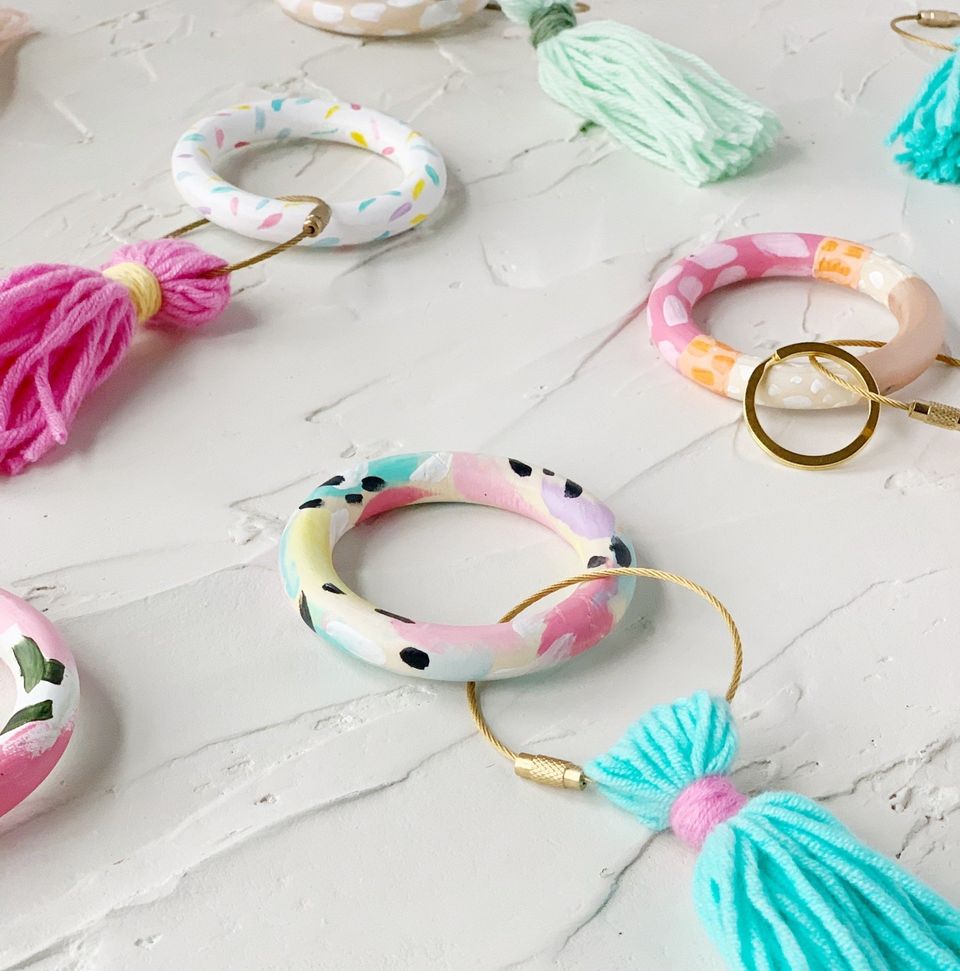
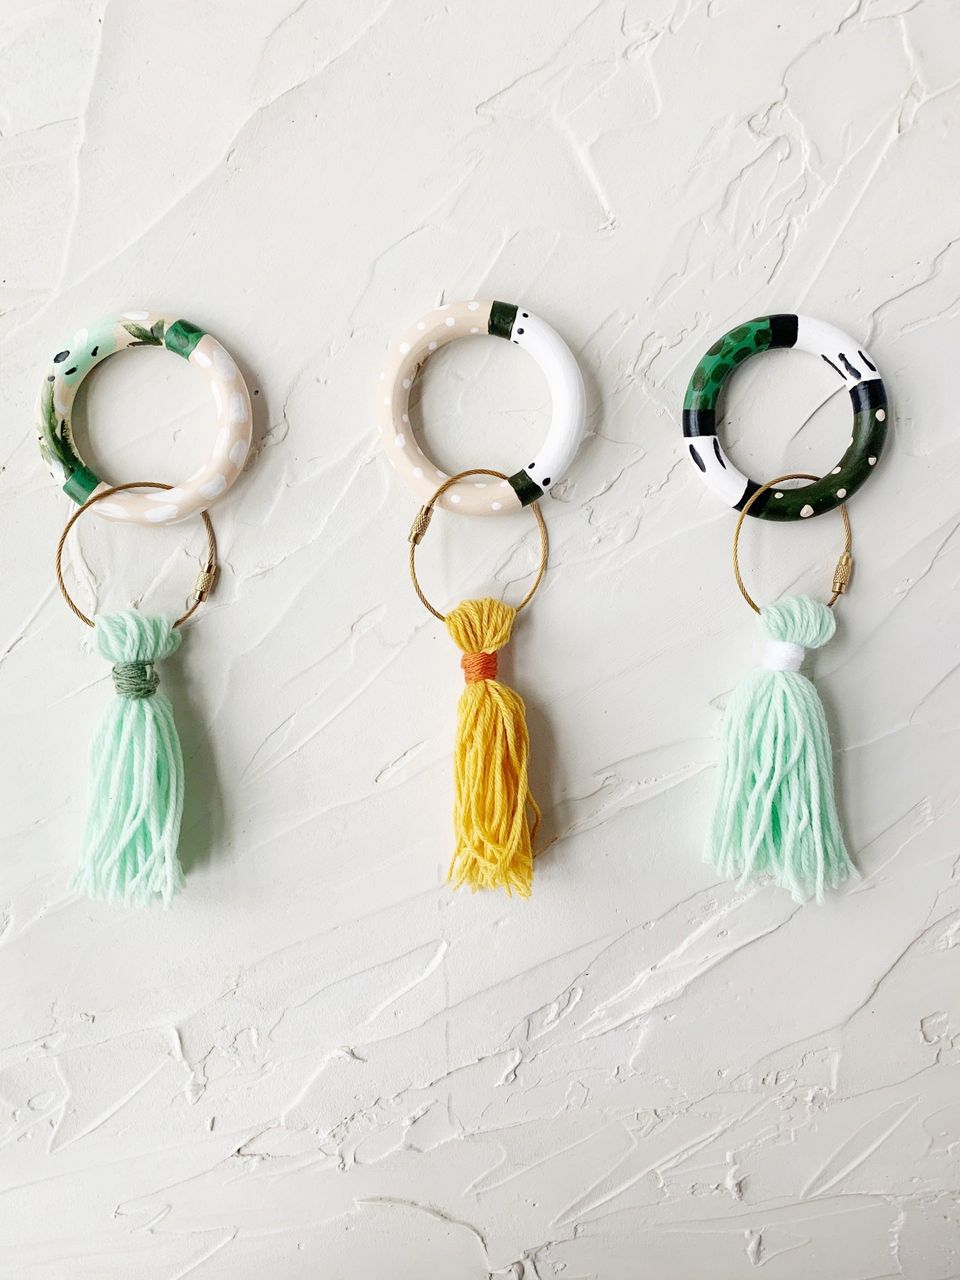
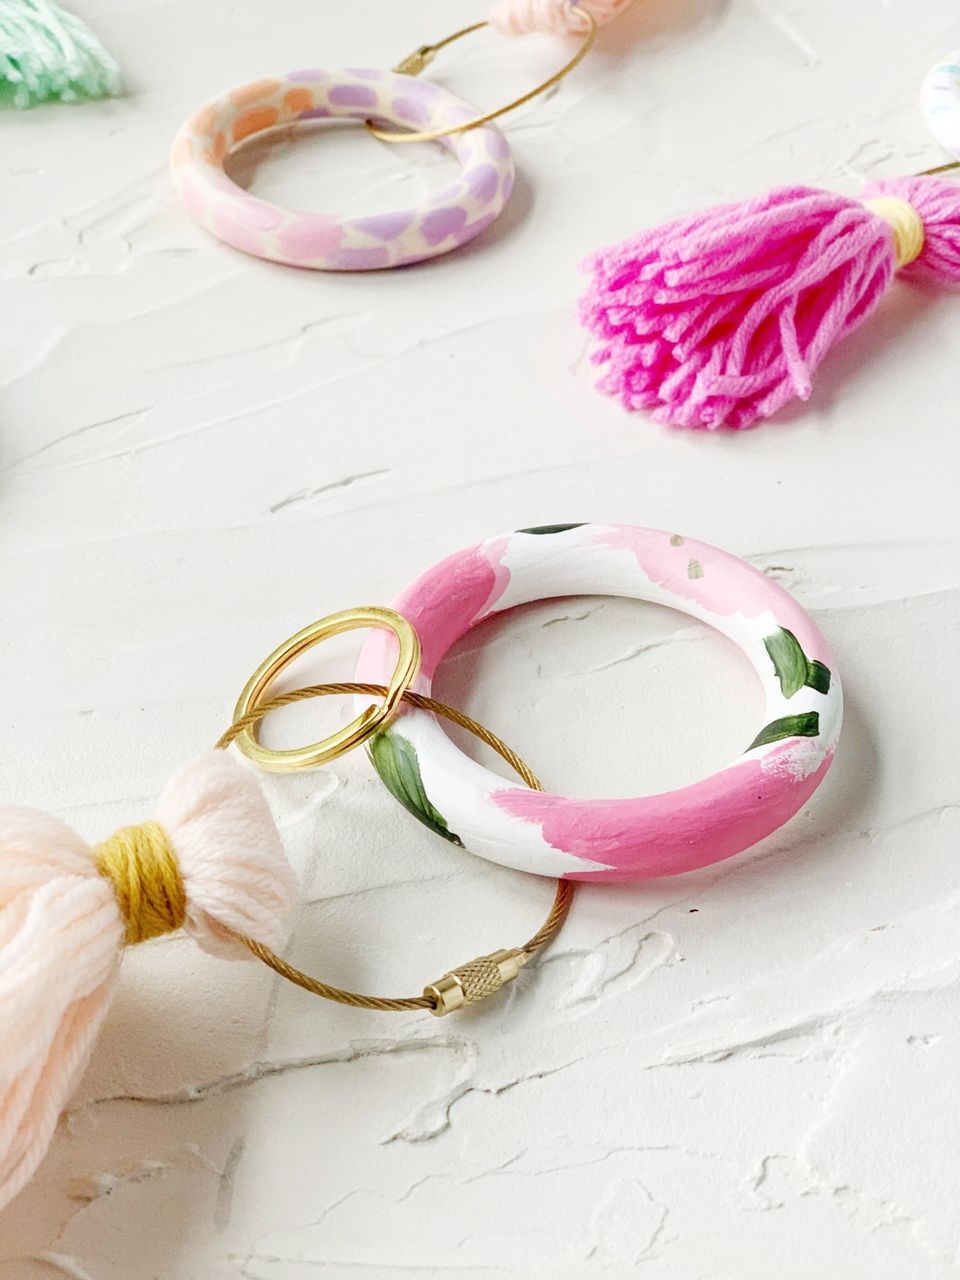
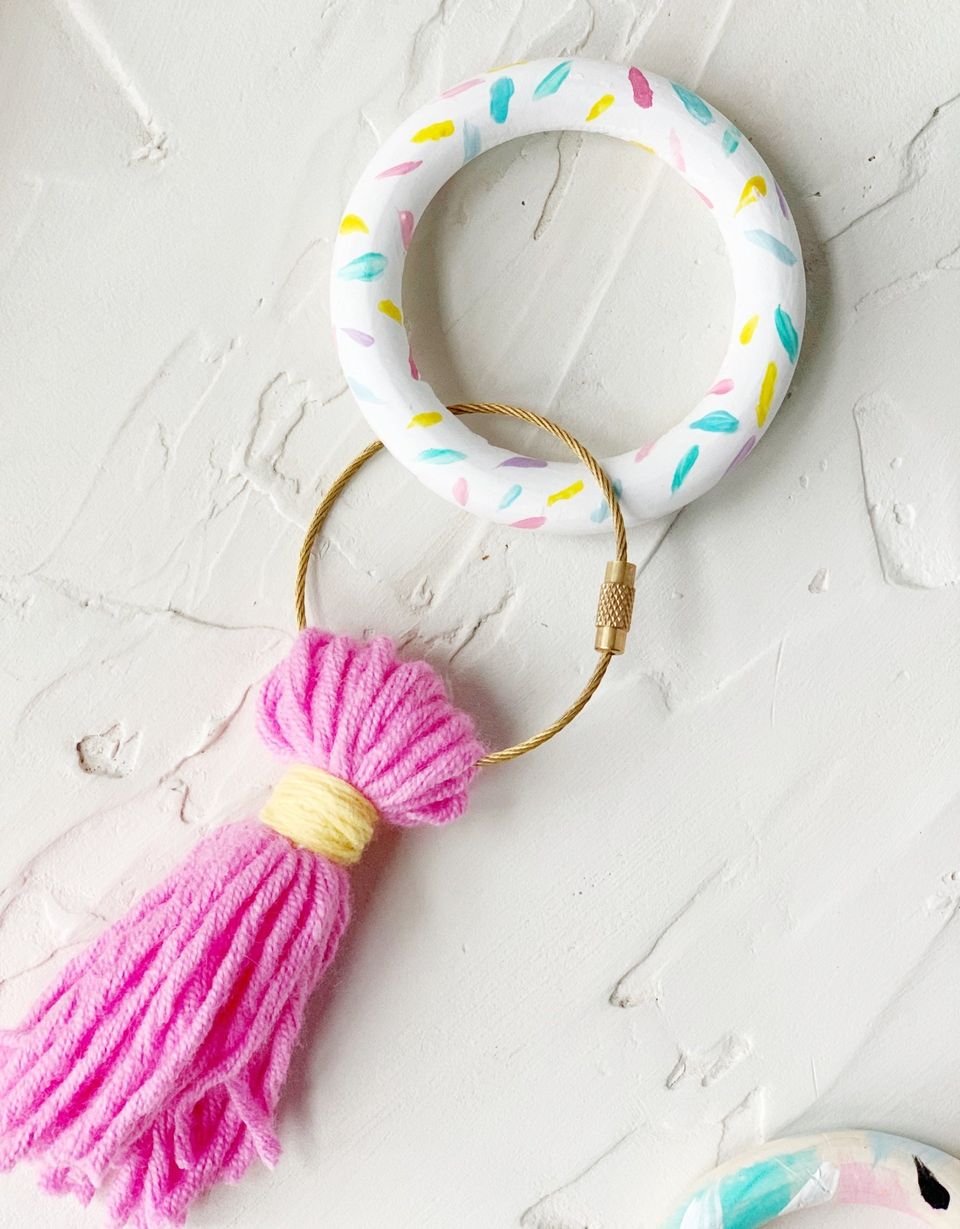
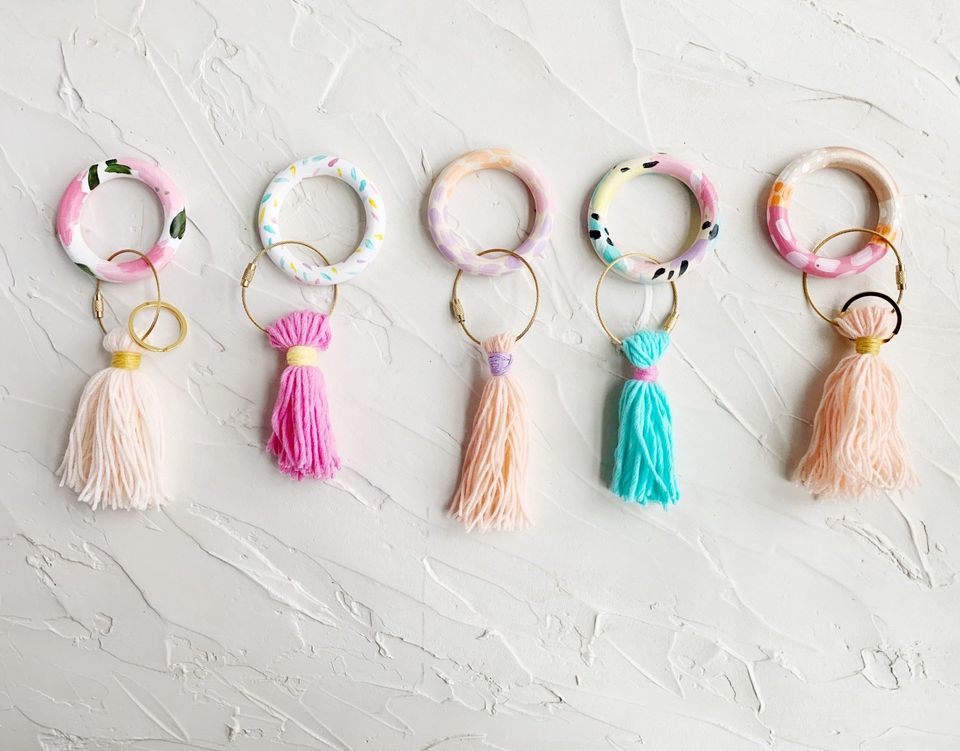
I put out some wax paper on my counter and got to work painting. I painted some solid white to start and others, I painted the pattern directly on the wood. I really like leaving some of the light wood showing through! I mostly did a mix of abstract styles and patterns with different color combinations. I just love projects like this, because I LOVE putting different colors together. It's one of my favorite things about my job designing wedding invitations.

Drying
This got a little tricky, since I tried to dry them flat first and I encountered a lot of smudges. I discovered it was better to hang them to dry. You can see the advance contraption I used above.
Tassels
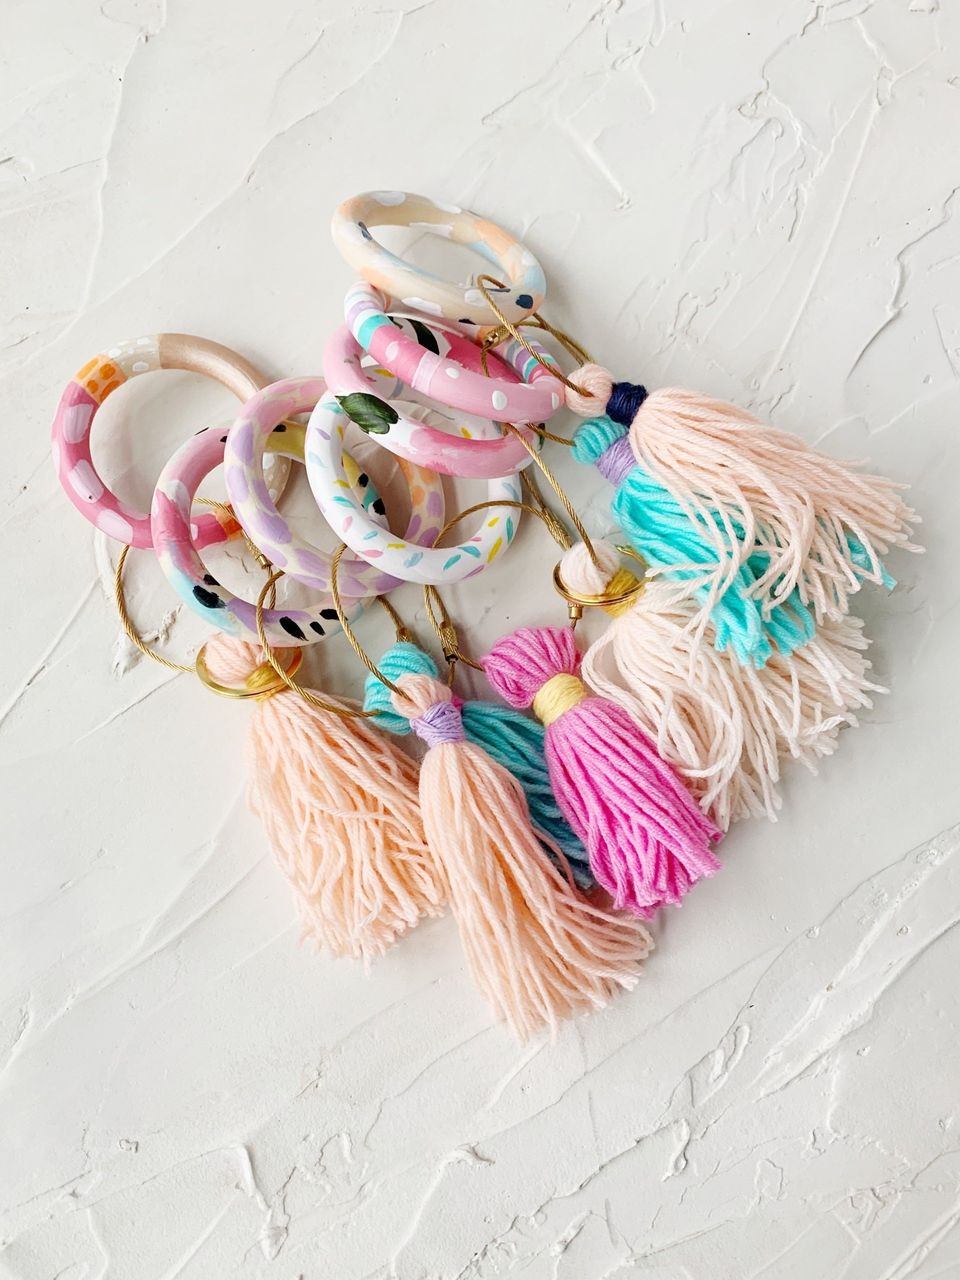
I don't have a tutorial or in-process shots of making the tassels, but there are tons of helpful tutorials on Pinterest. I used yarn I already had to make mine and mixed up lots of fun colors. I attached mine directly to my screw-in key chain.
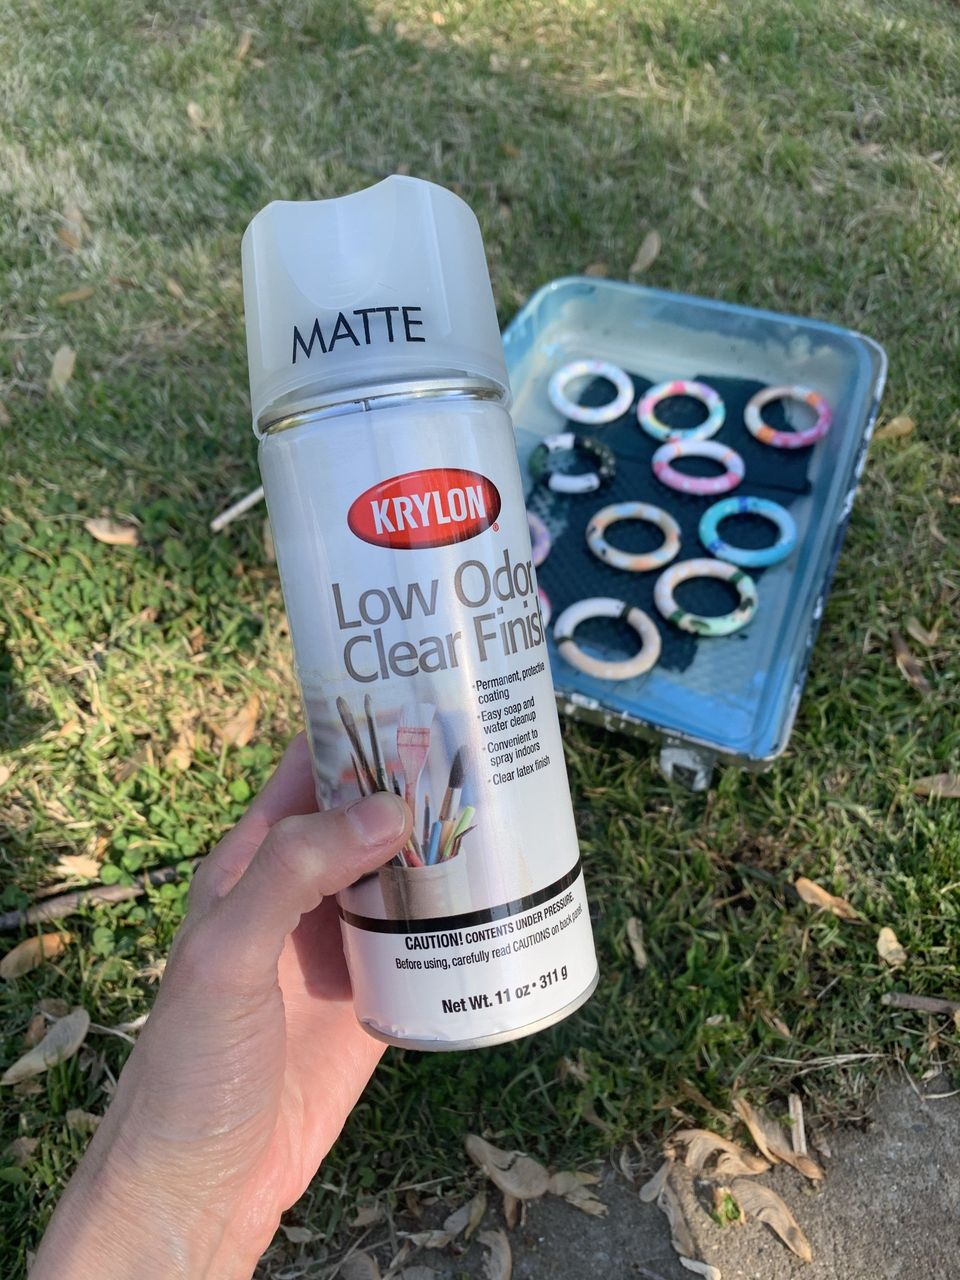
Sealing
Once the paint was dry, I took them outside and sprayed them with my favorite varnish. Each side got a couple good coats to make them nice and smooth and add to their durability. This was my first time using the low odor can and I loved it!
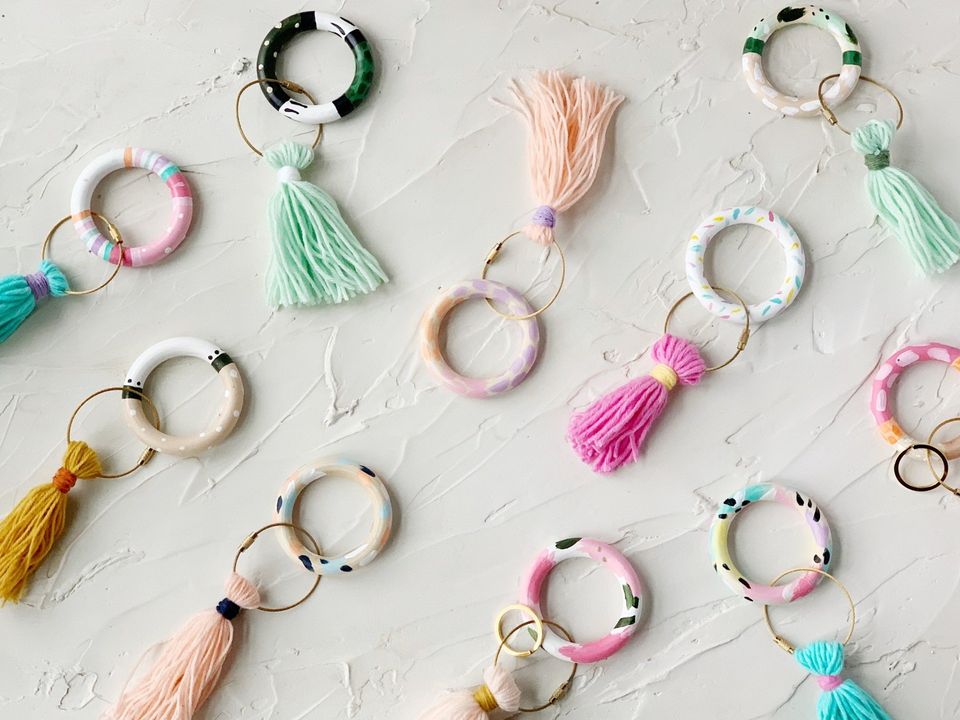
The finished product
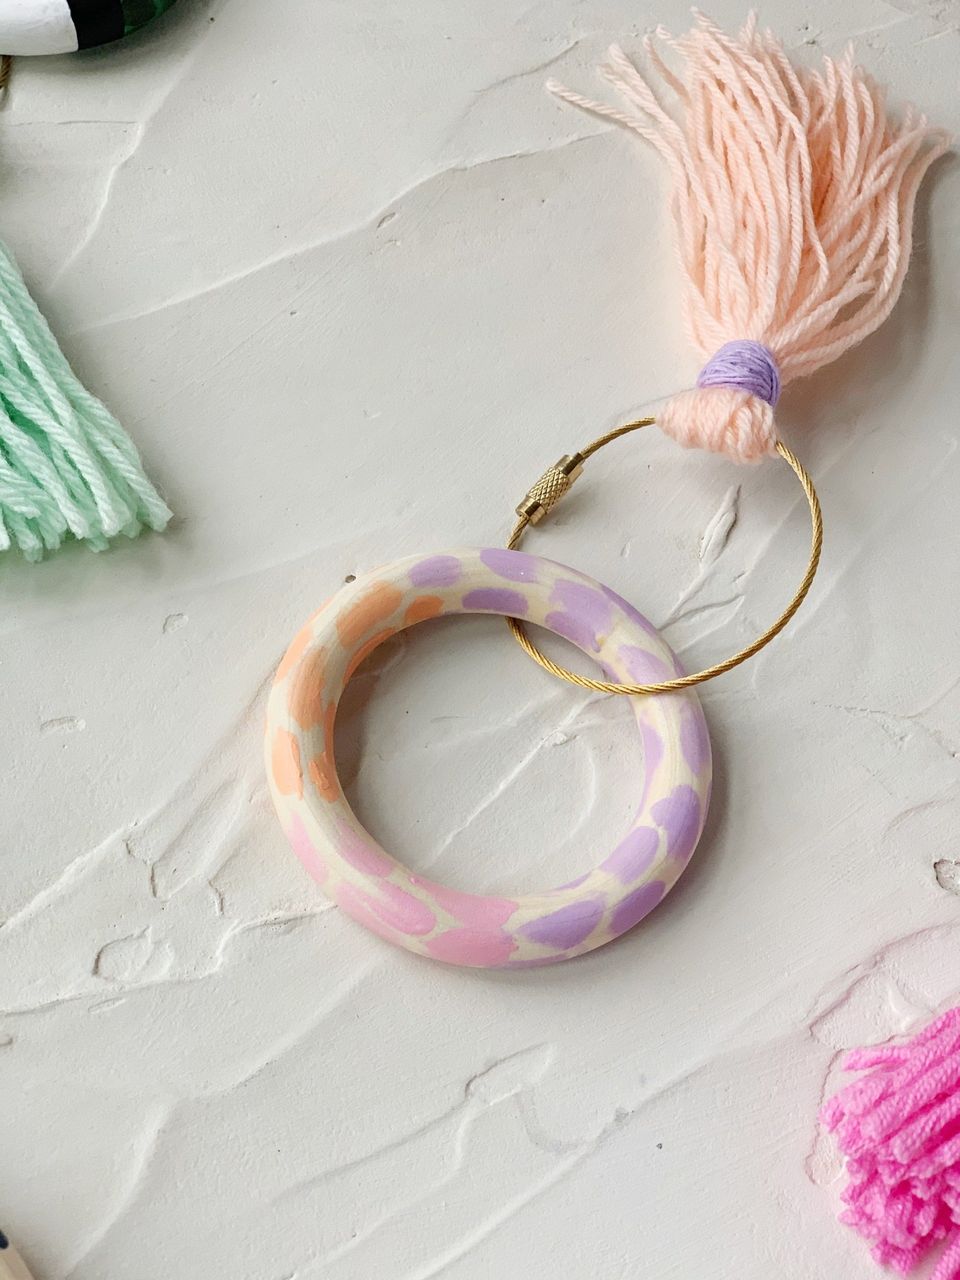
Once everything was dry, I started to put the key rings with the tassels I made and boy, are they cute! It's fun to make these for yourself, or even gifts for your friends and family. They are very inexpensive and easy to make and the sky is the limit for design!
Pin for Later!

Rifle Paper Co Wallpaper

Space Planning

Rifle Paper Co Wallpaper

Designer Drapes

Rug Roundup January 2024

Booth at Christmas Market
Grasscloth

What not to do

Romabio Velatura Mineralwash

I can't remember the first example of fluted wood furniture I saw, but it was probably either this gorgeous custom wood bathroom vanity from Chris Loves Julia , or the DIY fluted coffee table Fariha shared on Pennies for a Fortune . The custom cabinetry was done professionally using a router for each line, which isn't something I possess the skills to do. This did help inspire the colors I used in our bathroom remodel, though! I really connected to the method Fariha used to build the coffee table--wooden dowels. What a fabulous idea!