
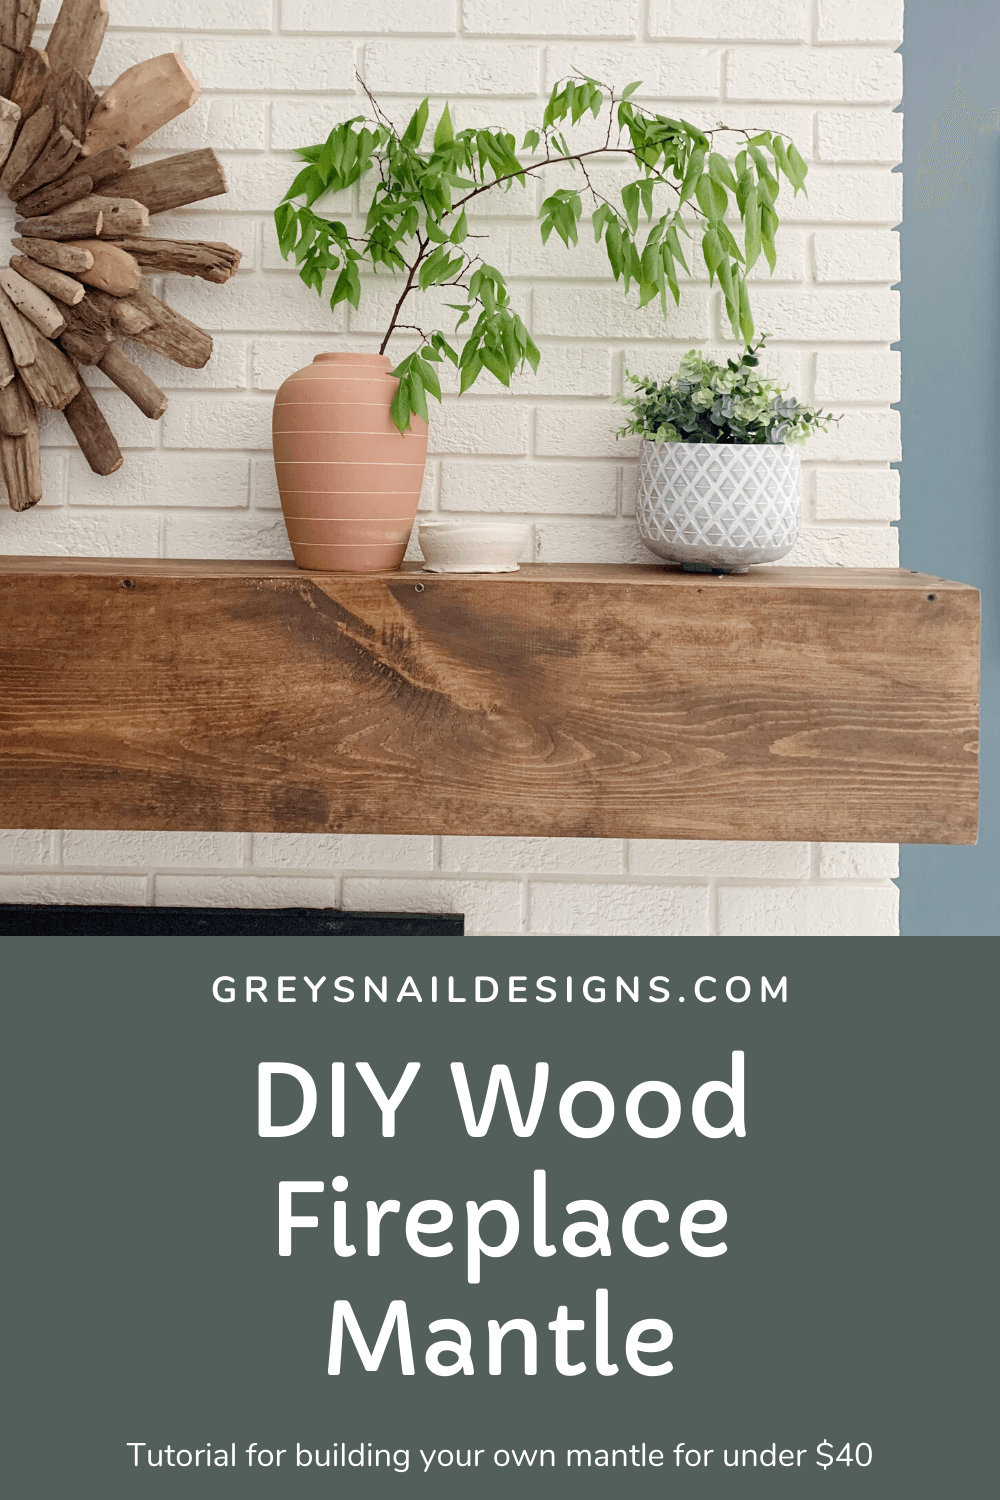
DIY Rustic Fireplace Mantle
May 9, 2020
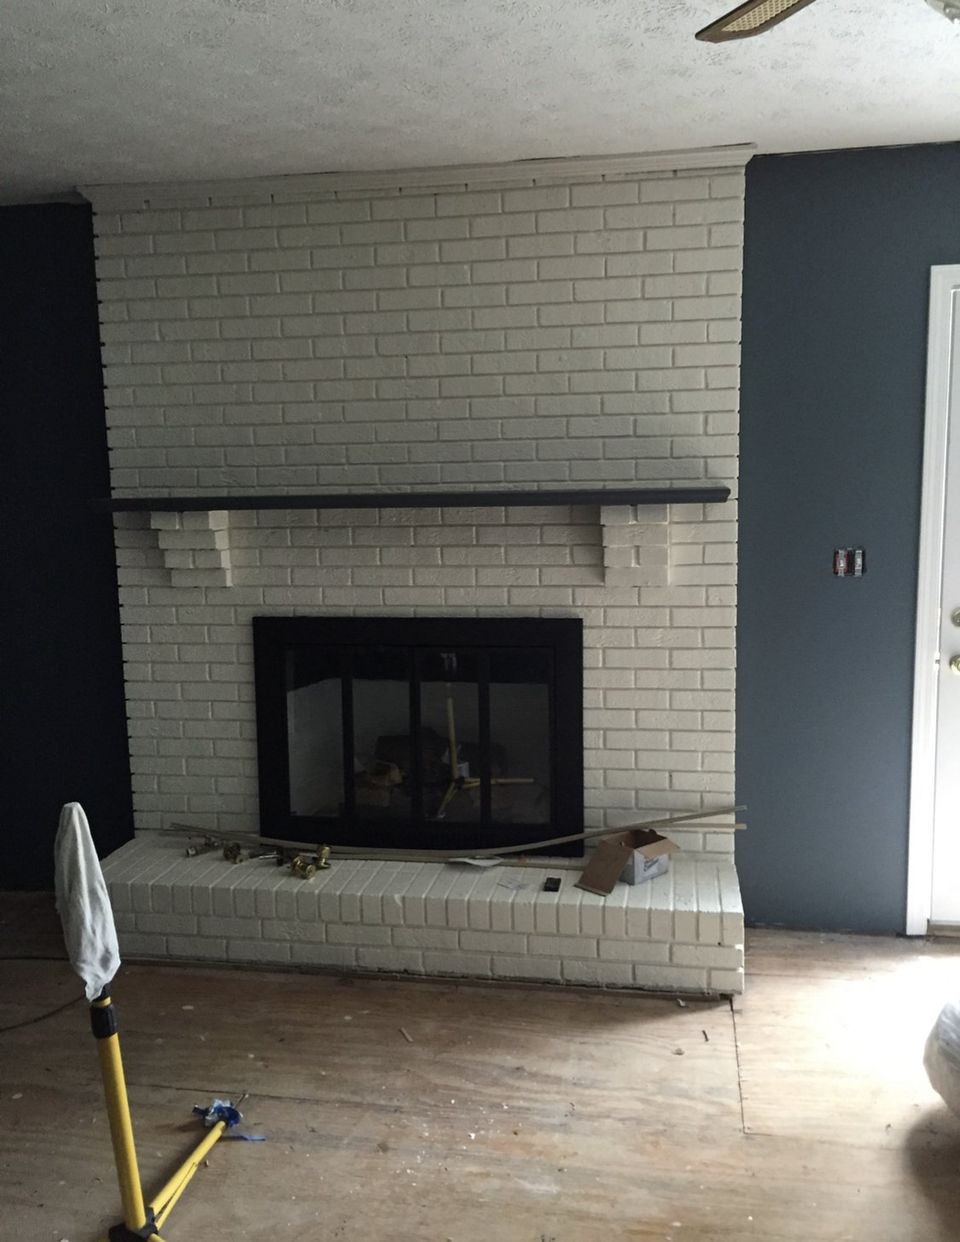
The Old Mantle
We lived with the original mantle for years. We painted the brick fireplace SW Dover White (a great creamy white) and spray painted the existing brass mantle black with high-heat spray paint. That's one of my favorite easy makeover tips that literally anyone can do. It's amazing how it freshens up the entire fireplace area.
I even traded out the old mantle for a chunky 2" board I stained grey, but I was never overly impressed with it. I didn't like that the focus of our fireplace were these huge brick stairstep supports. I also knew there was no easy way to remove them. Basically, the existing mantle sets on top of them and is secured by two screws in the underside of the mantle that fit into a hole in the top brick supports on either side.
I've had several people express interest in a tutorial on this, so here's my attempt. I really didn't intend to do one, since I don't feel like an expert in this at all, but I will share what worked for me with my very limited set of basic tools.
Constructing the New Mantle Box
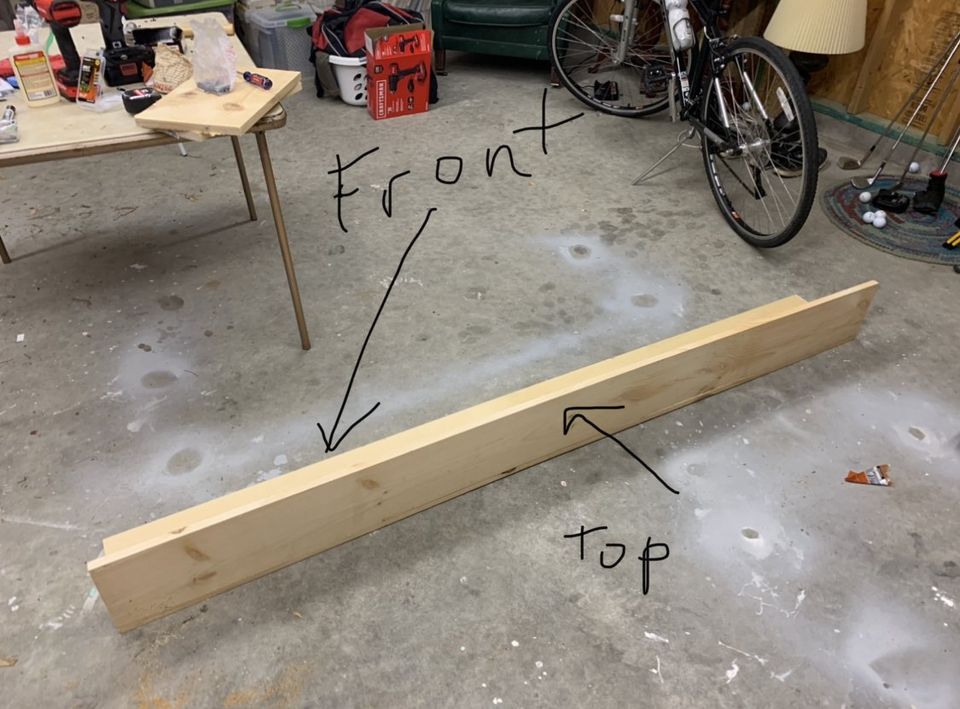
You are basically building a box for your new mantle. I used a hand saw, drill, electric sander, 2" finishing nails, 2" wood screws, 1/2" wood screws, and wood glue. Oh, and stain.
You'll first need to determine the length of your mantle. I wanted it to go the length of our brick surround, which was under 8'. You could also take it out past the bricks--that can look good, too. I purchased the following boards from Lowe's for around $30.00:
2 1x8x8" white boards
1 1x10x8" white board
You'll need to cut the two boards the correct length, which is the length you want your mantle. I used a hand saw.
I wanted the mantle to be as wide as possible in the front to cover the existing brick mantle supports, so I went with a 10" wide board. (The exact measurements of all these are like 1/4" less, so keep that in mind).
You might be able to get away with an 8" wide board, if you don't want it as wide.
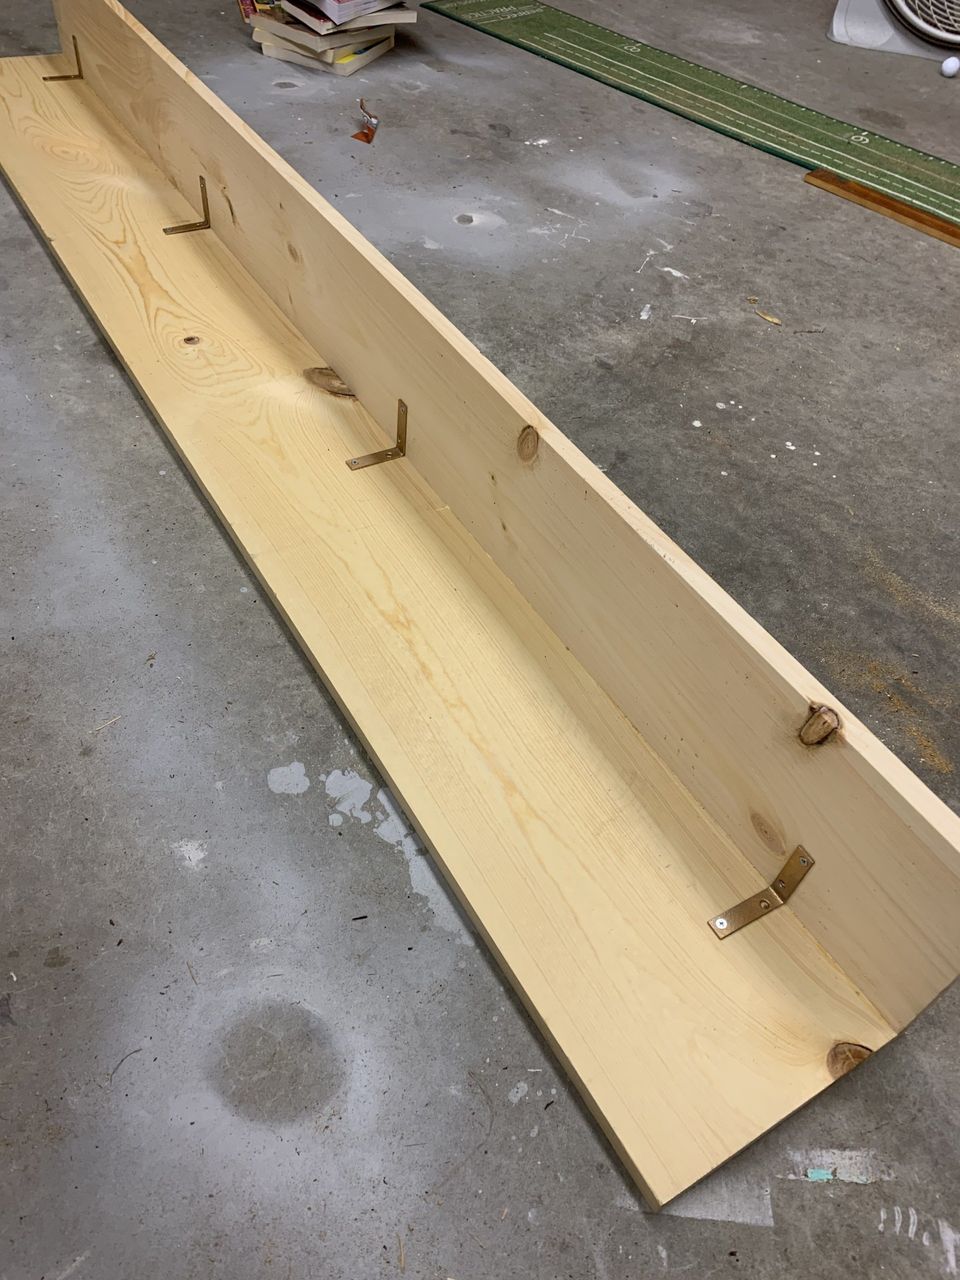
I used the 1x8x8" board for the top of my mantle (what everything is setting on). So I didn't have a seam where the boards join across the entire front of the mantle, I constructed it where the 1x10x8 was the front portion of the mantle. To do this, you'll been two people (or a huge set of clamps). I bought a set of clamps online at Lowe's thinking I could do it myself with them, but when I got them, they were tiny little elf clamps. #onlineshoppingproblems
Put wood glue along the front edge of the 1x8x8 and position it where it comes to a 90-degree angle with the 1x10x8. I used two stacks of books, so I could set the 1x10x8 on its side and stacked books so the 1x8x8 would be at the correct height for fastening. Press the boards against each other and have the other person hold everything into place so you can put some nails through the front of the 1x10x8 into the side of the 1x8x8. Carefully move down the entire length of the board, putting in several nails across the front, so it is not moving.
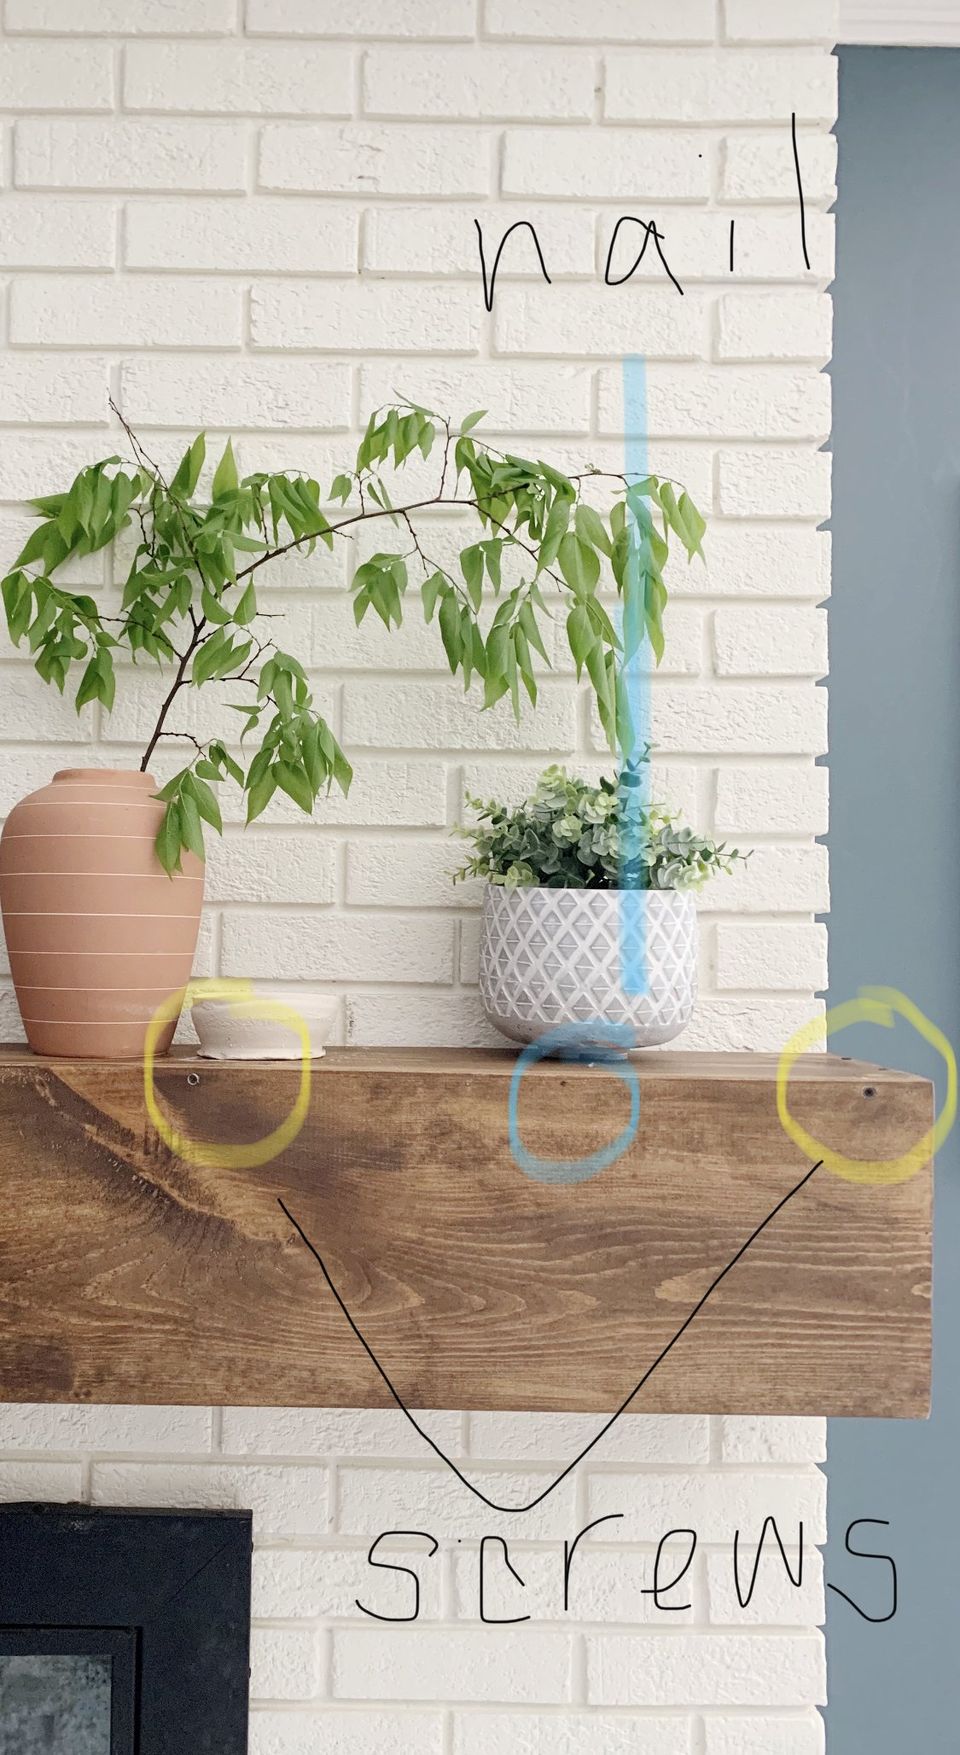
Once you have the basic L-shaped structure, you can start adding stability with screws. I used black 2" screws. I drilled 4-5 pilot holes across the top edge of the 1x10x8 (between the nails), then screwed in the 2" screws.
I went ahead and added some corner braces on the back, because I had them, but you could probably skip this step. That's where I used 1/2" screws to fasten them. Let everything dry overnight and be sure to wipe any excess glue off the front of the mantle.
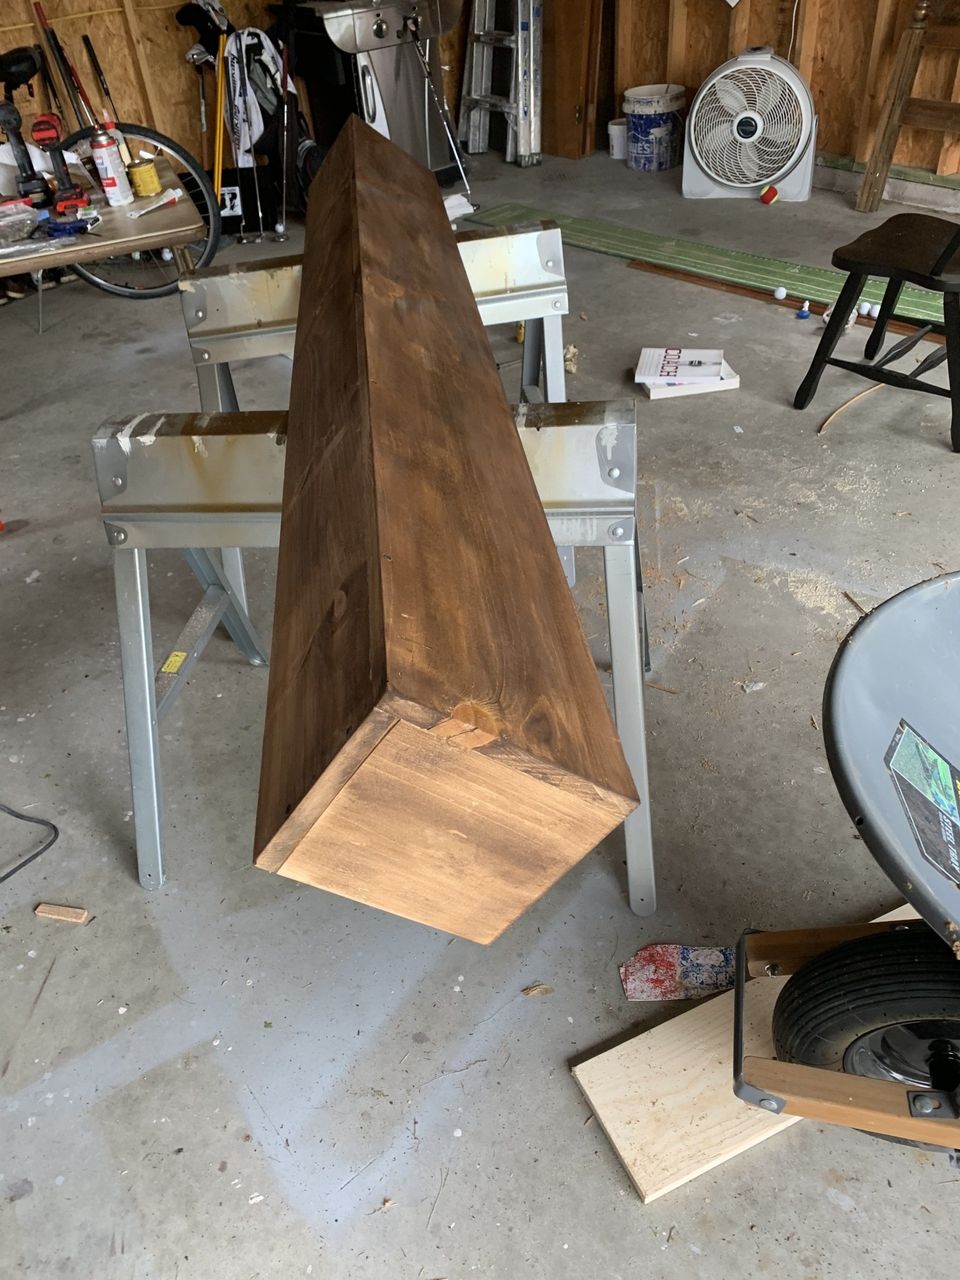
Adding the Sides
This is what that extra 1x8x8 is for. Now that the glue is nice and secure, it's time to add the sides to your mantle box. Since it may not be totally square (90-degrees), you may want to do what I did and trace the angle of the L-shape onto your board, so you can cut it more closely to what the shape actually is. It doesn't have to be perfect, but you want to get it as close as possible.
Once I cut my board to the correct length and angle to fit into that little end, I refit it to see what needed adjusted. If I needed to take off a little more, I just used my electric sander to sand it down so I could get a better fit. This worked nicely for me. Again, I was just using this tool to make it work. This is one of the reasons I feel like I "hacked" this project. :)
I did the same thing for the other side. I added wood glue to the two sides connected to the L-shape on the mantle and secured it with finishing nails, the screws through the top of the mantle (on the 1x8x8).
I also used my sander to sand down the sides where everything fits together. I wanted it to be as smooth and even as possible.
At this point, you could add wood veneer, attach it and sand it down if you don't want to have that side seam, but it's expensive and the seam turned out pretty smooth, so I'm not worrying about it.
Oh, and if your mantle goes all the way to the wall or shelving on the edges, you may not even need sides!
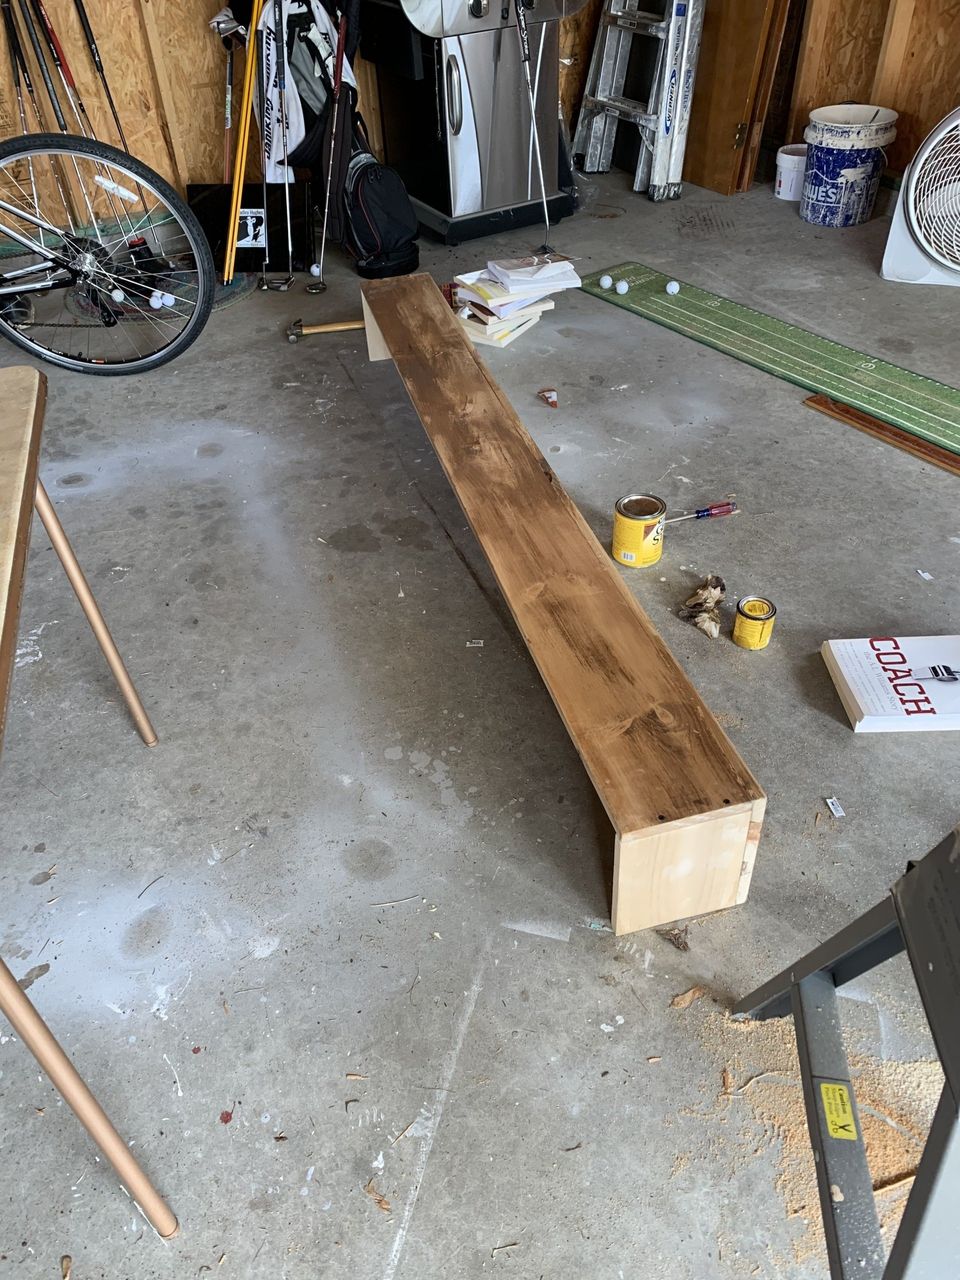
Staining
I used a mix of Minwax stain in Chestnut and Minwax Gel Stain in Walnut for the mantle. I sanded it between coats to get it as smooth as possible. I originally intended to go lighter, but ended up liking it darker and it helped the screws disappear.
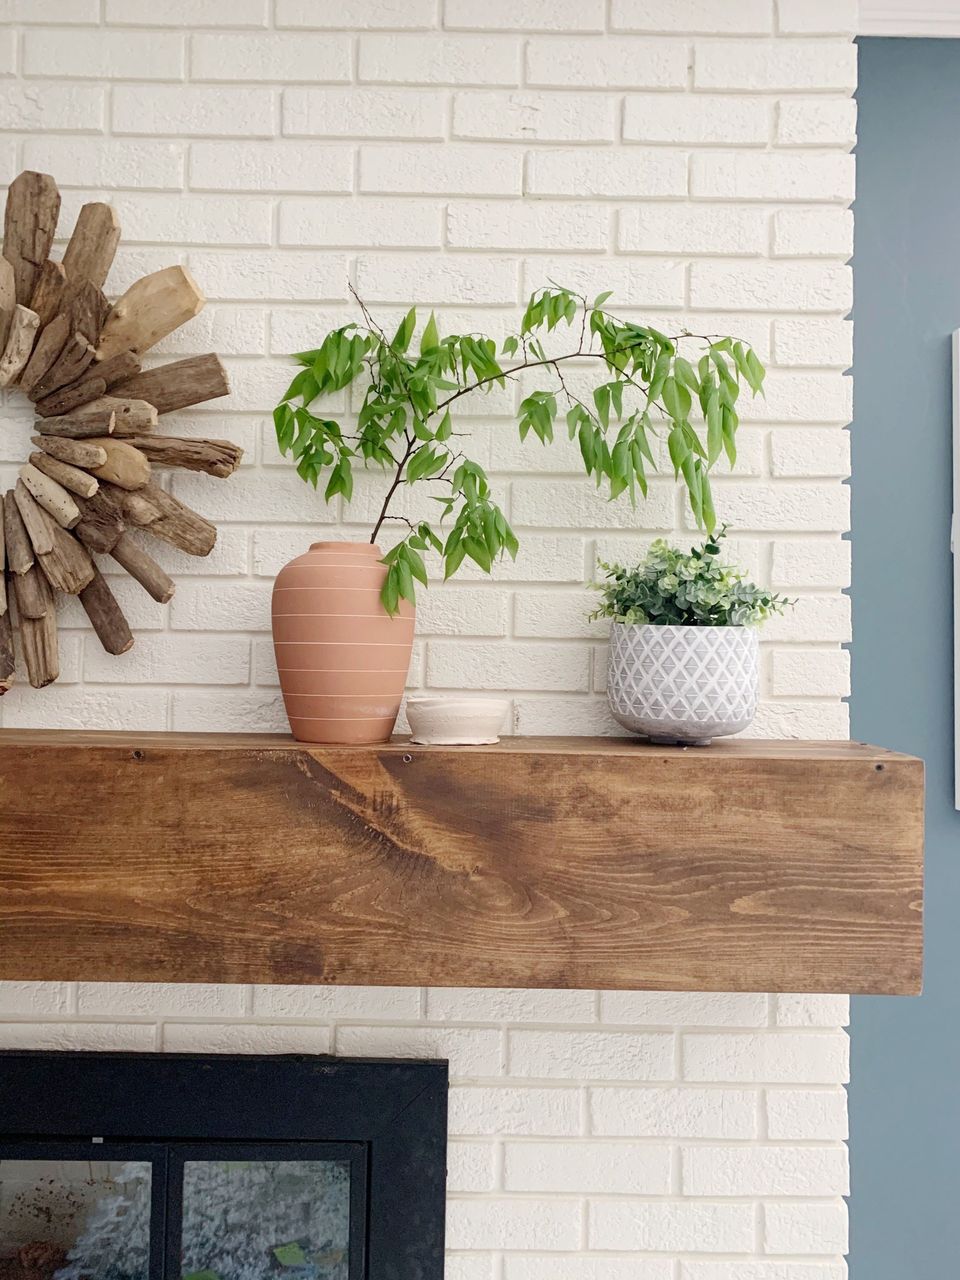
Attaching it to the Fireplace
Our mantle just sets directly on the existing brick supports. It is pretty secure like that, but to be sure it doesn't budge, we put one screw on each side that fits into a hole in the top of the brick supports.
If you don't have this exact structure, you may need to screw a 2x4 into the brick with masonry screws, so you have something to fasten your mantle onto. There are tons of great tutorials on this from people with much more expertise than me. Check Pinterest and search "diy mantle box" or "diy wood mantle".
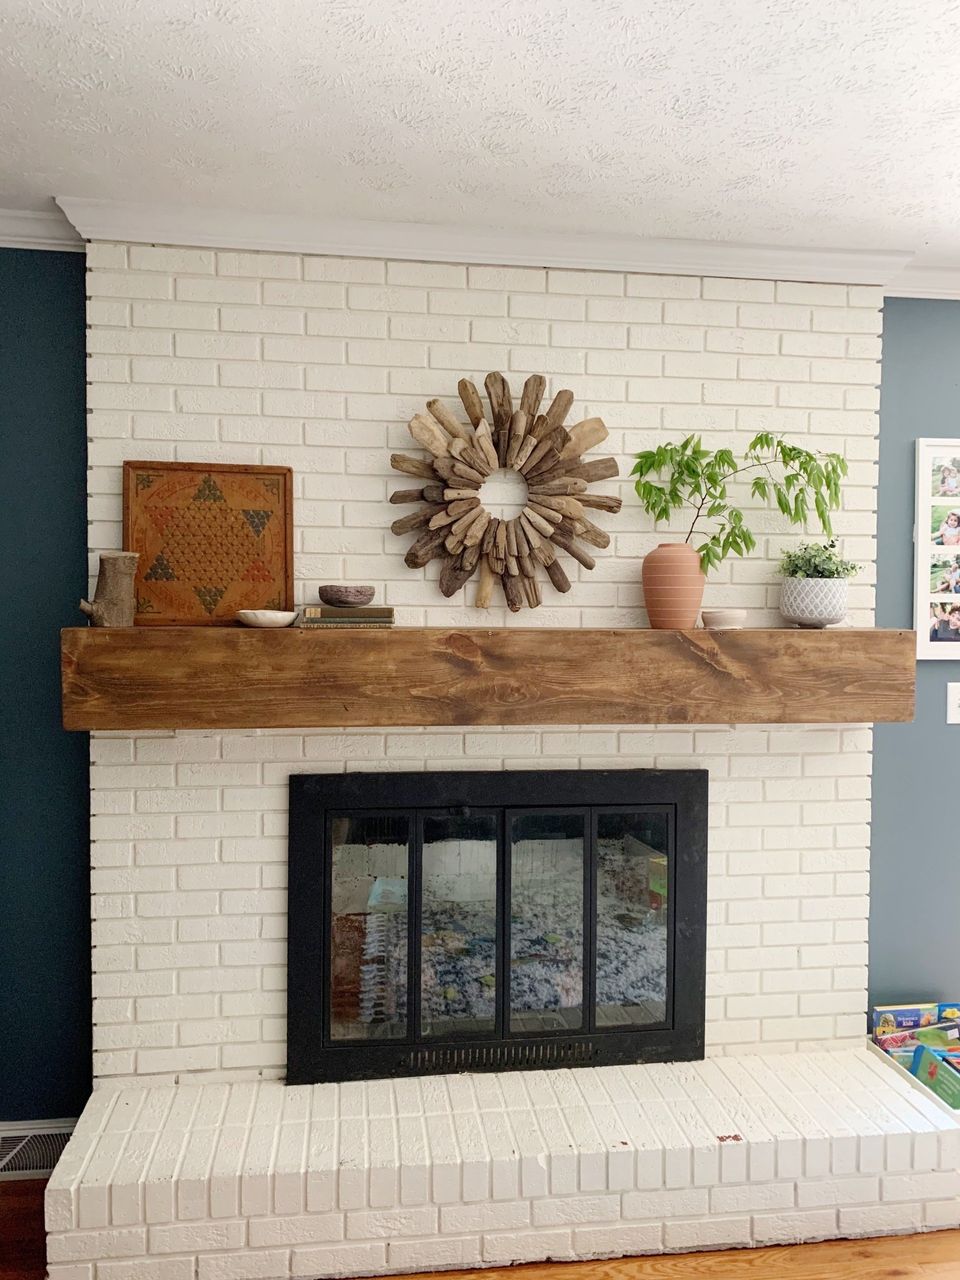
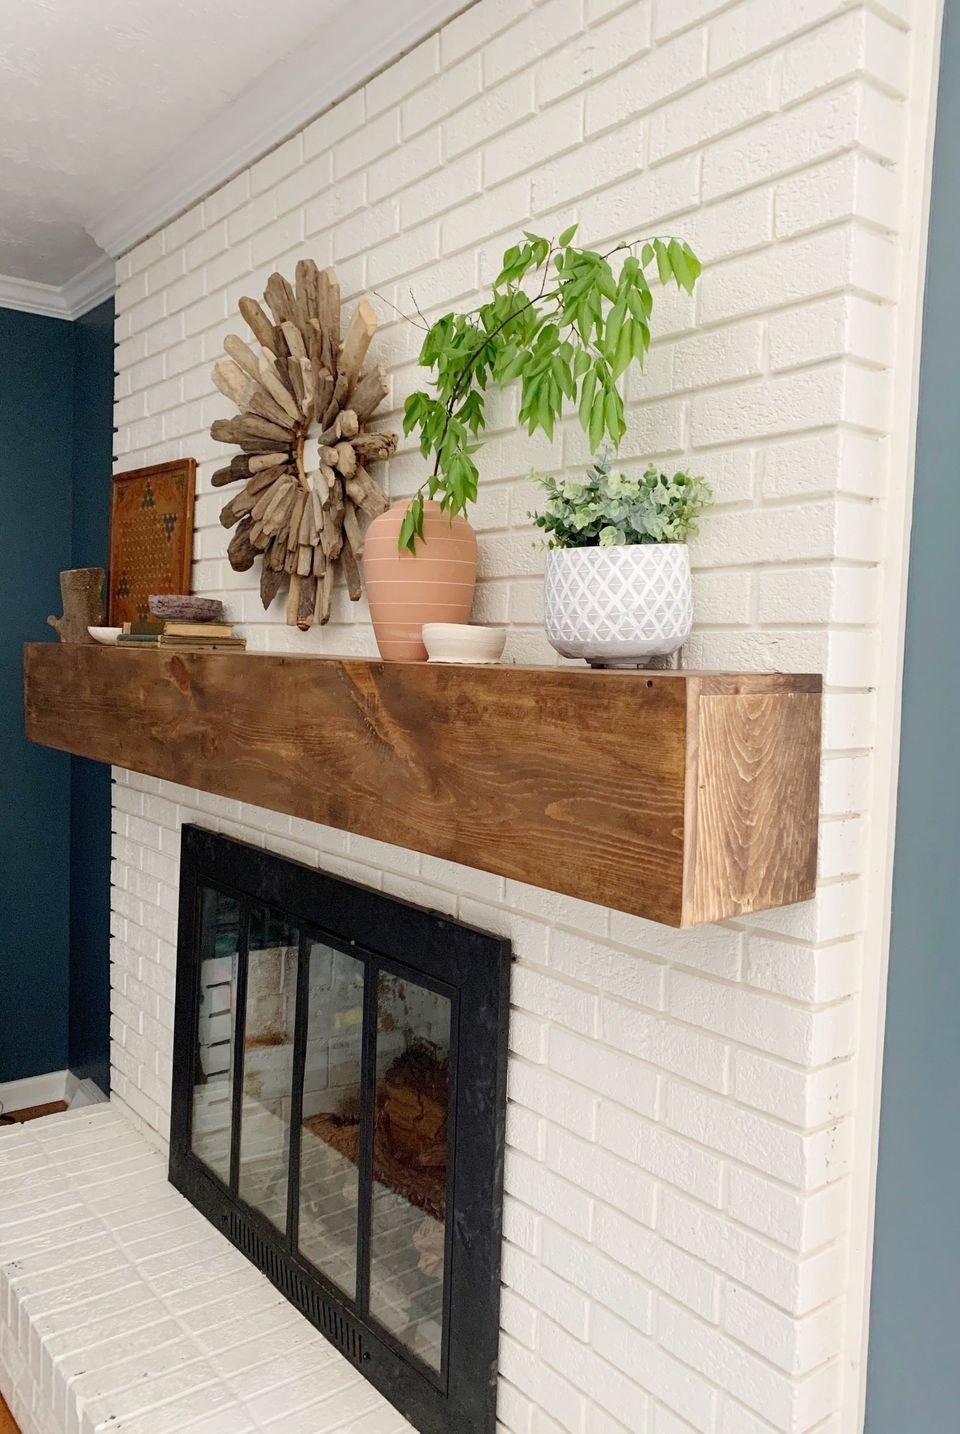
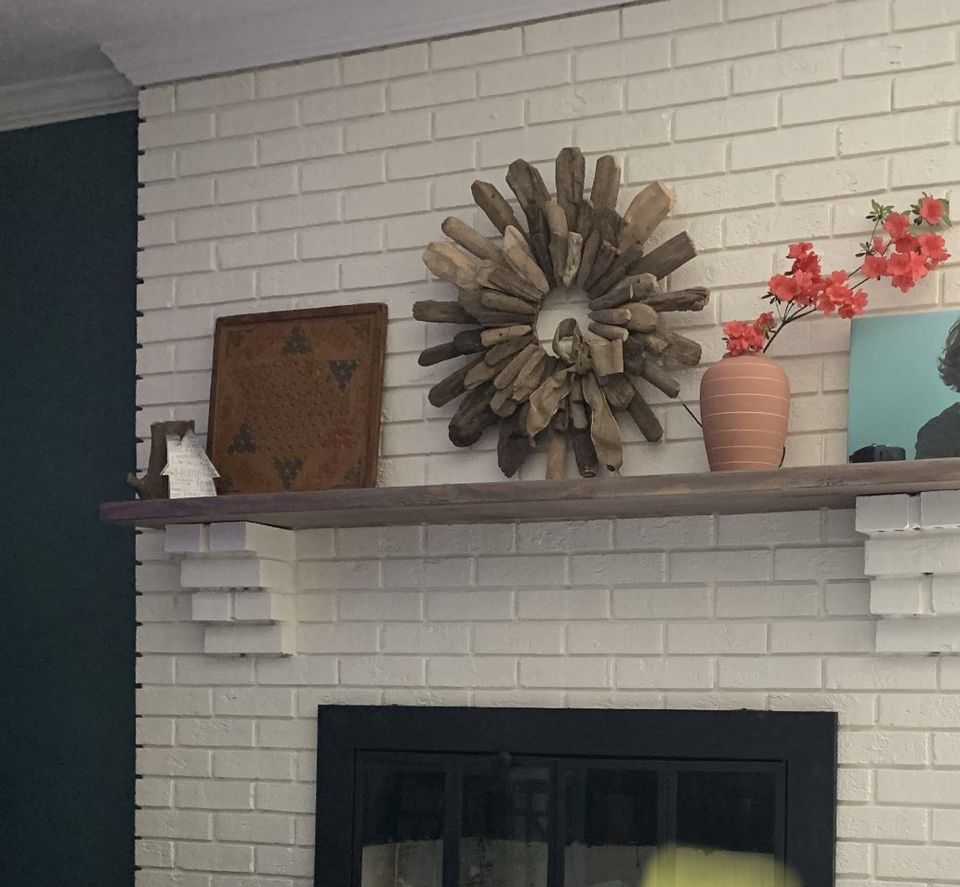
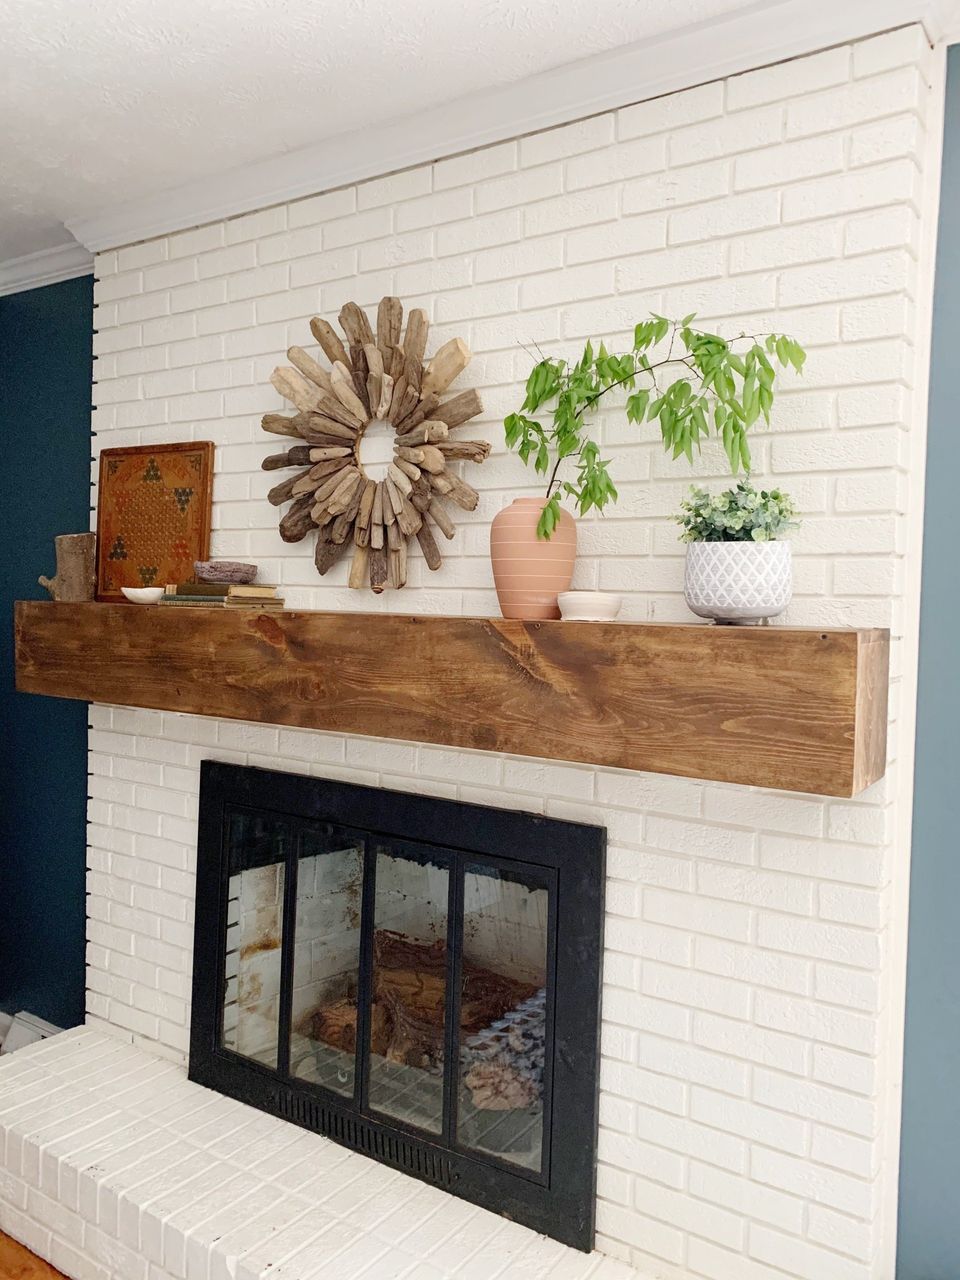
I love how our mantle turned out. It really is an easy project anyone can do. I love that it totally covers up our old brick supports and transformed our fireplace! I didn't even add a piece on the underside, because unless you're sitting on the hearth, you really can't see that it isn't there. I hope you'll try this and if you do, let me know how it goes on Facebook or Instagram @grey.snail.press!
Save for Later!

Rifle Paper Co Wallpaper

Space Planning

Rifle Paper Co Wallpaper

Designer Drapes

Rug Roundup January 2024

Booth at Christmas Market
Grasscloth

What not to do

Romabio Velatura Mineralwash

I can't remember the first example of fluted wood furniture I saw, but it was probably either this gorgeous custom wood bathroom vanity from Chris Loves Julia , or the DIY fluted coffee table Fariha shared on Pennies for a Fortune . The custom cabinetry was done professionally using a router for each line, which isn't something I possess the skills to do. This did help inspire the colors I used in our bathroom remodel, though! I really connected to the method Fariha used to build the coffee table--wooden dowels. What a fabulous idea!