
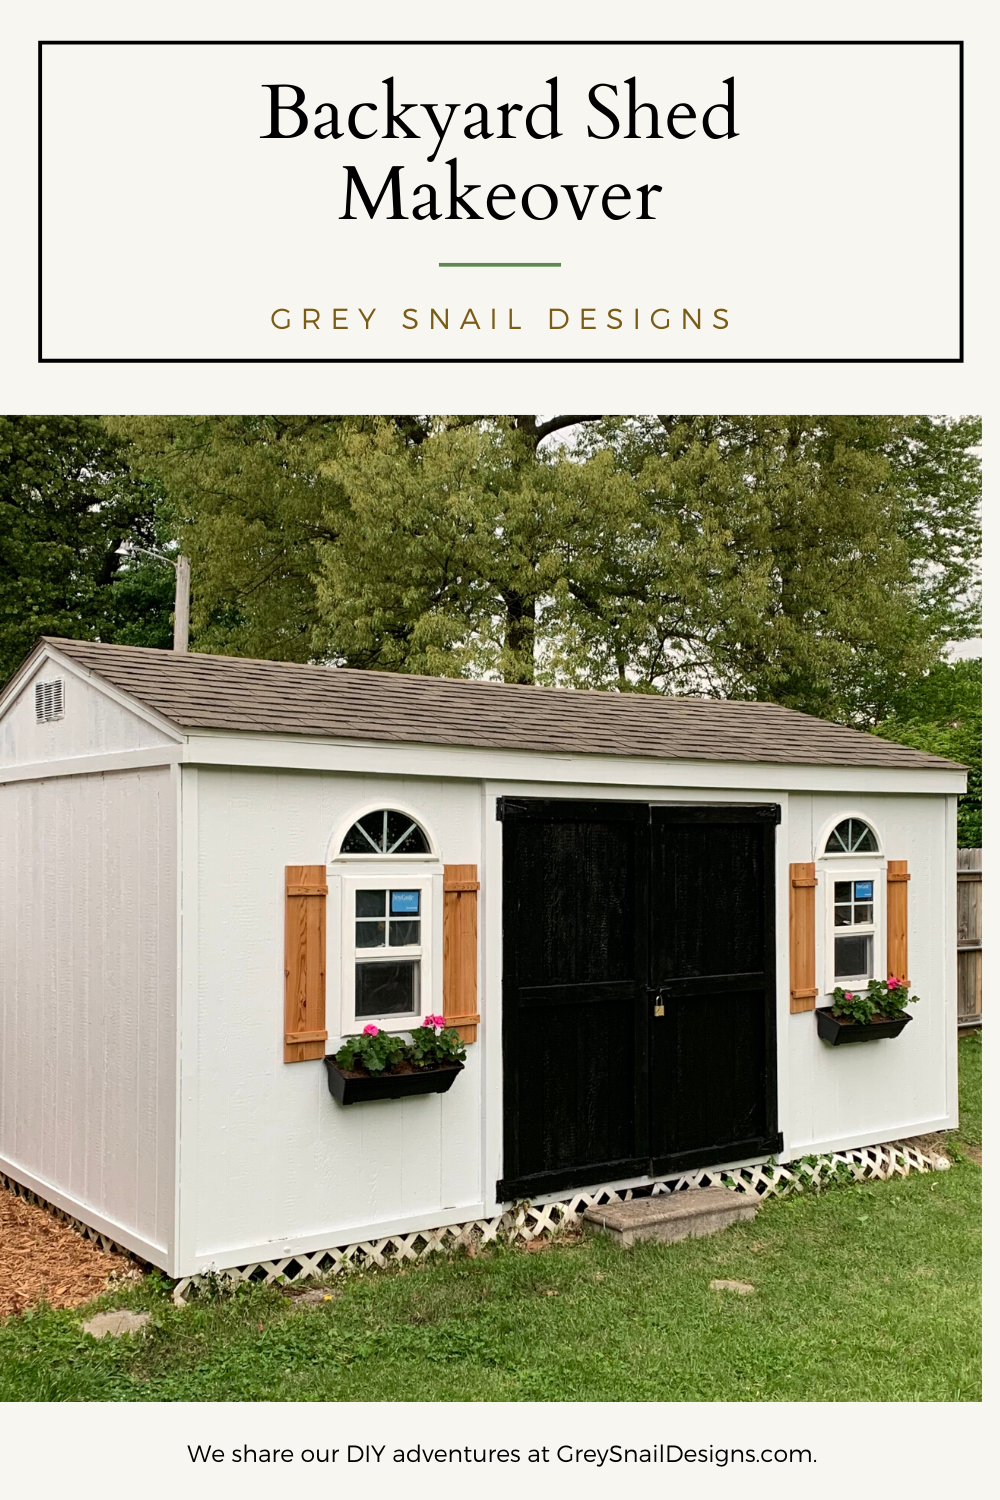
Backyard Black and White Shed Makeover
May 3, 2020
The Old Shed
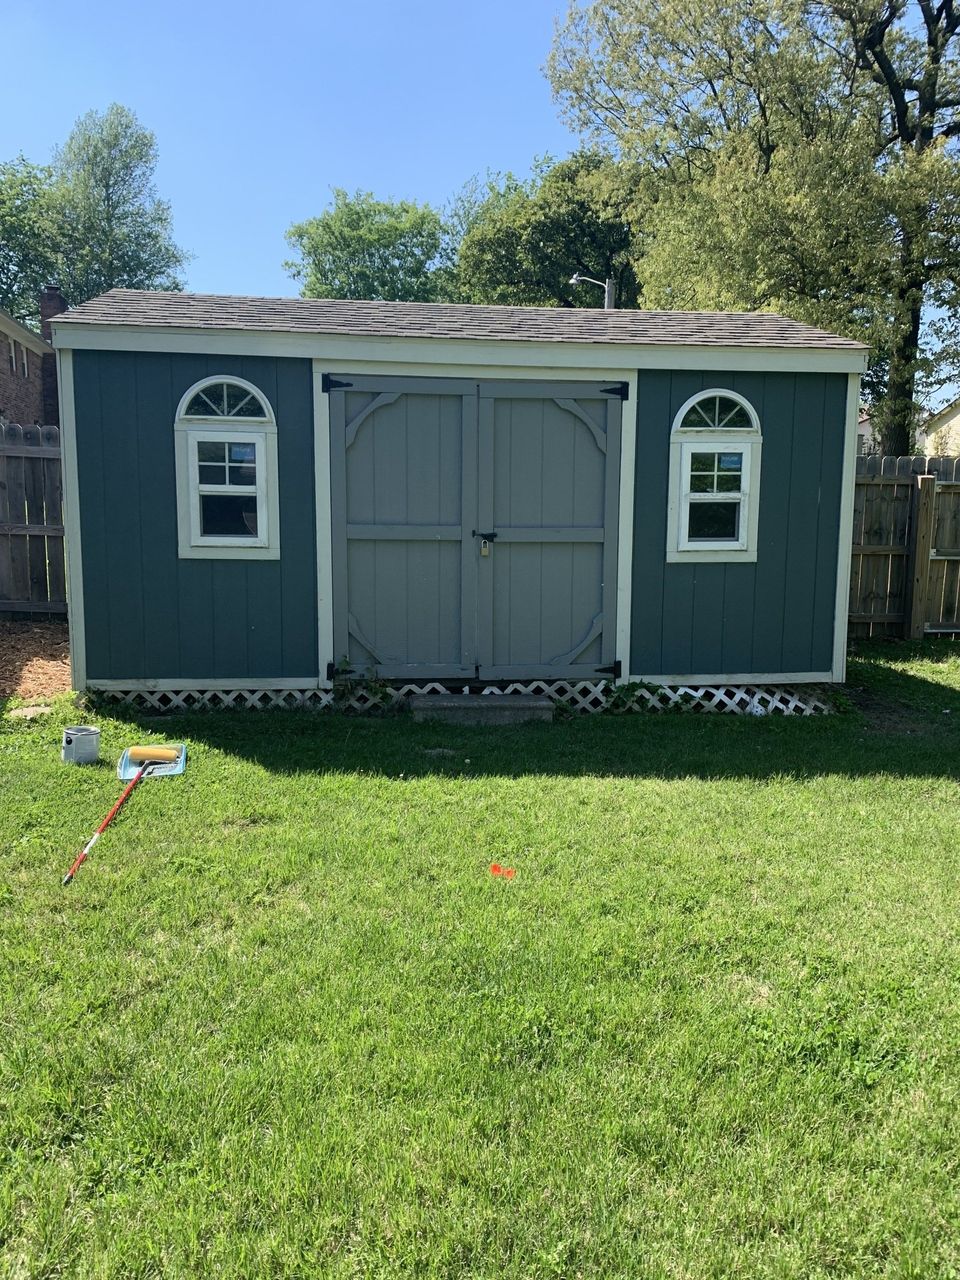
When we moved into our house, the shed was already there. We were thisclose to giving it away because we thought we didn't need it, but thank goodness we didn't, because I love having a place to store extra we don't often need and yard stuff. It was originally painted tan with white trim and my husband painted it a couple years ago in new colors (teal, cream and buff) in a huge rush right before they installed our fence. It needed painted again, so I started thinking out of the box.
Repainting
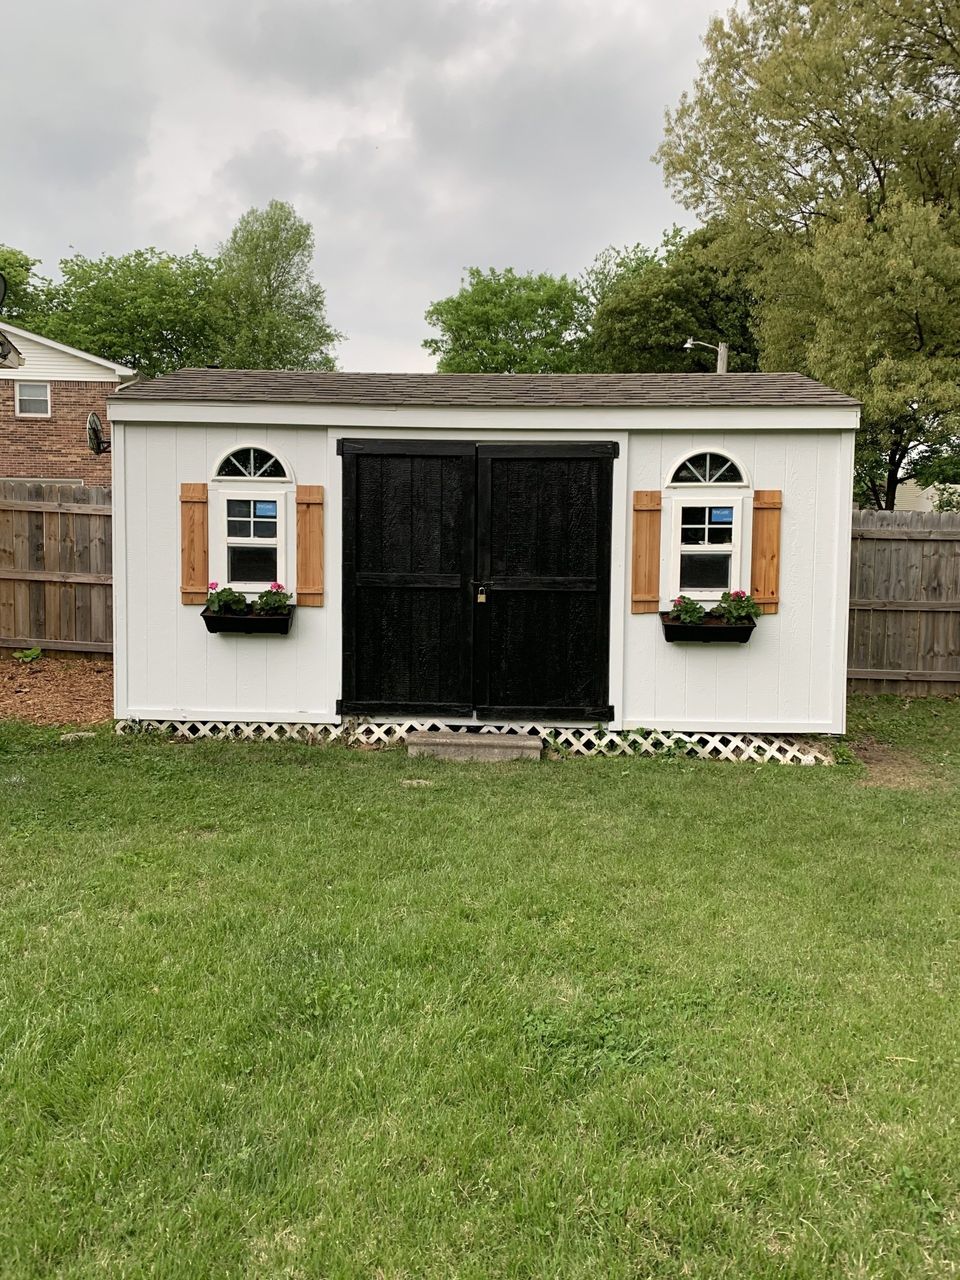
I knew I wanted something that went with the house better, and was more of a focal point instead of eyesore. I have no idea why this never dawned on me before, but I suddenly realized we didn't have to paint all the trim a different color--duh! My first thought was to go black since it was already dark and might be easier, but with the white windows, I really wanted to choose something that blended well with what we already had. Enter, white paint.
There are plenty of great inspiration photos on Pinterest for black and white sheds, and that's where I started. I loved the idea of having it look more like a little cottage than a shed, so I decided to add shutters, window boxes and remove some of the barn-looking trim on the doors.
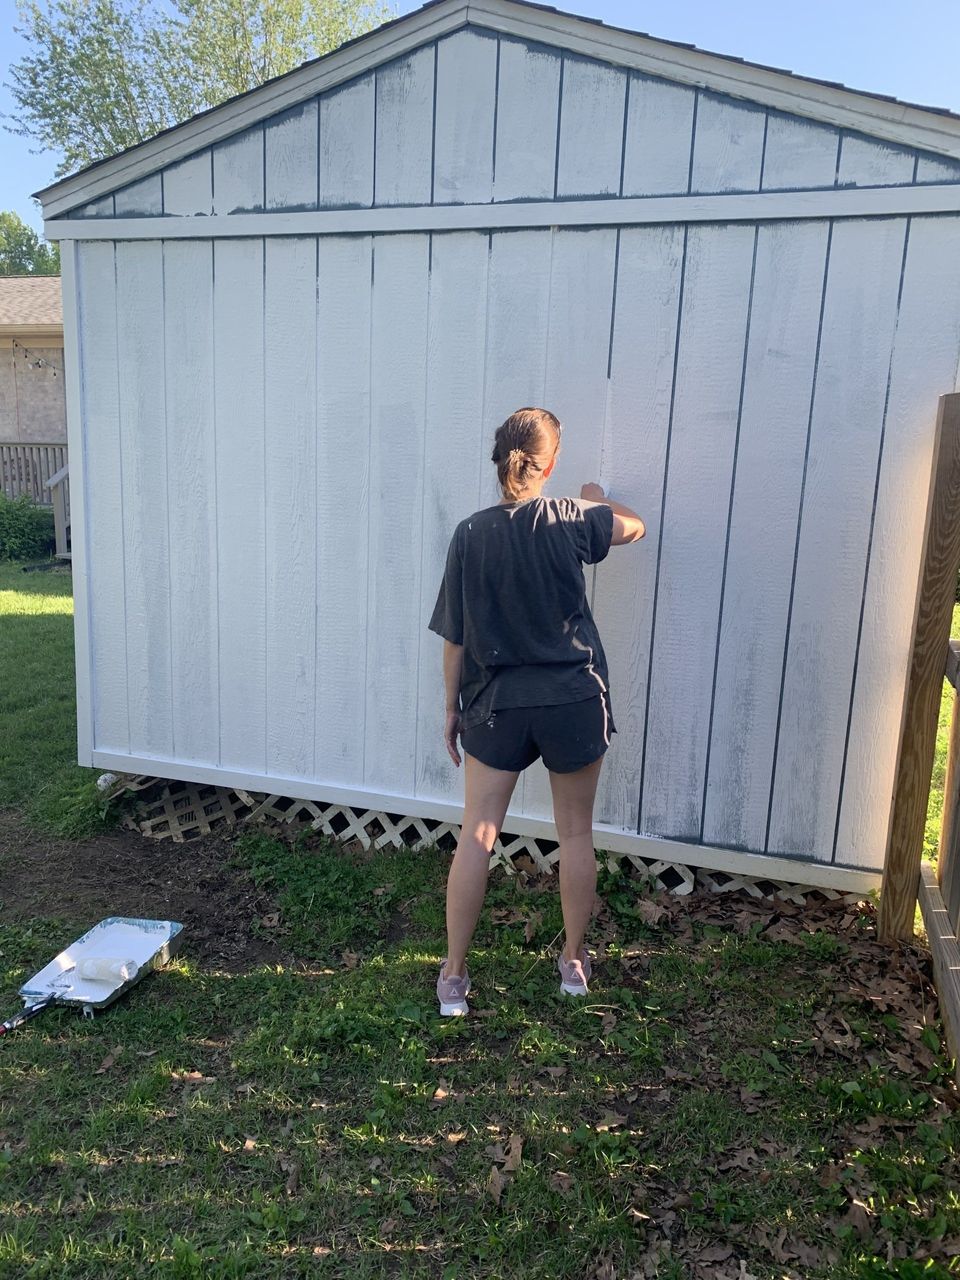
Normally, I'd choose to have my paint tinted to a specific shade of white, but Coronavirus. Instead, I did a Lowe's pick-up and ordered a gallon of exterior white paint, along with a small (tiny) can of Krylon black interior/exterior paint.
I painted the entire shed and all trim white. Well, that is, besides the back (behind the fence), because I ran out of paint and have to get more! So, it definitely takes 2 gallons! I also made the mistake of not buying rollers with a thick enough nap, so they'd get into the spaces between the panels on the shed. I ended up having to brush ALL of the cracks by hand. Learn from my mistakes and buy a roller with a thick nap for this textured project.
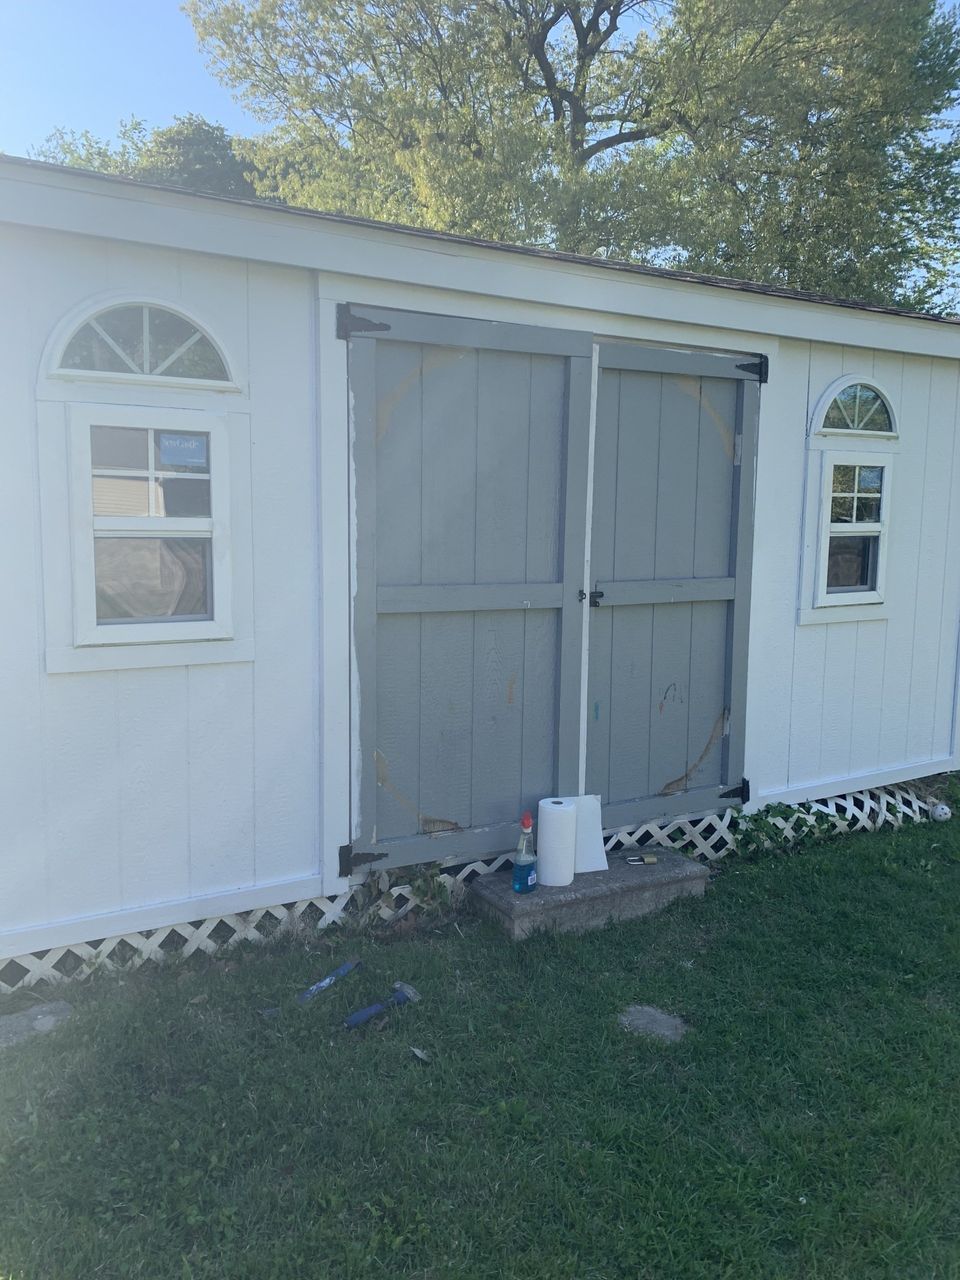
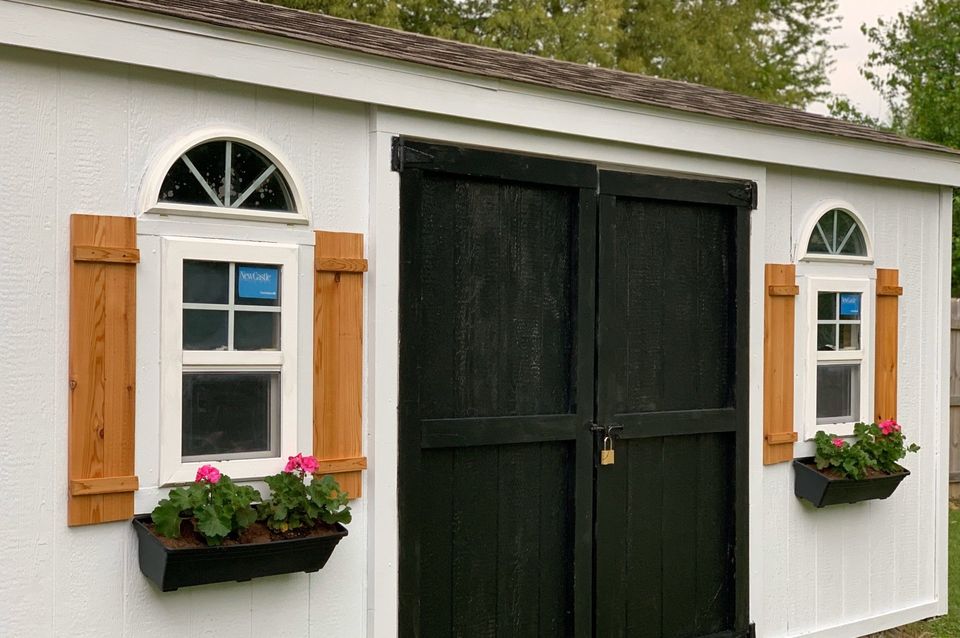
I removed the diagonal wood pieces on the shed doors. They were too rustic for me and not the look I was going for. Then, painted both doors solid black.
Shutters
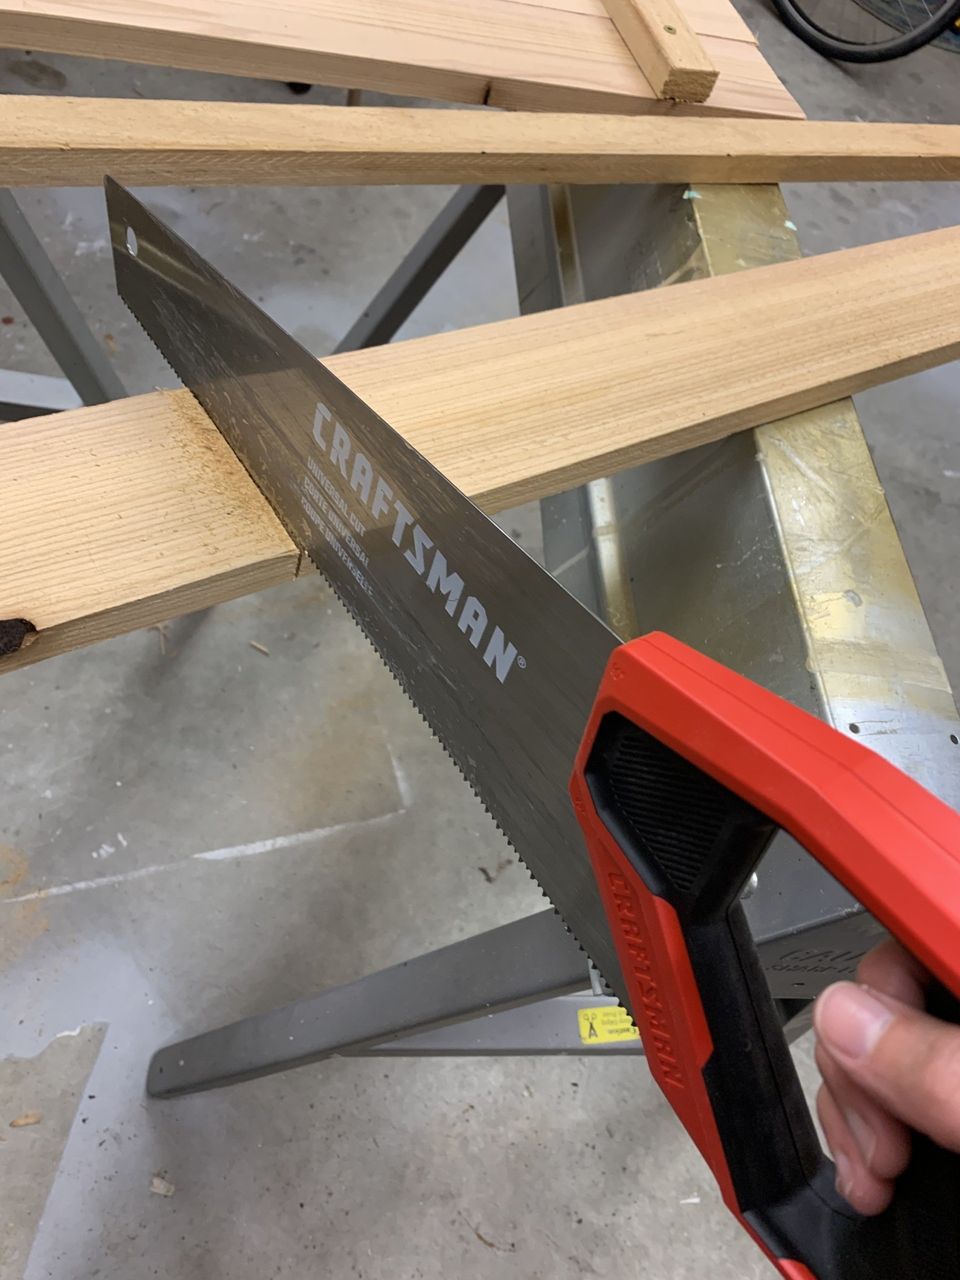
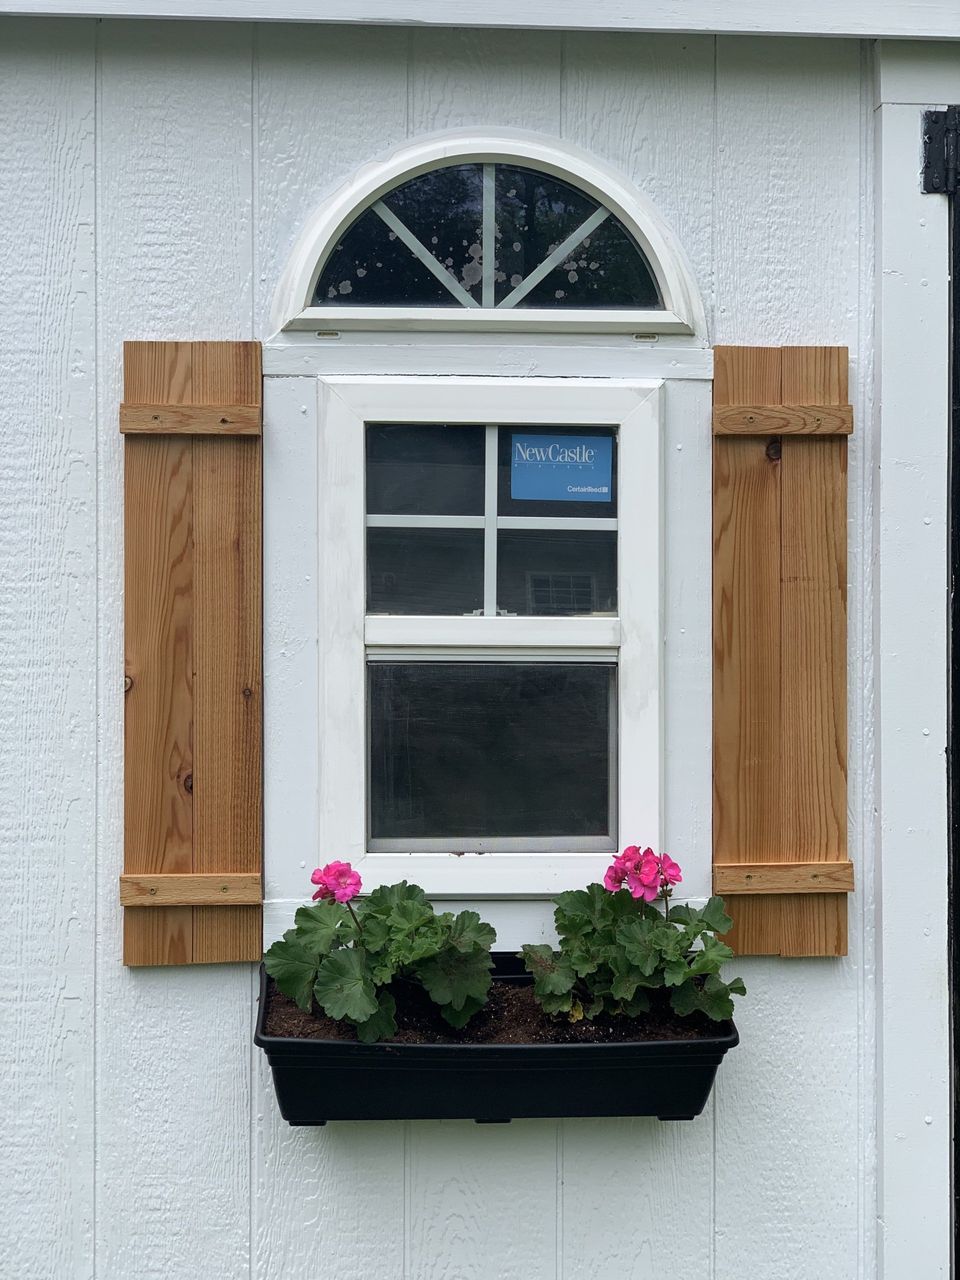
When I discovered I had enough room for some small shutters, I was thrilled! I love the look of natural cedar, so I purchased 1x4x8 and 1x2x8 boards to make them, along with some 2" wood screws. I cut two 1x4 boards each to 32" to make each shutter. Then cut my 1x2 the width of the two boards, to fit across the boards and hold them together. I did all this with my handheld Craftsman saw.
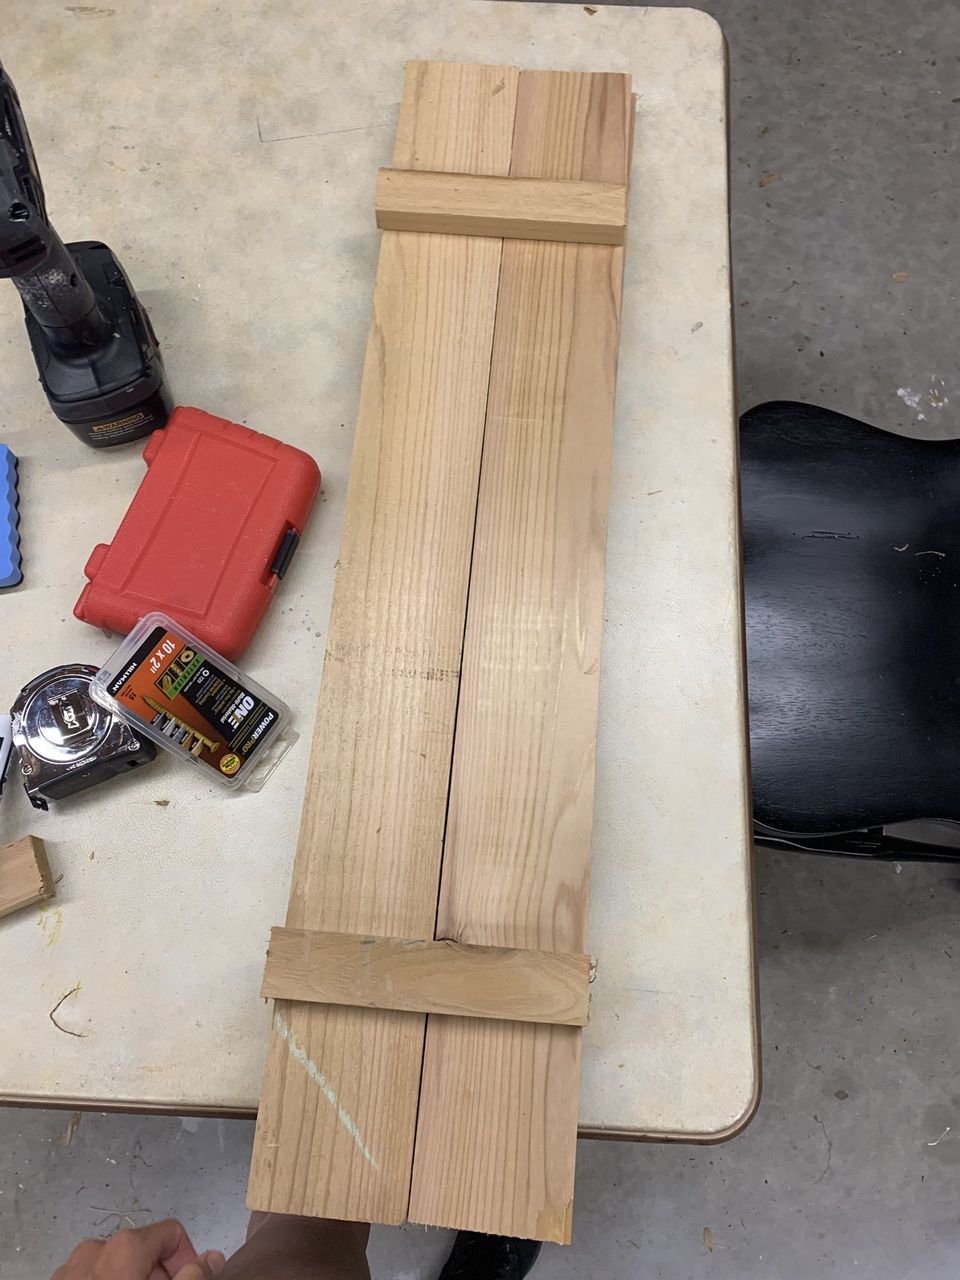
I sprayed one coat of Thompson's Water Seal on the front and back of each shutter before hanging them. I love the natural finish it provides.
You'll need two people to get them up. I screwed each shutter in using the existing four screws on each. Someone held the shutter tightly agains the shed and I screwed each one in a little at a time, until it was secure.
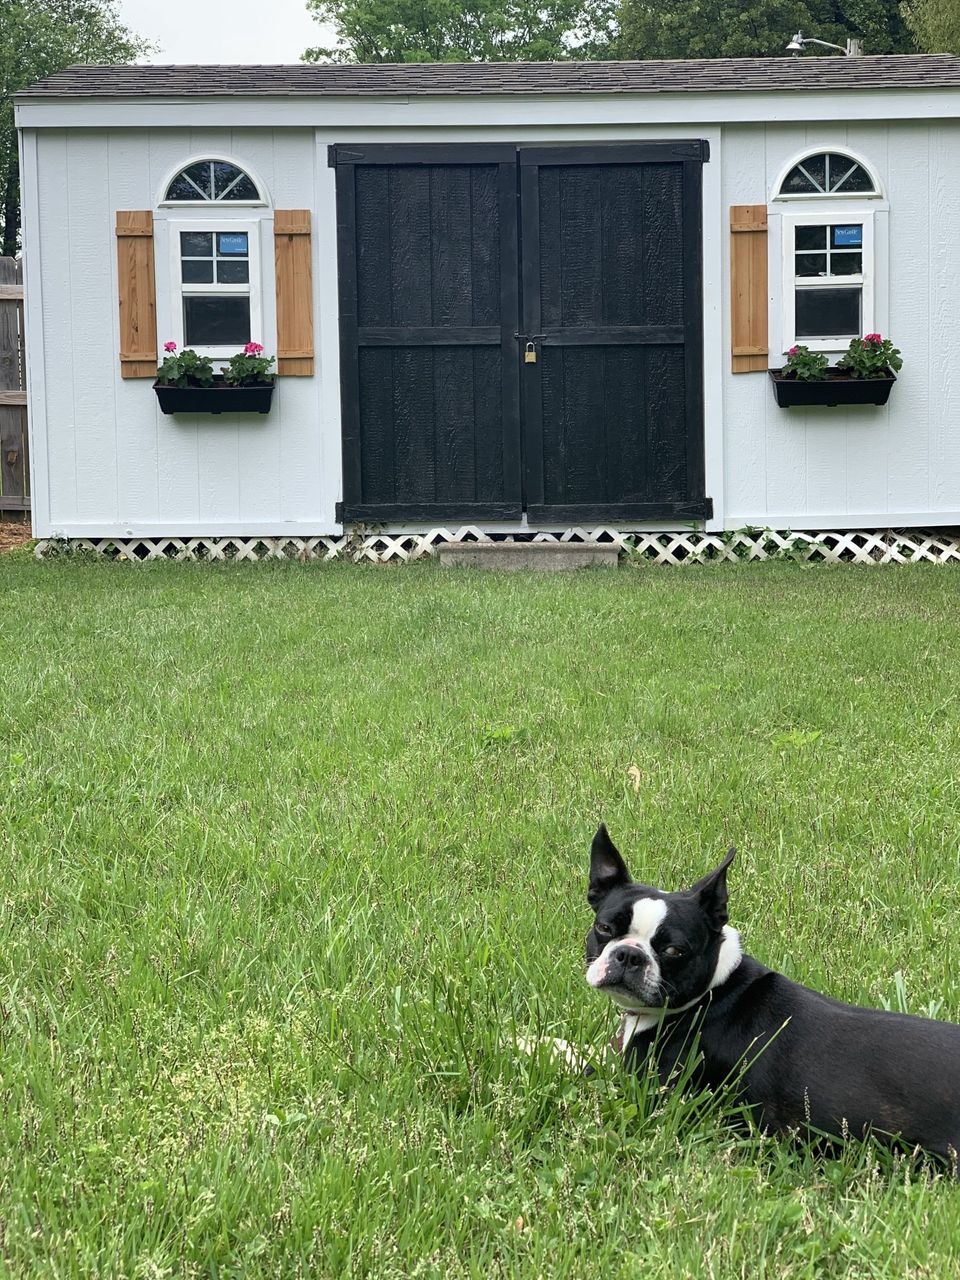
I also only calculated enough lumber for two shutters, but was able to stretch it into three. You can see our little three-shuttered shed here! Remember--two windows need FOUR shutters. Color inspiration from our Boston Terrier!
Flower Boxes
I had cedar flower boxes built for the front of our house a few years ago, so I absolutely love a flower box, but I wanted these to be a little more budget friendly. I bought two black plastic planters from Lowe's, drilled holes in the bottom so water will drain, and drilled a couple holes on the back side to screw it into the shed wall, just under each window.
I filled them with dirt and pink geraniums, which usually do well in flower boxes. I always recommend using Miracle Grow Moisture Soil so they stay moist in these kinds of planters. They usually dry out easier than normal pots.
Our New (Old) Shed
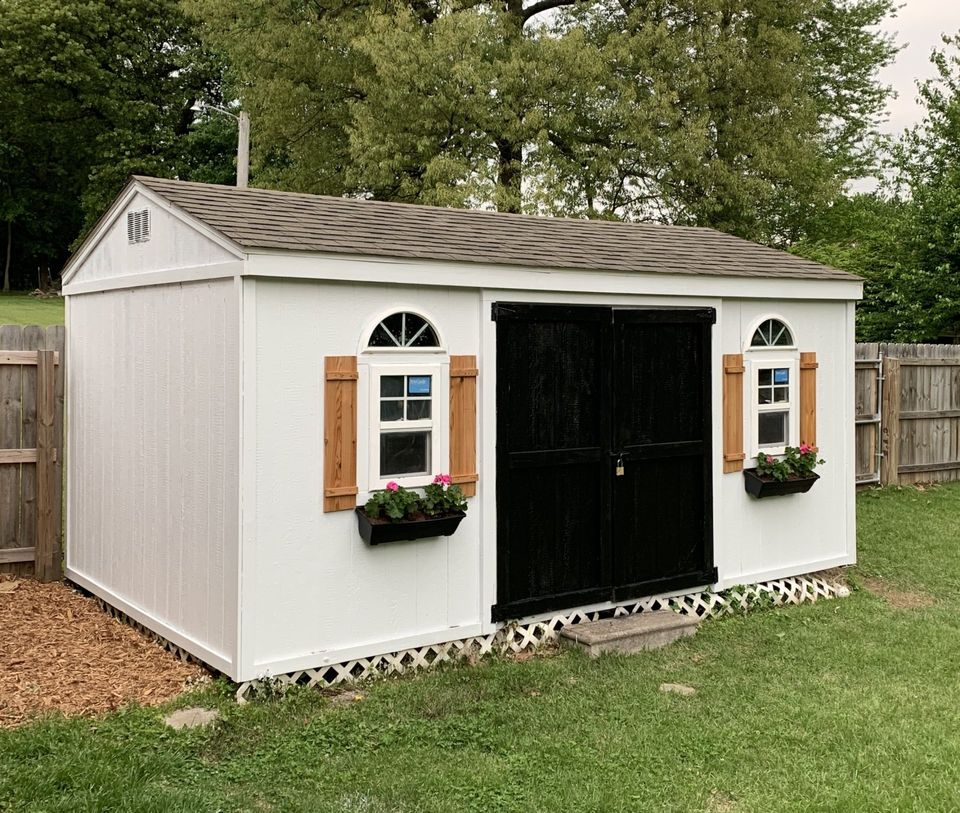
I worked until after 9 pm to get as much of this done as possible, since it was supposed to rain the next day. I also just couldn't wait to see what everything looked like together! I had my husband out there holding up shutters for me, only using the light on the end of the drill see! I really couldn't love it more--I am so excited about this project it makes me want to do a little dance!
I'm amazed at what a difference these small details and color choices made in our backyard and very inexpensively. I'd still like to get something besides the lattice, but a girl can only do so much in one weekend!
Here are some tips. Don't just keep painting over what's already there with different colors. Think about what you are attracted to in inspiration photos you admire. I finally realized we didn't need all that contrast trim--there wasn't one picture I liked with it. It is so much cleaner and more modern with it all one color. Also think about safe color choices. Does your choice go with your house? It's right next to it, so it should blend well. If you're on a budget, you don't have to give up the details you love. Figure out how to get the same or similar look with cheaper materials, or make something yourself. The shutters and window boxes were super simple and really budget-friendly. I hope you'll enjoy and take some of these ideas to make something in your backyard (or life) more beautiful!
Save for Later!

Rifle Paper Co Wallpaper

Space Planning

Rifle Paper Co Wallpaper

Designer Drapes

Rug Roundup January 2024

Booth at Christmas Market
Grasscloth

What not to do

Romabio Velatura Mineralwash

I can't remember the first example of fluted wood furniture I saw, but it was probably either this gorgeous custom wood bathroom vanity from Chris Loves Julia , or the DIY fluted coffee table Fariha shared on Pennies for a Fortune . The custom cabinetry was done professionally using a router for each line, which isn't something I possess the skills to do. This did help inspire the colors I used in our bathroom remodel, though! I really connected to the method Fariha used to build the coffee table--wooden dowels. What a fabulous idea!