
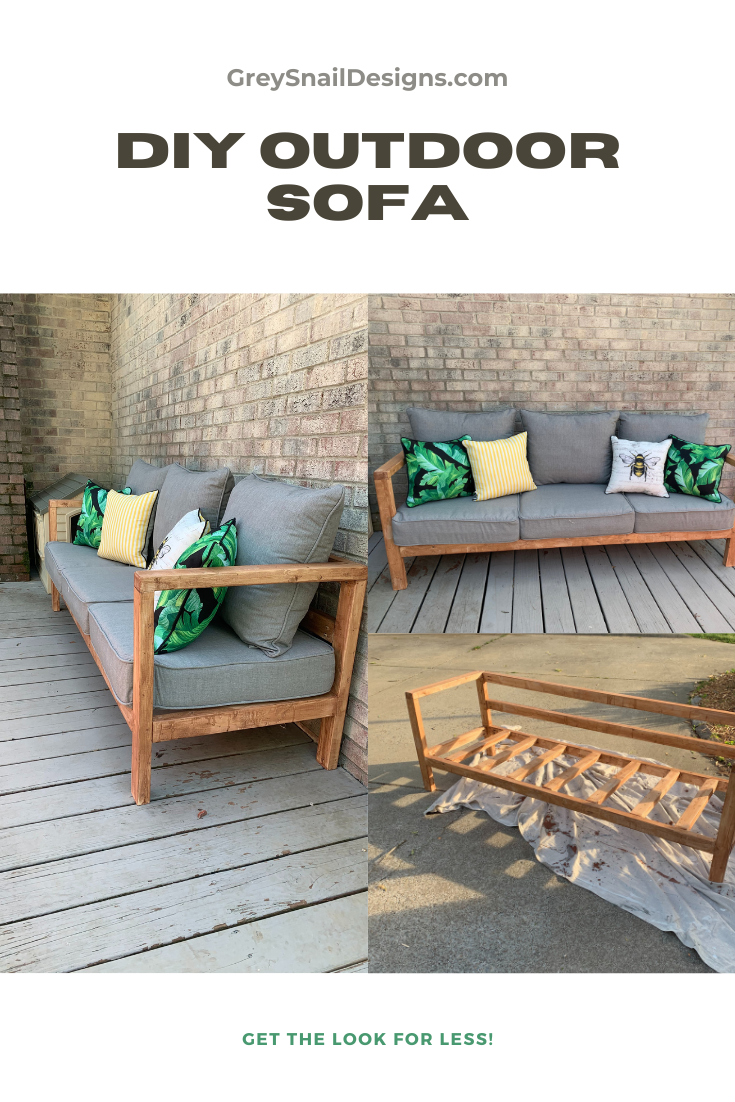
DIY Outdoor Sofa
Jenni Jarvis • April 22, 2021
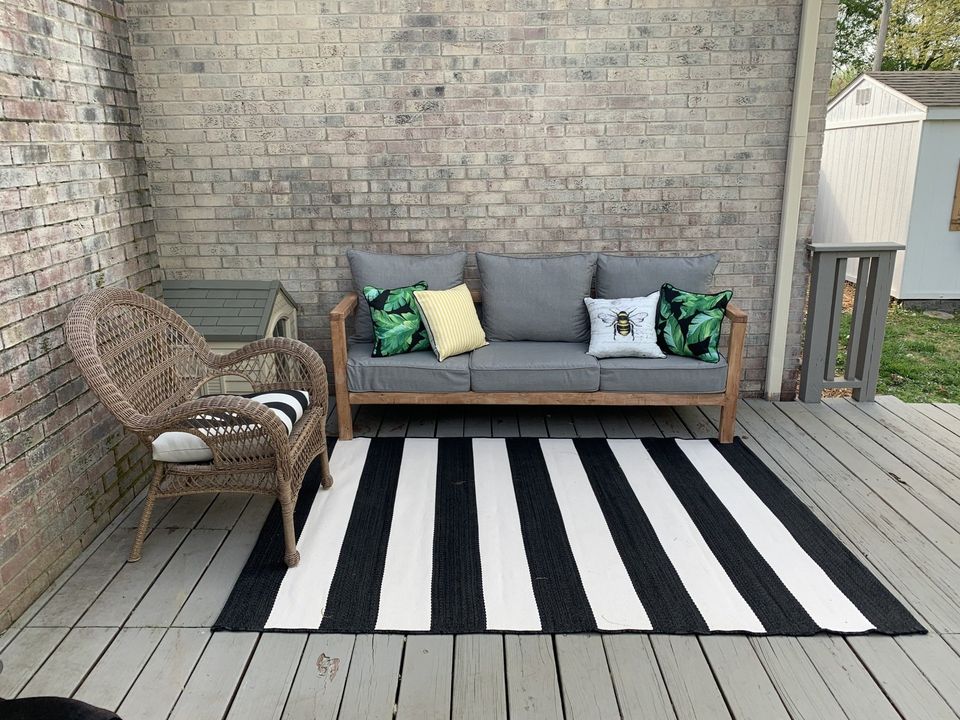
Outdoor Sofa
While sitting outside at the table on the deck, I looked over to the other side and imagined getting an outdoor sofa for a little extra seating and lounging. Once I had the vision, I couldn't get it out of my head and had to find a way to make it happen. I thought it would be as simple as ordering an outdoor sofa, but once I started shopping around, I couldn't believe how expensive pieces like this were! Everything was around $1,000 or more! Our deck is entirely un-covered, so the idea of leaving it out in the open at that price didn't appeal to me, so I found a way to make one myself!
Your Base
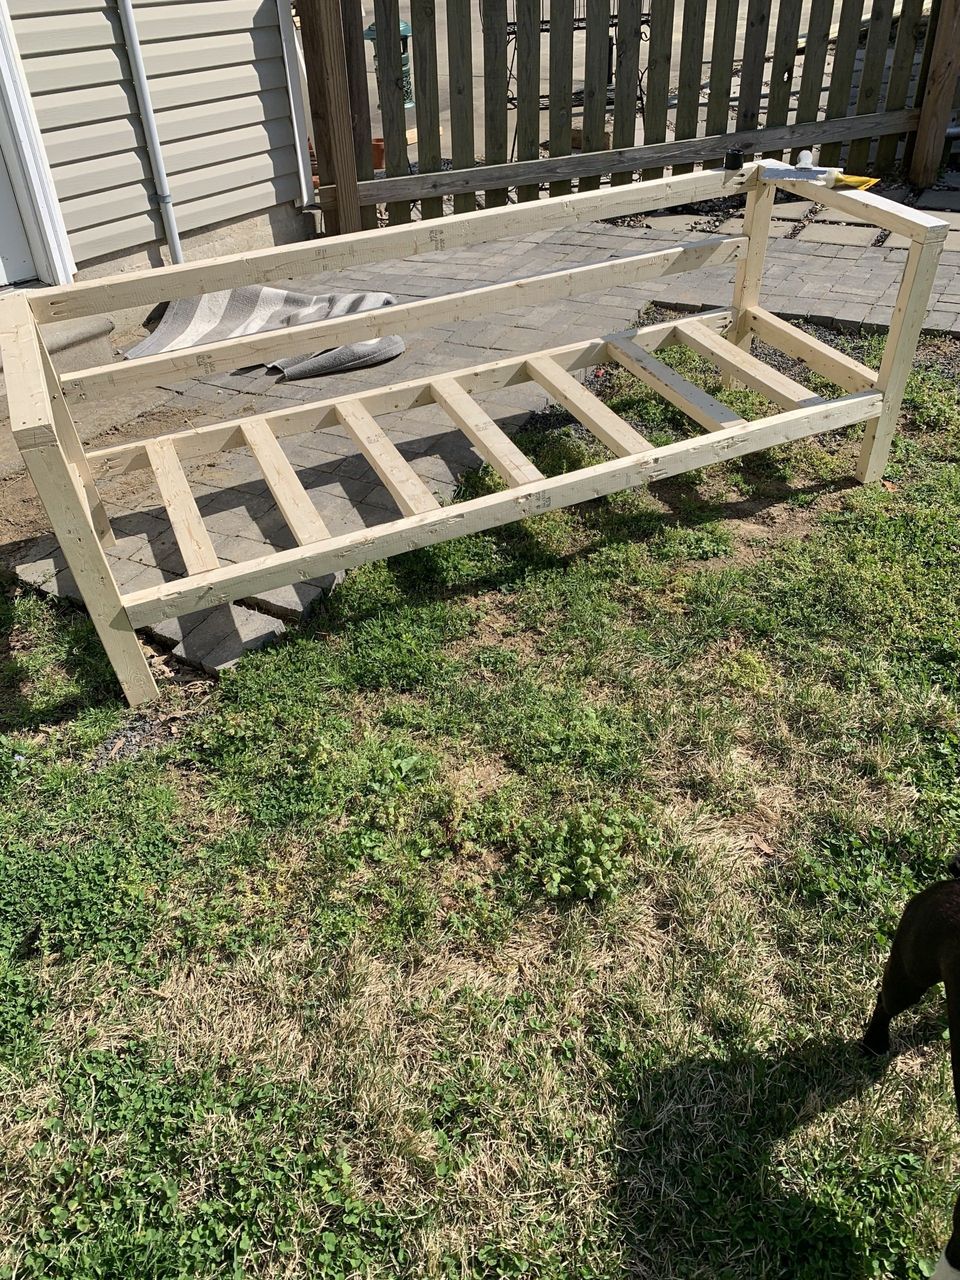
I looked at different sets of free plans on Pinterest and eventually landed on this design by Angela Marie Made. Basically, I built the frame to fit my cushions. I knew I wanted something large--3 wide, so I had to adjust some of her measurements. I learned lots of new things along the way, including making invisible pocket holes! I bought a single Kreg pocket hold jig for around $20. You have to use a separate clamp with it and it's definitely more tedious than a more expensive jig, but it got the job done.
I also cut everything with my hand saw. I am no expert at woodworking, but it was an easy-enough project for me to complete, but it was definitely a challenge and I also used my parents for a couple extra hands. I was going to use cedar, but I ended up buying pine because with wood prices being sky-high right now, I didn't want to spend that much. Also, if I messed up something, I didn't want to feel too guilty.
I won't share my plans, because I literally went by Angela Marie's and they are much better than anything I could show you. The only thing I left off was the decorative side rails on the arms. I just kept mine simple. It's sturdy and very comfy with the cushions. I also added an extra support under the cushions on the sides of the middle one, so they won't fall down into the frame when you sit on it.
Finishing
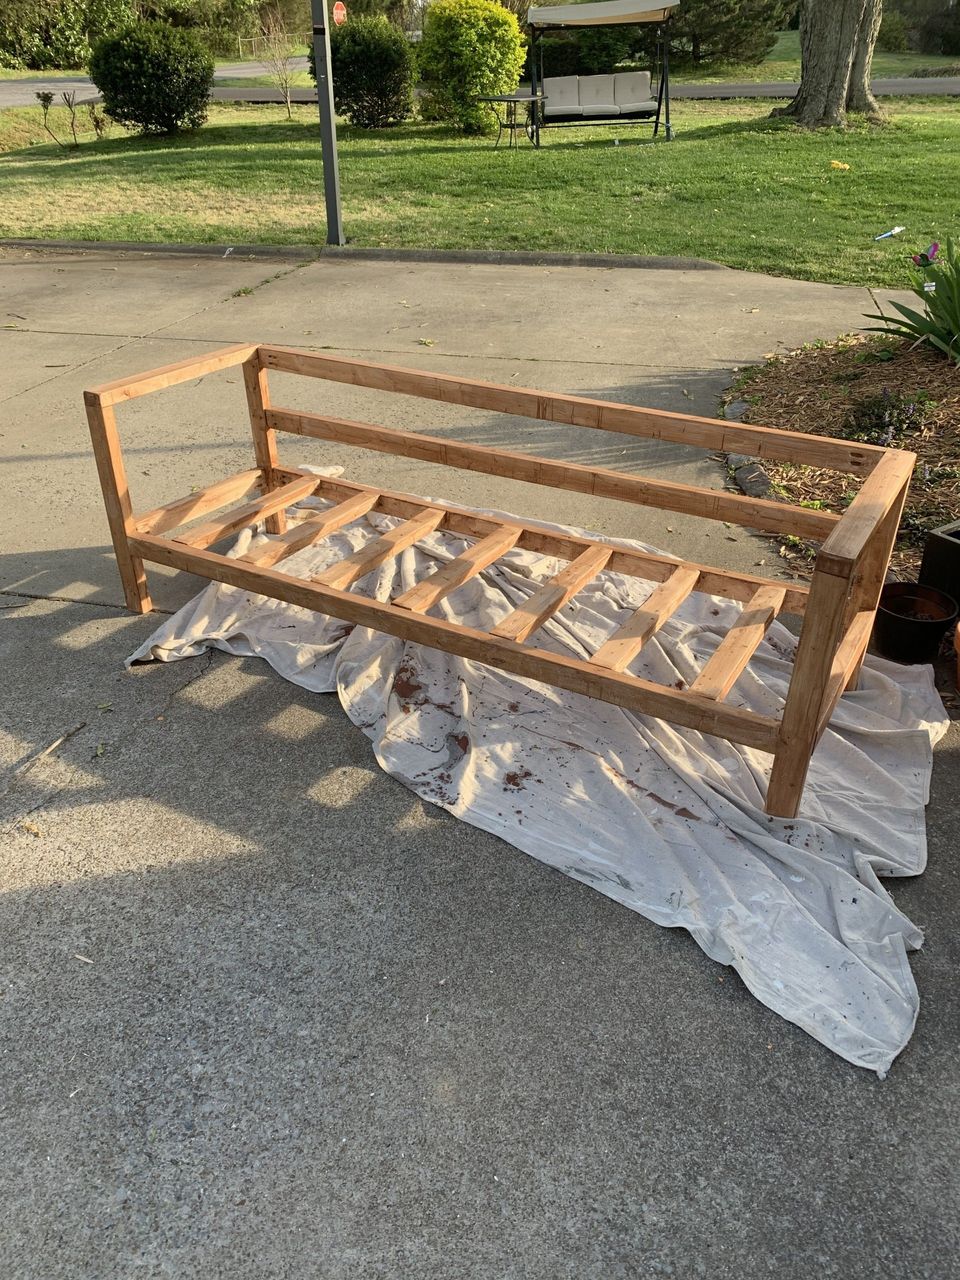
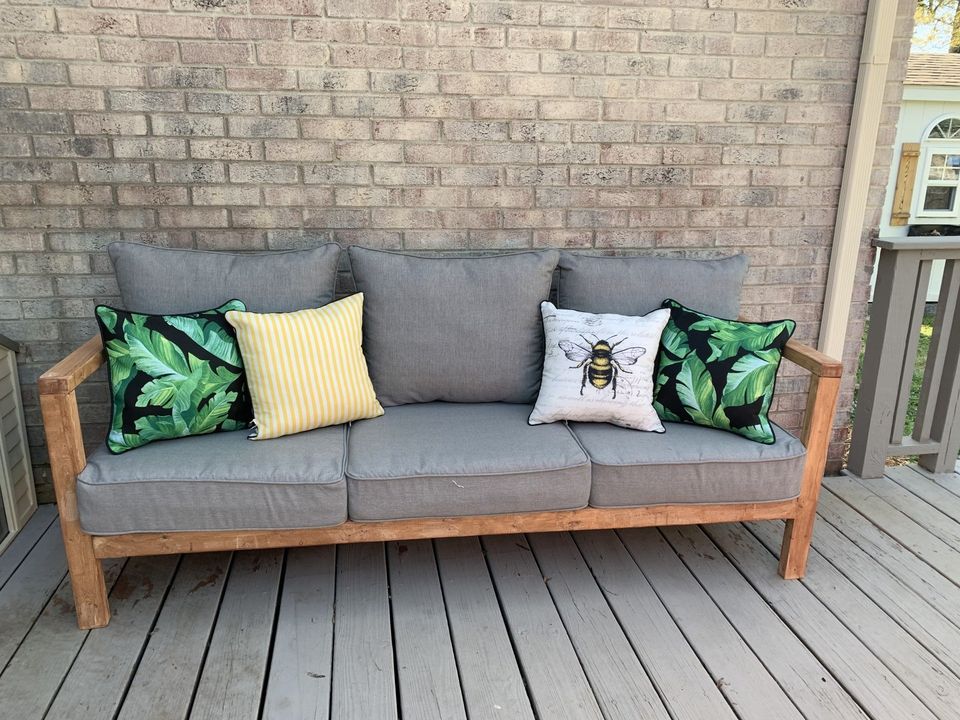
I sanded everything with my electric sander after it was put together. You could also do it before. I wanted the look of cedar, so I found a reddish stain + sealer by Thompson's and I love how it turned out.
Cushions
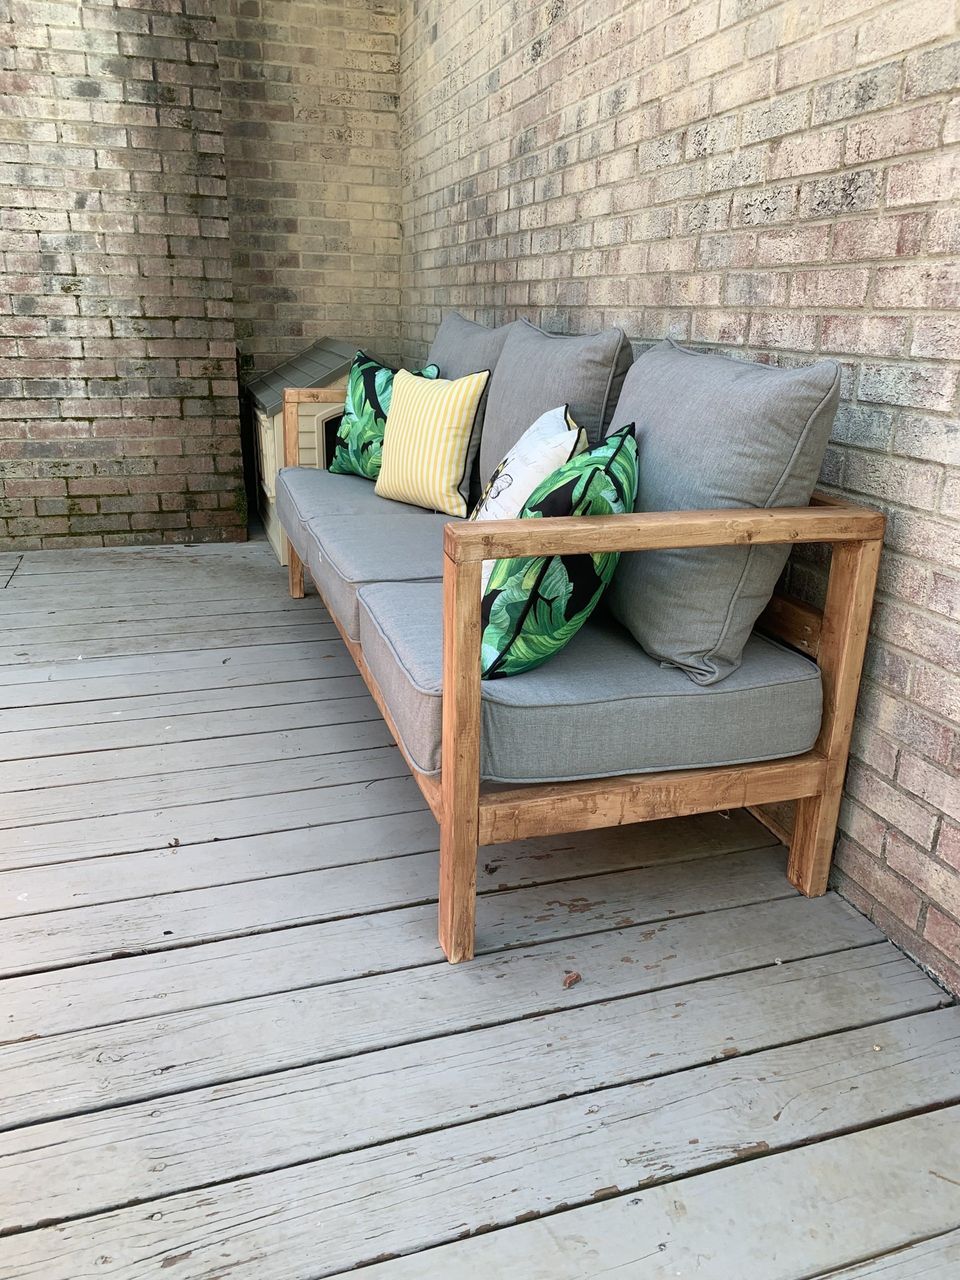
I originally built my frame to fit 24x24" cushions, but ended up finding these Allen + Roth cushions
at Lowe's that were 25x25". It actually worked better having the cushions fit tighter, so I'm glad I found these cushions. I also picked up these adorable throw pillows at Walmart for $5 each!
Seating Area
I pulled everything together with this 5x7 black and white striped rug by Better Homes & Gardens at Walmart for $49.98. I just love how it turned out and want to build another bench!
Pin for Later!
Rifle Paper Co Wallpaper
Space Planning
Rifle Paper Co Wallpaper

Designer Drapes
Rug Roundup January 2024
Booth at Christmas Market
Grasscloth
What not to do
Romabio Velatura Mineralwash
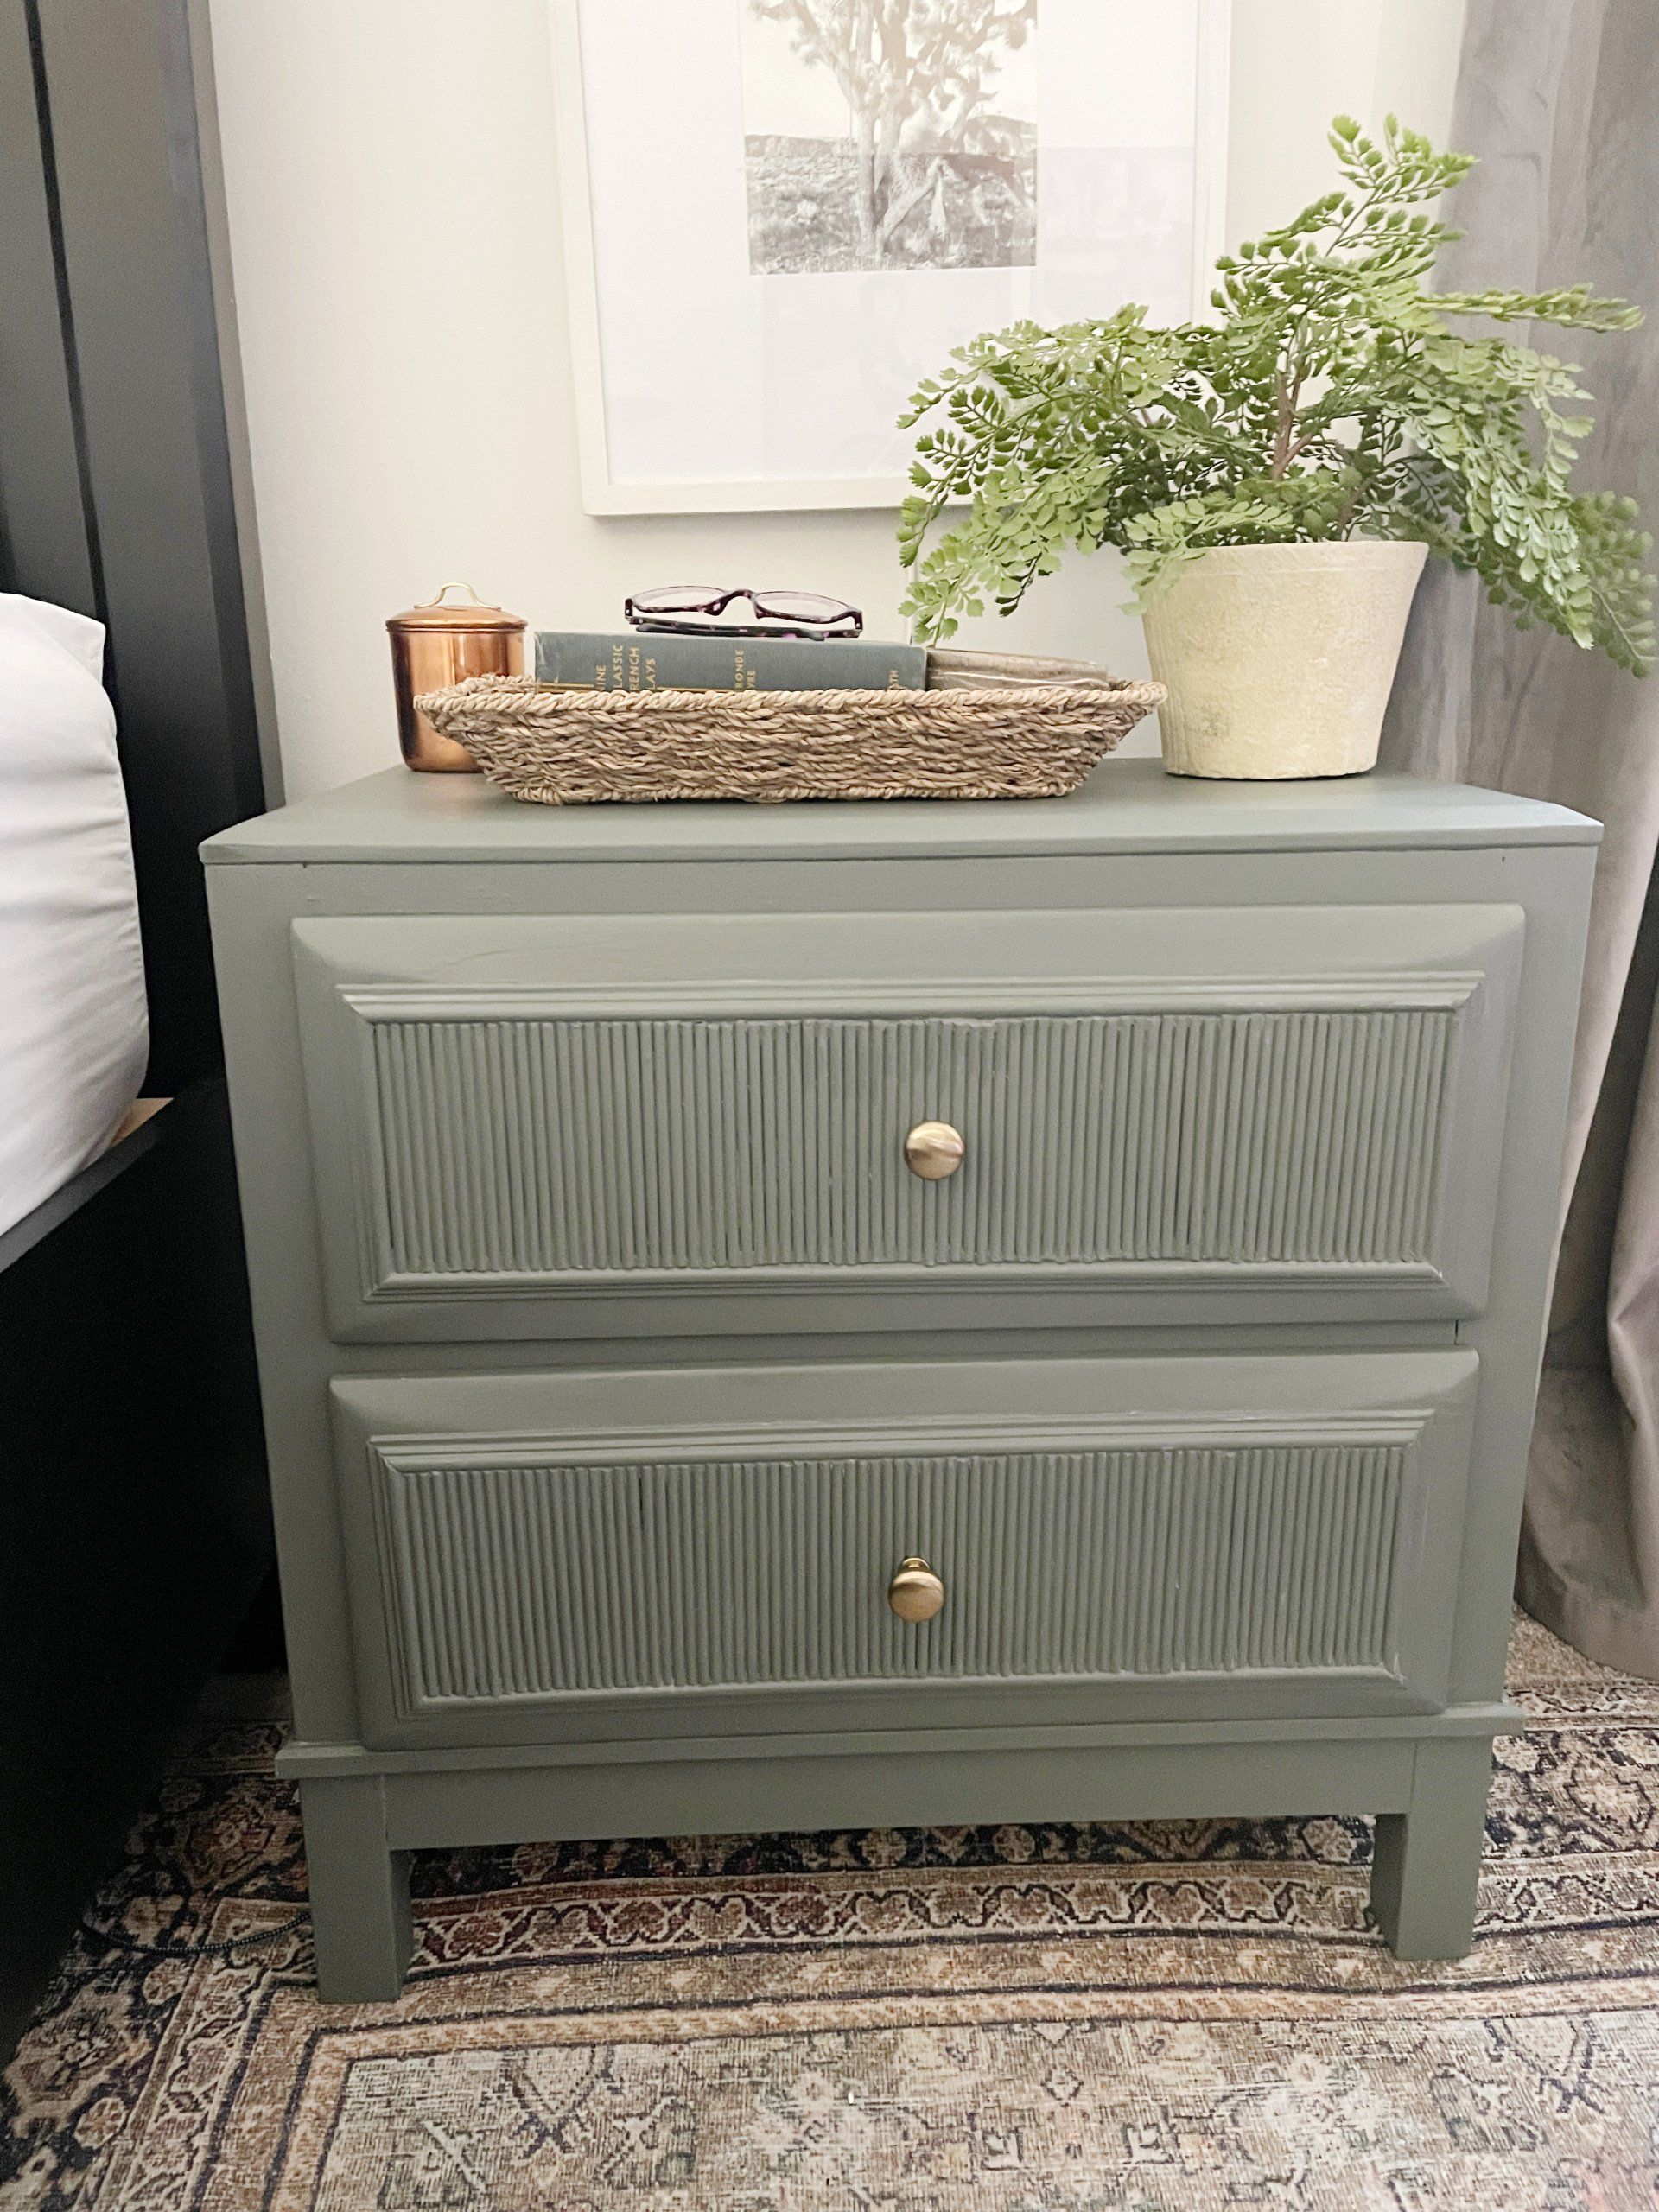
I can't remember the first example of fluted wood furniture I saw, but it was probably either this gorgeous custom wood bathroom vanity from Chris Loves Julia , or the DIY fluted coffee table Fariha shared on Pennies for a Fortune . The custom cabinetry was done professionally using a router for each line, which isn't something I possess the skills to do. This did help inspire the colors I used in our bathroom remodel, though! I really connected to the method Fariha used to build the coffee table--wooden dowels. What a fabulous idea!